eniheartorganizingtag:blogger.com,1999:blog-88646660028409912522022-07-19T04:52:18.170-05:00IHeart OrganizingIHeart Organizinghttp://www.blogger.com/profile/05084013302005288836noreply@blogger.comBlogger1730125tag:blogger.com,1999:blog-8864666002840991252.post-41482193580614581352020-03-14T14:02:00.000-05:002020-03-17T11:00:11.387-05:00Before & After: From Tired Cabinet to Bathroom Storage (You can see my previous post on our bathroom organization here.)
The bathroom itself hasn't been updated in about 15 years now and is something we would like to tackle within the next year or two. Once we were sans cabinet, I needed something ASAP to keep our limited counter space free of my clutter and to make up for the loss of three drawers and three shelves. You know where I am going with this right? I really didn't want to invest a lot of money into something knowing that we aren't too far away from making more permanent changes to the bathroom.
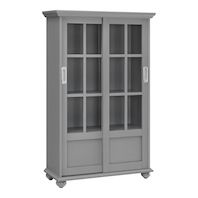
With that in mind, I went straight to Facebook Marketplace to look for an inexpensive solution. I was looking for a piece of furniture that wasn't too deep (I didn't want it to be obtrusive in our modest-sized bathroom) and something with doors. With the germs that fly in the bathroom, I always prefer storage behind drawers and doors. Doors also cut down on the amount of surface that I have to clean and wipe down frequently. I initially thought a lawyer style bookcase would be a bit different, but with our bathroom being on the smaller side, I ultimately decided it would be nice to do something with more glass. So I started to search for curio style cabinets that were less than 14" deep.
I figured that it would be a quick find, but it took some weeks of checking in and trying a variety of search terms. I finally stumbled upon something within my low budget, but it would require some modifying to make it juuuuuuust right.
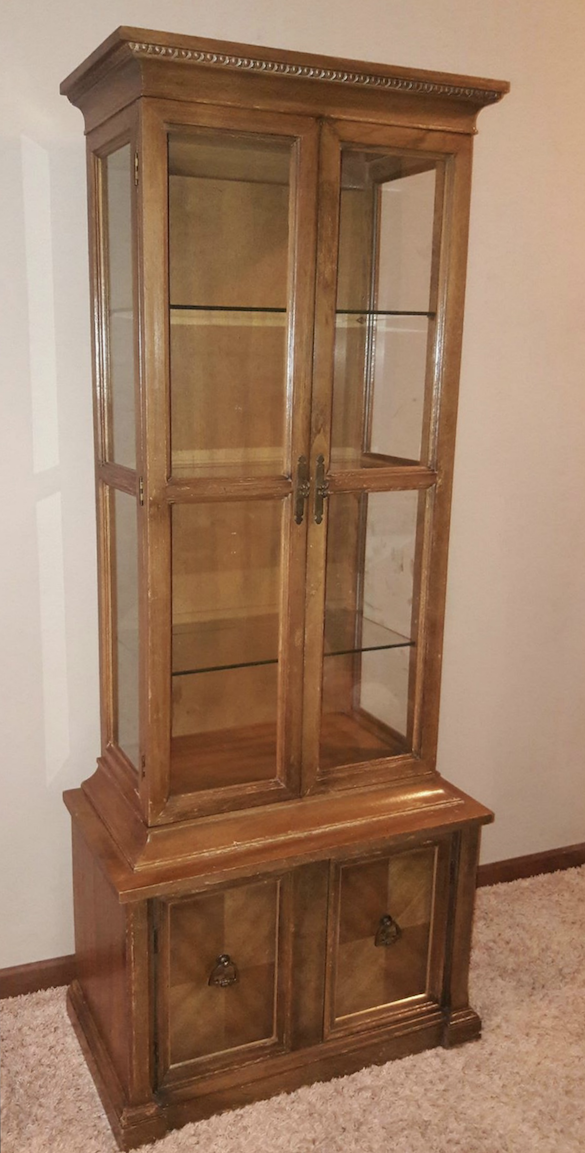
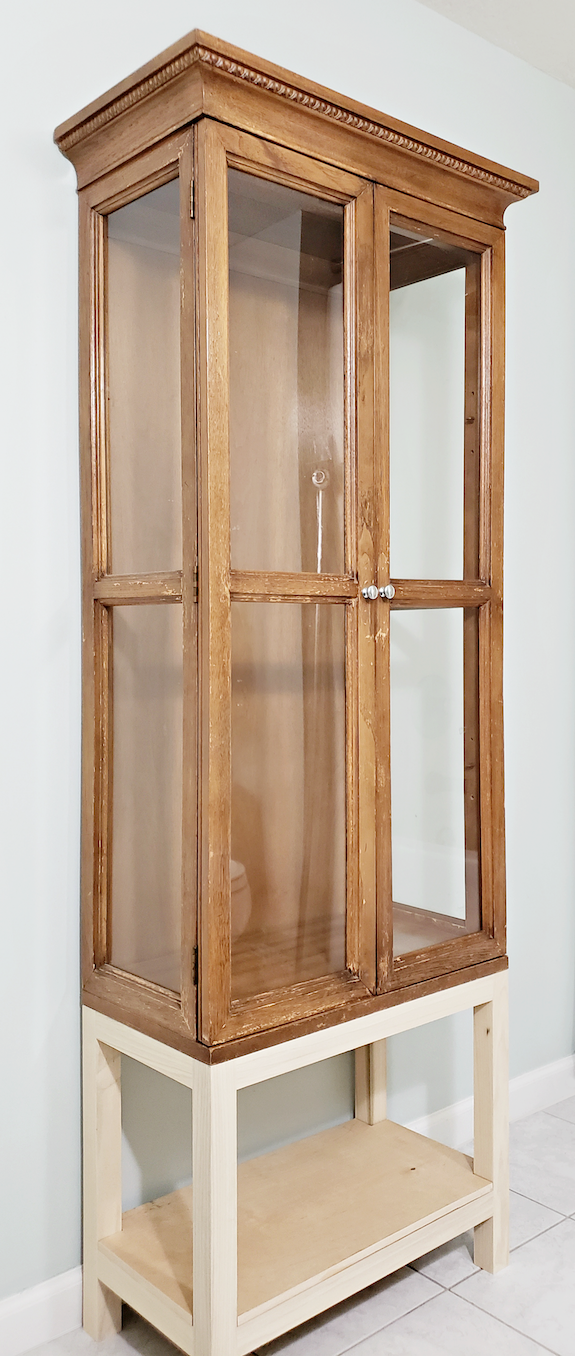
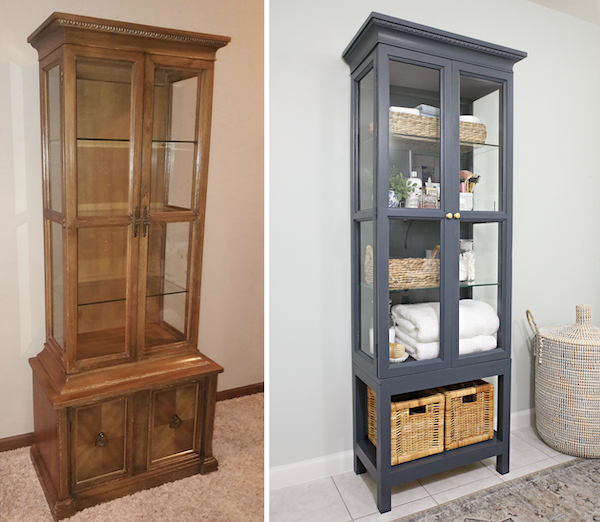
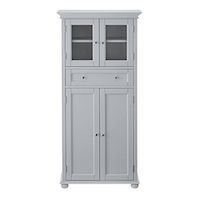
The picture above is from the original listing, and my husband raised his eyebrows when I told him I wanted to take a drive to pick up this piece of furniture for our bathroom. Although the wood wasn't in great shape, the price was low and I saw a diamond in the rough.
What I was instantly drawn to was the top half of the cabinet. The glass portion was the perfect size and I also appreciated the decorative moulding for a more traditional look. The bottom of the cabinet wasn't at all my style and felt too bulky, but my hope was that we could construct something a bit more streamlined. As soon as we got the cabinet back into our home, we began to slowly deconstruct it to separate the top piece from the bottom.
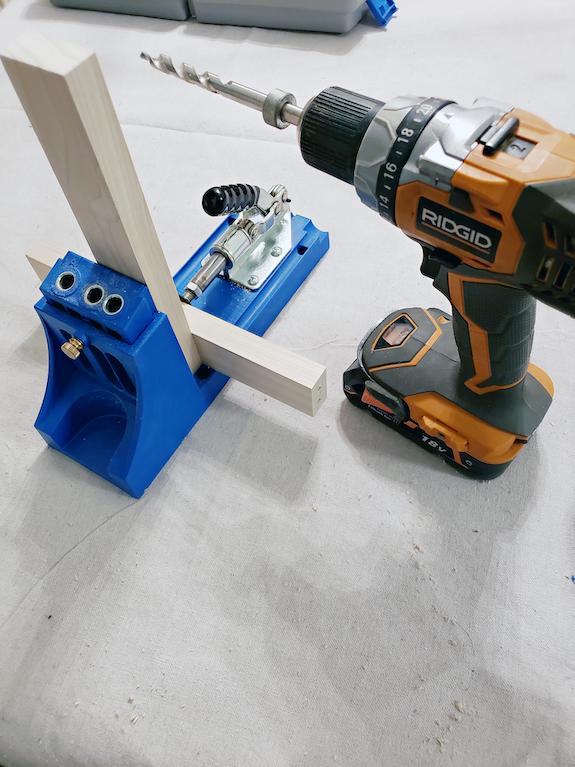
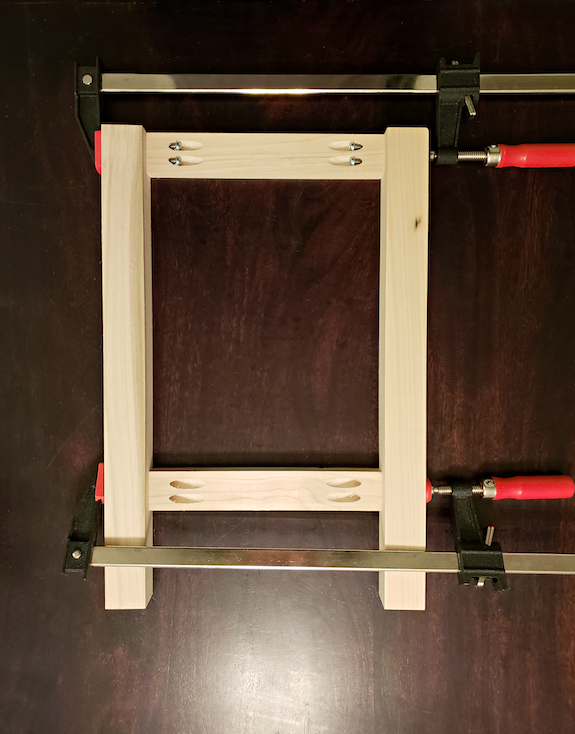
We built the new base from hardwood 1" x 2" poplar boards.
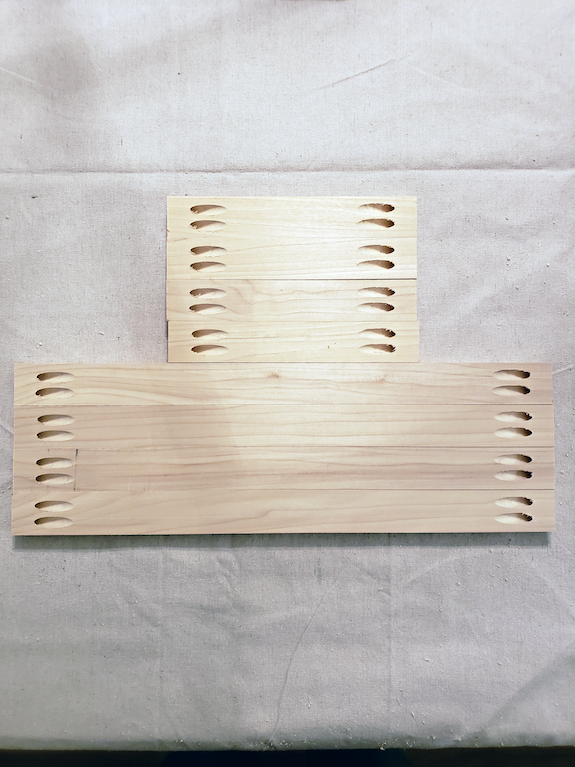
Our Kreg Jig was our best friend for this project, as it allowed us to create a series of concealed pocket holes to assemble a clean looking finished product.
The base of the cabinet was going to be about 12" deep by 24" wide. We did two tiers of support so we would be able to add a shelf at the bottom as well. The legs were constructed of 2" x 2" boards.
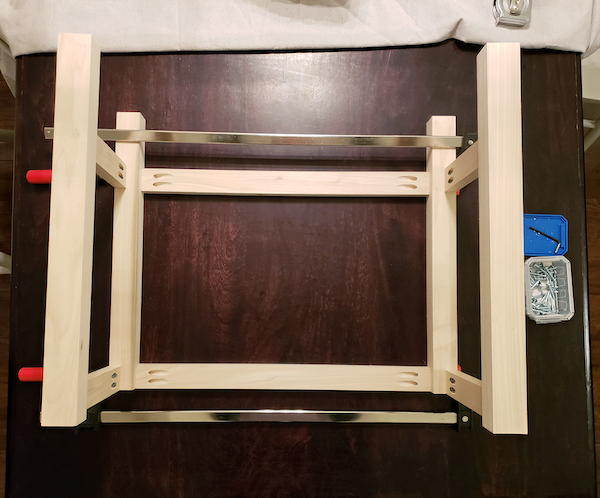
We screwed the 1" x 2" side pieces into the 2" x 2" legs (twice). Then we attached the back and front 1" x 2" pieces.
Almost there!
We cut a 1/2" piece of birch plywood to create the bottom shelf.
I always freak out a little during the middle. I was worried the clean and simple bottom wasn't going to tie into the more traditional top. But before I made any final judgment, I decided to prime and paint the entire piece a solid color.
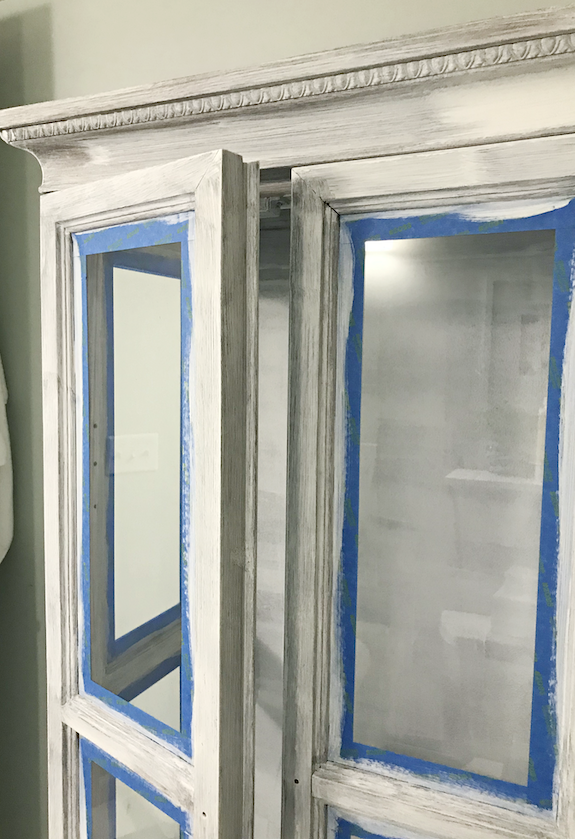
Prior to painting, I did a few things to prep the cabinet. We used our brad nailer to affix the shelf to the base. Then I caulked all of the cracks around the legs. I used a sanding block to sand everything down. After that, I took a liquid deglosser to the top half of the cabinet because the wood had a chipping top coat and I wanted to be sure I wasn't going to have any trouble with paint adhering. Not done yet, I used some wood filler to fix any cracks, dents, holes, scratches, etc... Finally, I taped all of the glass off with painter's tape and found my oil-based primer.
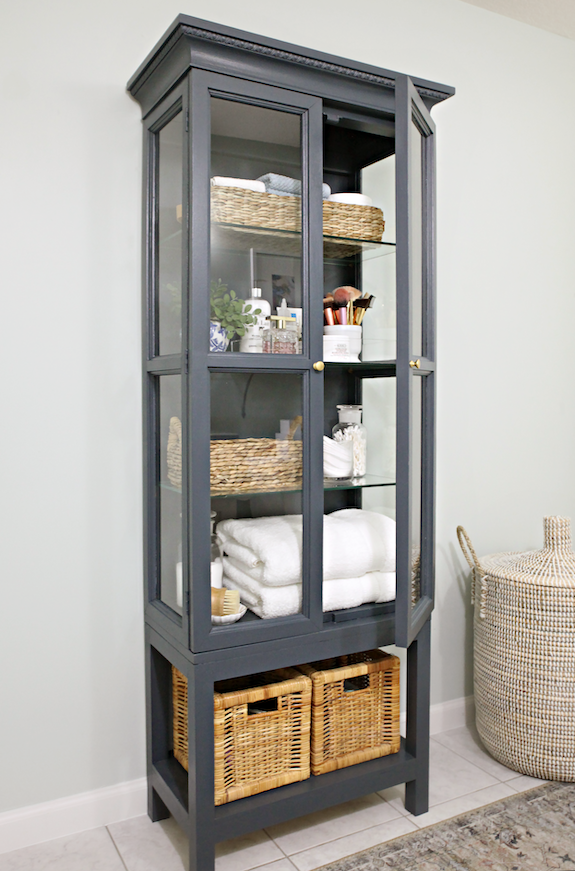
Once painted, the cabinet turned out really lovely. The entire project came in under $75 for the cabinet, wood supplies, and paint. Considering I had been pricing out new options for between $250 - $1200, I am very happy with how this turned out.
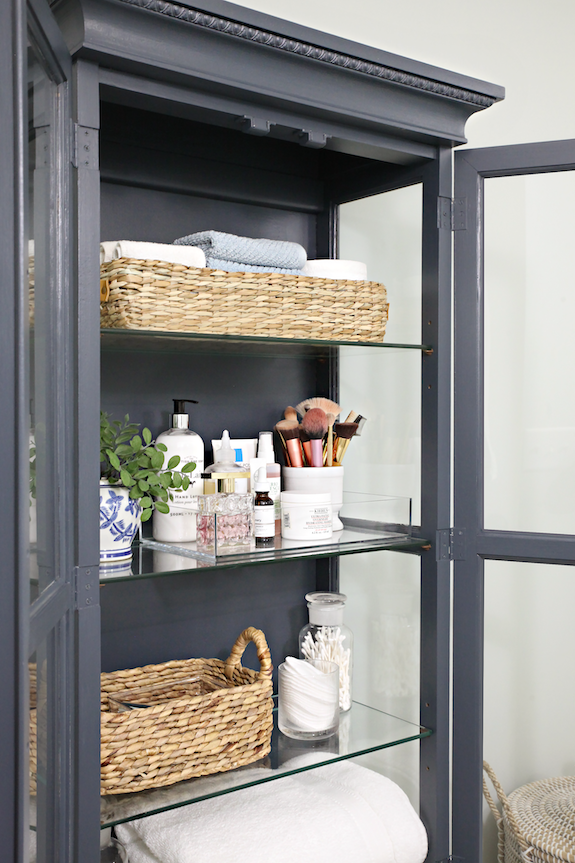
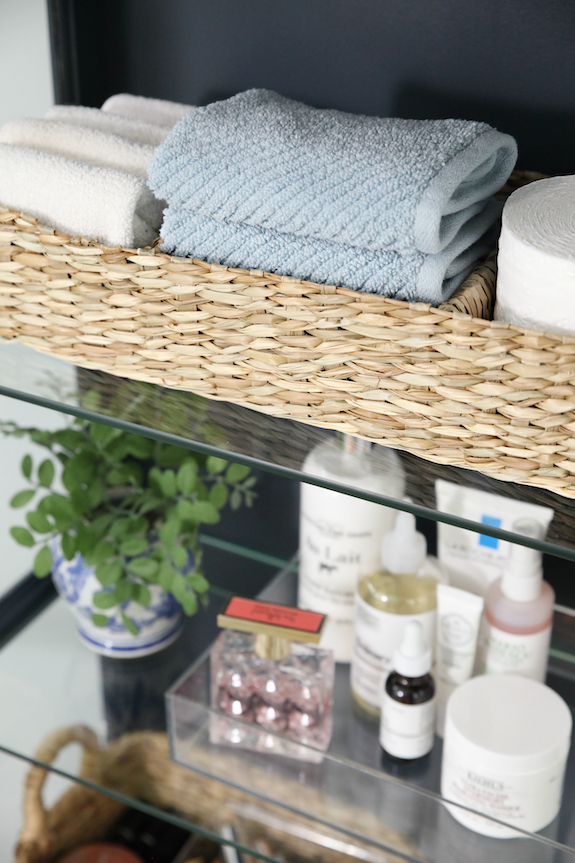
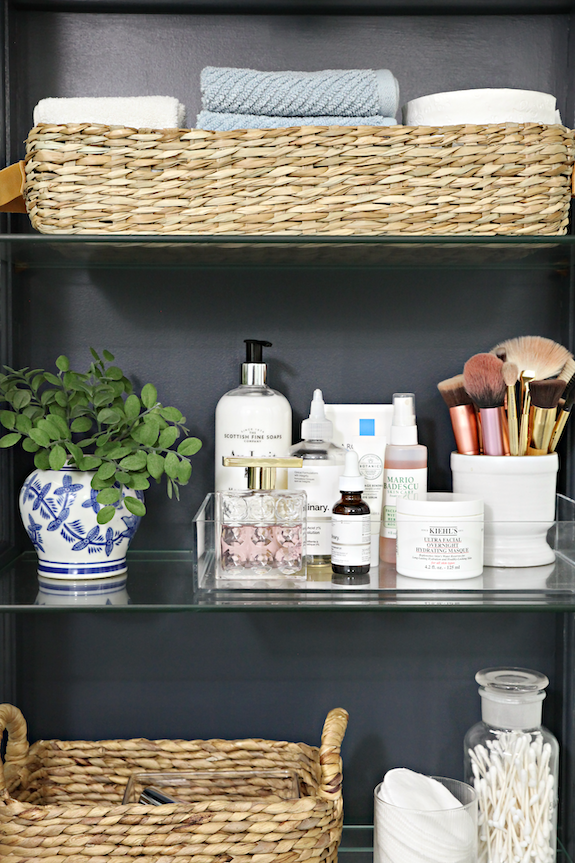
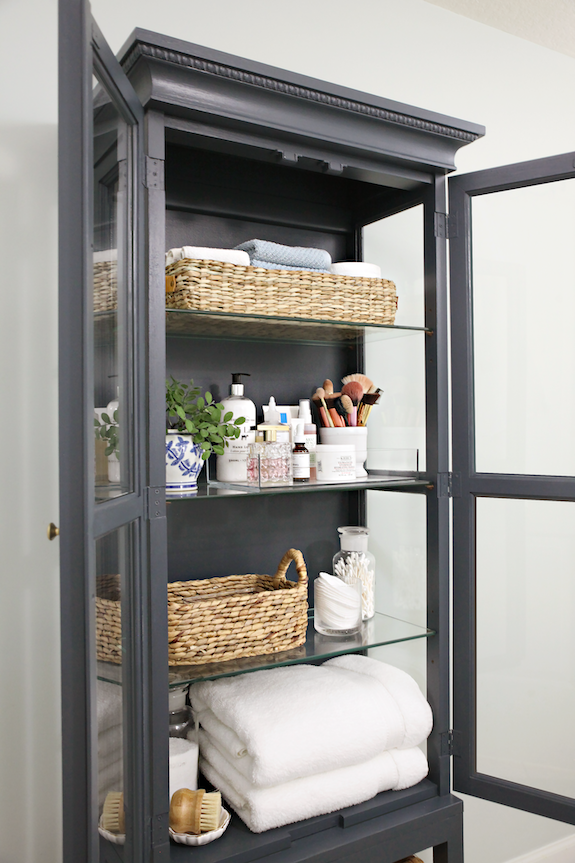
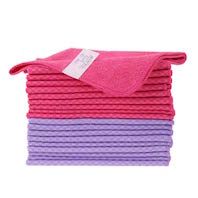
I use the cabinet to hold everything I reach for on a daily basis. The top shelf holds a divided basket with face cloths, washcloths, and an extra roll of toilet paper.
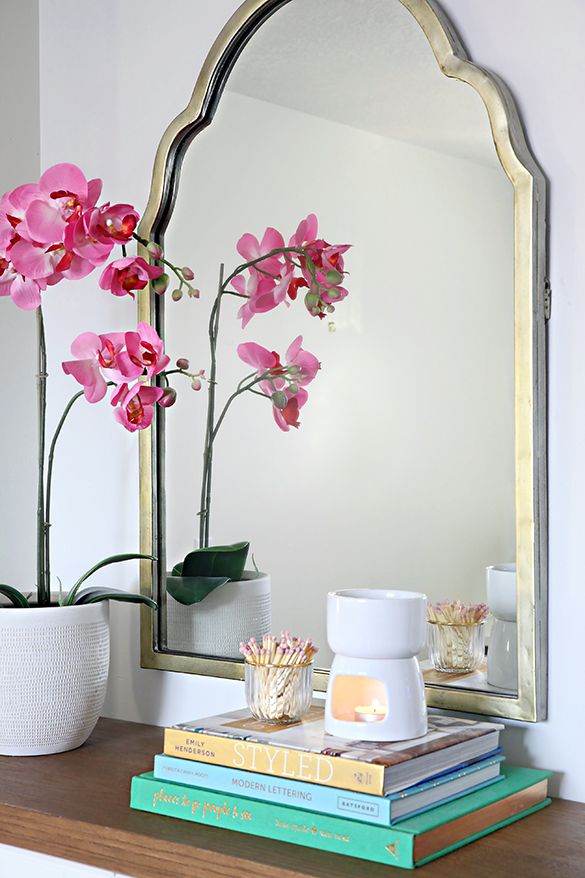
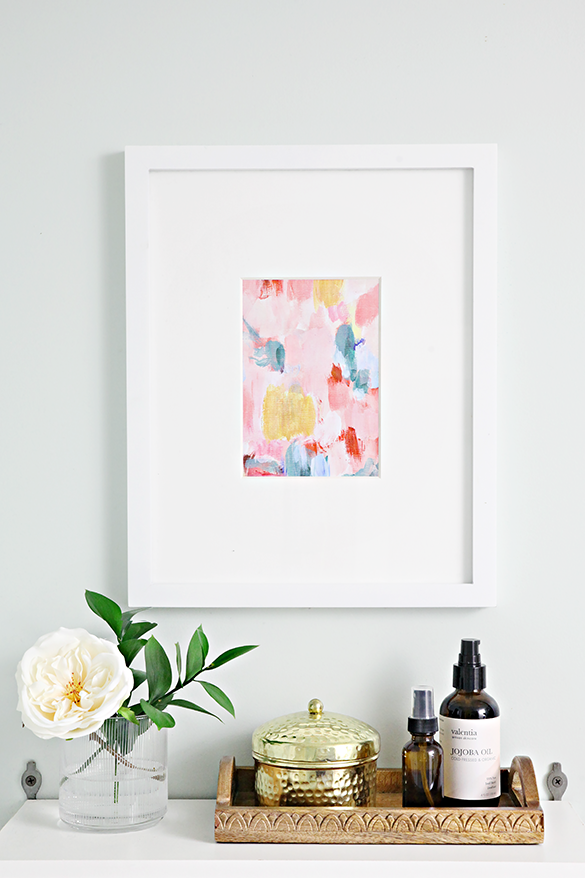
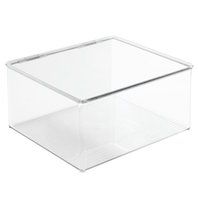
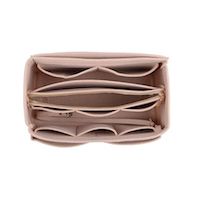
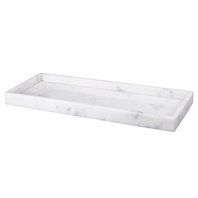
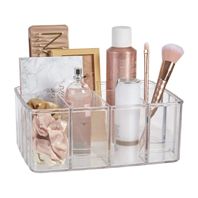
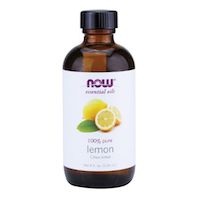
An acrylic tray corrals all of my lotions and facial creams.
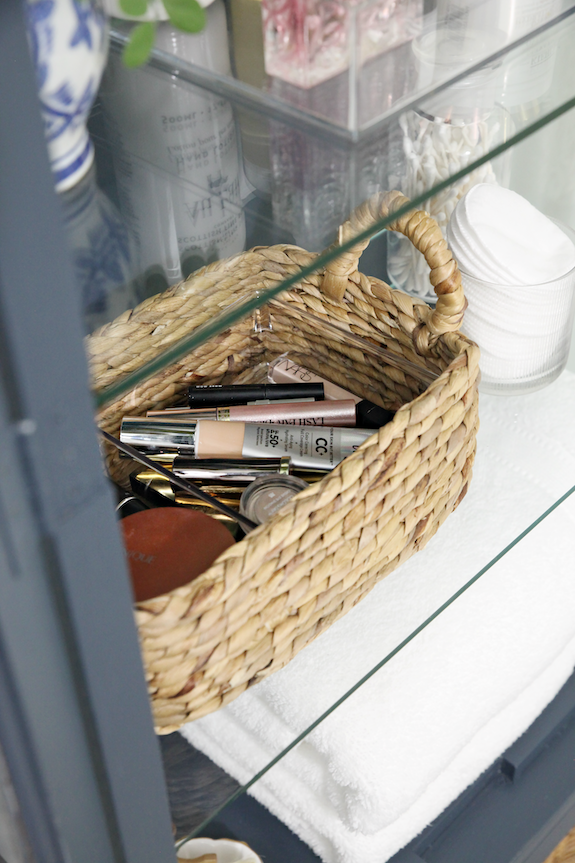
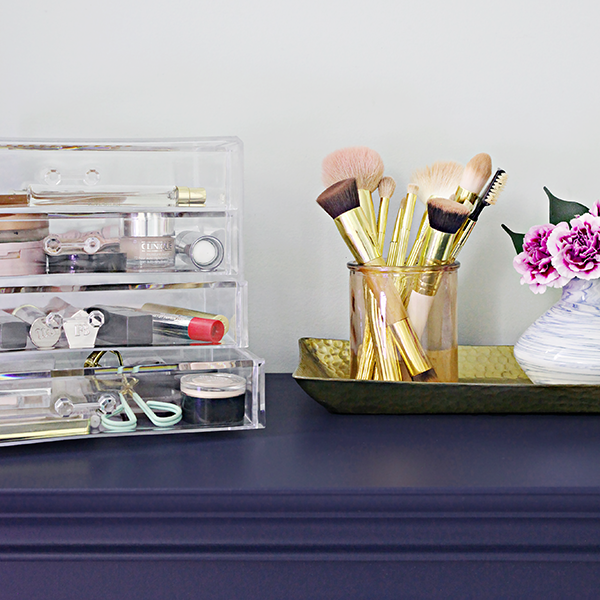
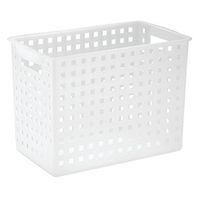
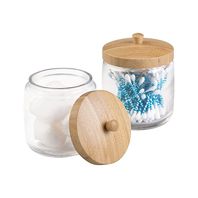
While a small handled basket works great to hide my makeup clutter. I also use a basic drinking glass to hold some facial cotton pads and a clear apothecary jar for cotton swabs.
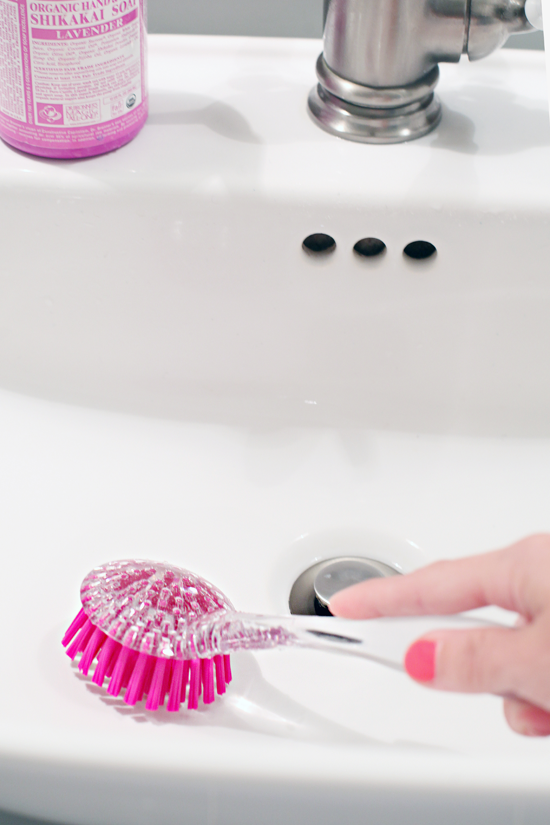
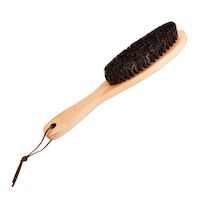
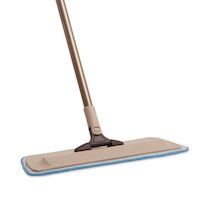
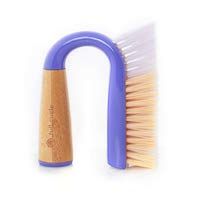
The bottom shelf holds a couple extra clean towels, bath salts, and a spa brush.
Because we added a small shelf below, I was able to fit two tall baskets to conceal the less sightly toiletry clutter such as small grooming tools and a manicure kit.
Let's take a look at a side-by-side before and after to show what a little out of the box thinking can yield.
The original base was salvageable enough to donate so hopefully someone else can put that piece to good use also.
Don't you love a good "one man's trash is another man's treasure" story? The overall depth of the cabinet is only 12" so I was able to add quite a bit of storage with a tiny footprint. And it's so pretty I hope it sticks around even after we get to updating our bathroom someday.
I would love to see/hear about your Facebook Marketplace finds too! Or how you are getting creative with storage around your home! Share the details in the comments below or tag me on Instagram!
P.S. I purchased this cabinet on Facebook Marketplace weeks prior to any news of COVID-19. I completely understand the sensitivity of the current situation and Facebook Marketplace may not be the best way to shop given current social distancing recommendations. I still wanted to share in case you have a piece of furniture that might need some new life, or if you are just looking for inexpensive and space-saving bathroom storage solutions. Please stay safe and healthy my friends. ♥
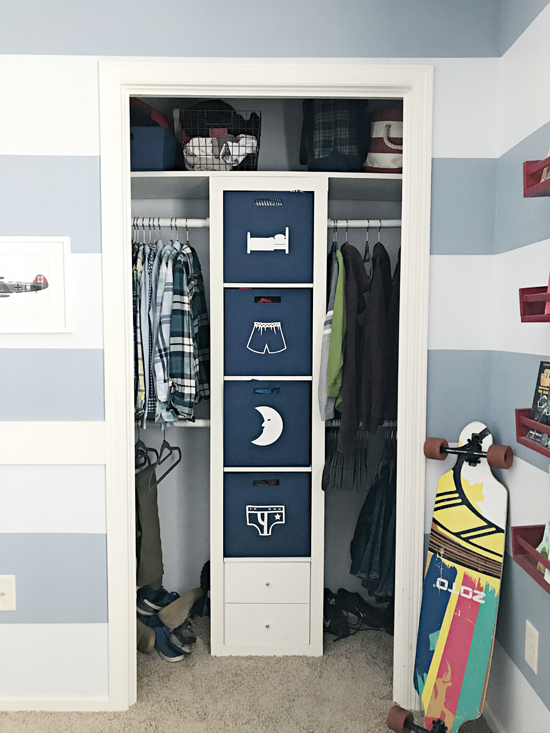
]]>IHeart Organizinghttp://www.blogger.com/profile/05084013302005288836noreply@blogger.com21tag:blogger.com,1999:blog-8864666002840991252.post-91110339209011366942020-01-16T00:40:00.000-06:002020-03-14T14:05:20.285-05:00DIY Sliding Closet Doorour teen boy's bedroom closet which included widening the doorway to allow for a large, built-in storage unit. His room isn't all that large or "roomy", so maximizing his closet to allow for both drawer and hanging storage was extremely important and has proven to be a great way to give him more space for reading, working on projects, having sleepovers, and doing his homework.
We knew there were so many benefits to widening the doorway to his closet, but then the problem solving began in terms of how to cover it all back up.
There was a bit of planning and troubleshooting and decision making that went on with this project. Here are a few of the things we had to work through:
To keep the trim or not? That was the question. I decided that if we kept the trim around the door, that it ultimately should be completely covered by the door when it was pulled closed. But that would also increase the size of the door by about 4-5 inches in width, and the door was already measuring pretty large. The alternative was to remove the trim, but that would require more drywall work and some fussy refinishing.
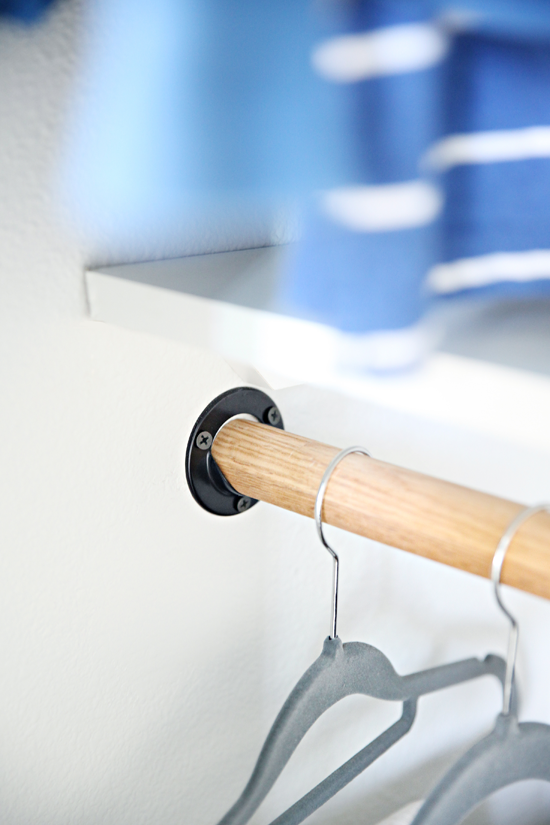
Before making a quick decision, we thought we would install the rail to get a good idea of how far away from the wall the door would hang, and if the trim would interfere with it at all. Bryan easily had the rail installed in less than an hour and didn't even call me in to help (using the included installation instructions). Yay Bryan! Except I was instantly confused by the placement of the rail. He used the large bolts that came with the rail kit and installed them directly into the wall studs. Which made complete sense. But, this meant that the rail didn't go all the way to the corner of the room (it was just an inch or two short). If you want to be extremely specific about the rail placement, then you actually need to install a ledger board into the studs first, and then the rail can be installed anywhere into the ledger. Bryan knew I didn't want to use a ledger board if I could help it, so he just assumed going into the studs was the answer. But then I wasn't sure if I loved that the hardware didn't land exactly into the corner. And that led to another decision to make.
We now knew that the door would hang out enough to clear the trim, so the trim was going to stay. But before making any more decisions regarding the rail placement/ledger board, I wanted to construct the door and see it on the rail. The advantage of a ledger board is that it gives you the flexibility to install the rail hardware wherever you would like. It also allows the door to hang even further away from the wall/trim. The disadvantage is that it is another distracting element that adds to the entire setup (although painting the board the color of the wall would minimize that).
When coming up with the design for the door, I had a couple of inspiration pictures saved that I continuously referenced. This one and this one were my top two favorites. They both had a diagonal design that was trimmed out in a classic style. My son also really liked the design and gave me the thumbs up. With the hardware installed, we now knew how the rail system worked, where we wanted the wheel hardware to attach to the door, and the maximum thickness the door should be.
Quick Tip: We taped a couple of pieces of paper together that were scaled to the exact width of the door that we had planned to build. Then we drew the top trim boards based on our measurements and "installed" the paper on the rail with the hardware. This was a GREAT way to visualize how the door would cover the closet door casing and also allowed us to confirm that the boards we were planning on using to trim the face of the door would line up nicely with the hanging hardware. I like to visualize things before completely committing whenever possible.
Finally, my last but largest concern that I had was that the large door would be too overwhelming due to the smaller size of his room. The door was going to be just over 4' x 7' and I just didn't know of any other options in terms of closing off that wonderful opening we created. I told myself that sometimes larger things work best in small rooms to create more visual interest and to help balance some of the smaller accessories and knick-knacks. I also figured I could paint the door a similar color to the walls so that the pattern could be the focus, and the color would more or less fade away.
Now that we had worked through all of those points, it was finally time to start building that dang door!
Because our opening plus trim was over four feet, we talked through a few ways to achieve that width with as little wood as possible (to keep the door from getting too heavy). We began with a 4' x 8' piece of 1/2" thick MDF because the actual dimensions are 49" x 97". If we were to trim out the edges with 1" x 2" boards, then we would be exactly where we needed to be. With that in mind, we thought we would construct something similar to our son's DIY headboard project.
The rail was already installed so we had the exact measurements we needed so we began by cutting the height of the door accordingly.
Then I got to painting. I decided it would be easier to paint the back of the board, and the edges of the top boards, before assembly. I am telling you, doing this first was a major sanity saver later on! It made putting that final coat of paint on the finished door SO MUCH EASIER not having to get my brush down inside of every last groove.
For the diagonal pattern we used 1" x 4" primed boards that we cut to length. What is hard to see is that we drew a couple of pattern lines lightly in pencil to be sure our first few pieces went in exactly where we wanted, as those pieces would set the stage for all of the remaining cuts.
To affix the boards to the MDF, we covered the back of each board in wood glue and used our brad nailer and 1" brad nails.
We used a speed square along the edge to draw our cut line, everything was cut at a 45-degree angle with our miter saw.
While purchasing material and paint, we noticed some extra-large paint stir sticks and thought that they would make for the perfect spacers. And they did!
After we got going, we cut, nailed, cut, nailed, cut, and nailed... All the way until the entire door was covered in diagonal planks.
You may notice a couple of final pieces where the spacing doesn't look right, and that is because those areas were going to be covered by the decorative trim on the face anyway, we just popped boards in for backing.
Also above you can see how we trimmed the perimeter of the door with the 1" x 2" boards we purchased. Bryan ended up ripping each one to be exactly flush with the depth of the mdf board plus the diagonal pieces. Again, we added those boards to get the door just wide enough to cover both the closet opening and the closet door casing. This also added a nicely finished edge on each side of the door.
To finish off the design, I found some light-weight pine lattice moulding at Home Depot. It was the perfect width to frame out the door and hit the rail wheel hardware juuuuust right.
I know, I know... This is that awkward middle stage where it is hard to see just how amazing it is going to look until it is all painted in the same cohesive color. But first, I had to fill every last nail hole with putty. And then I went over the entire door a second time just to be sure there were no pits. And then a lot of sanding everything nice and smooth.
This step was worth every bit of time it took to really achieve the best finish possible.
The color I went with is Benjamin Moore Wales Gray. I felt like it was just different enough from the walls (Sherwin Williams Nebulous Cloud), and complimented the ceiling (Benjamin Moore Blue Dusk).
Once the door was up, I decided it wasn't worth it to move the rail to the corner of the wall and add a ledger board behind it. The fact the rail stops an inch short isn't all that obvious because the edge of the door goes right into the corner. Plus, the details on the door steal the show!
The rail is able to support up to 225 pounds, and our door came in under that so we could scratch that worry off of the list, and the stoppers on each end are completely adjustable.
Although the door still cleared the trim without a ledger board, we ended up having to inset the bottom bolt of the door hanging hardware into the back of the door to prevent it from rubbing against the white closet door casing.
I found the handle hardware on Amazon here. I like that it is substantial and coordinates with all of the other matte black hardware throughout his room.
I put together a little motion shot of the new door opening and closing because we are just so excited to finally have this project checked off of our list!
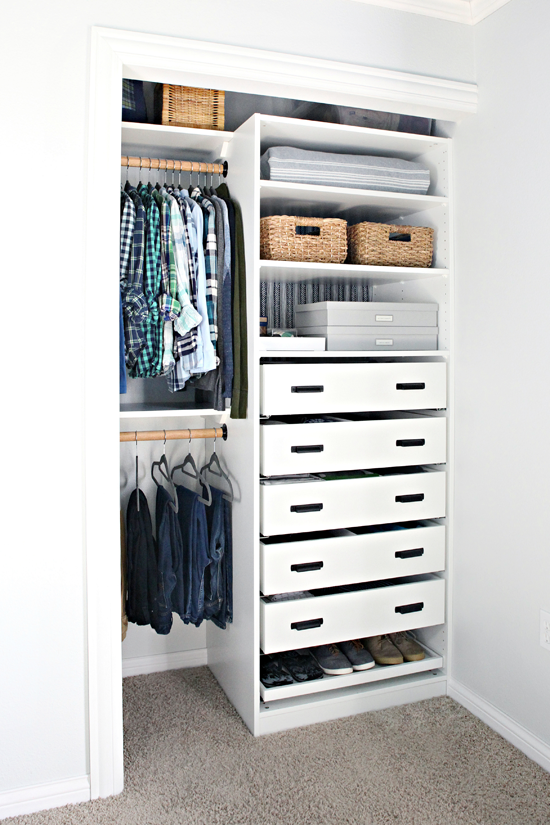
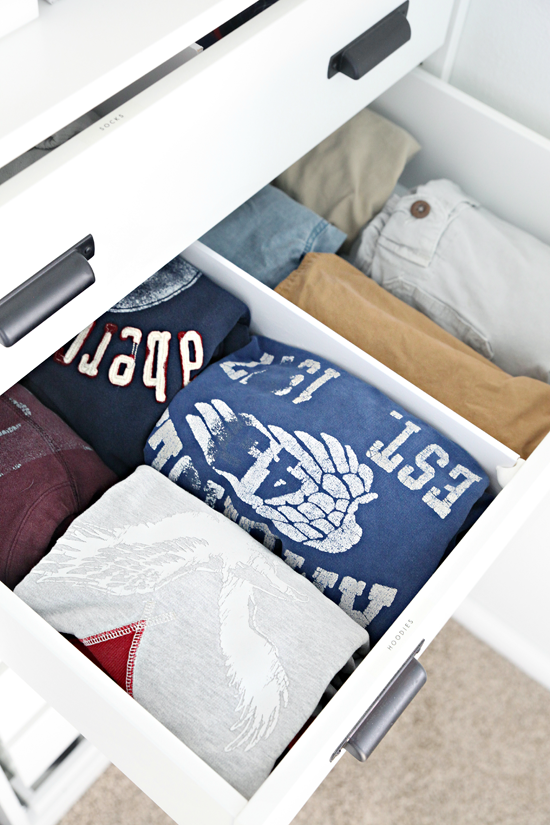
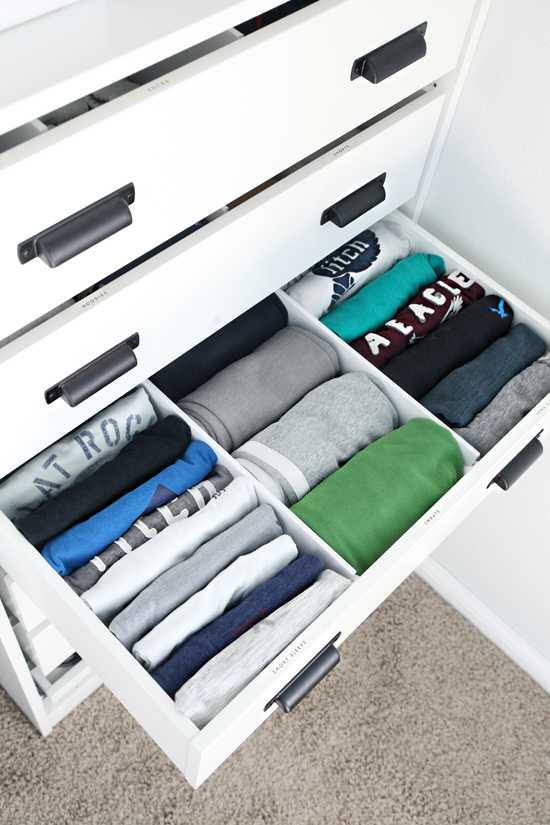
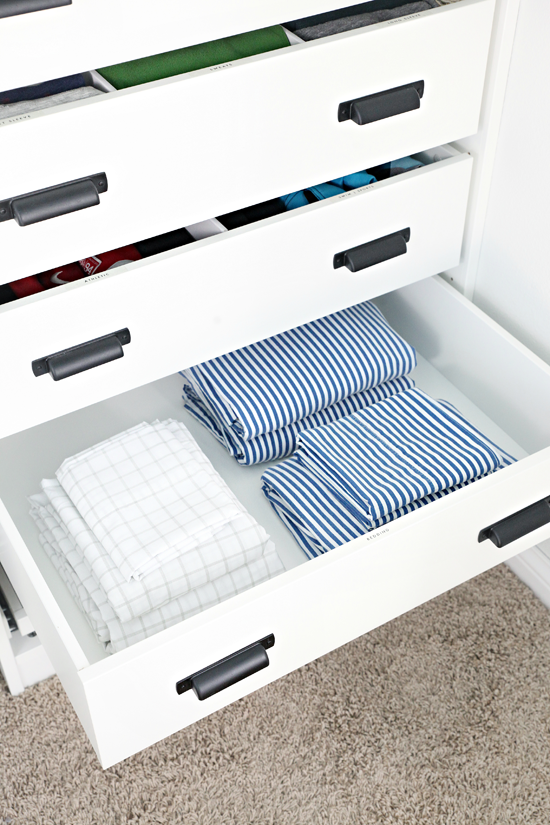
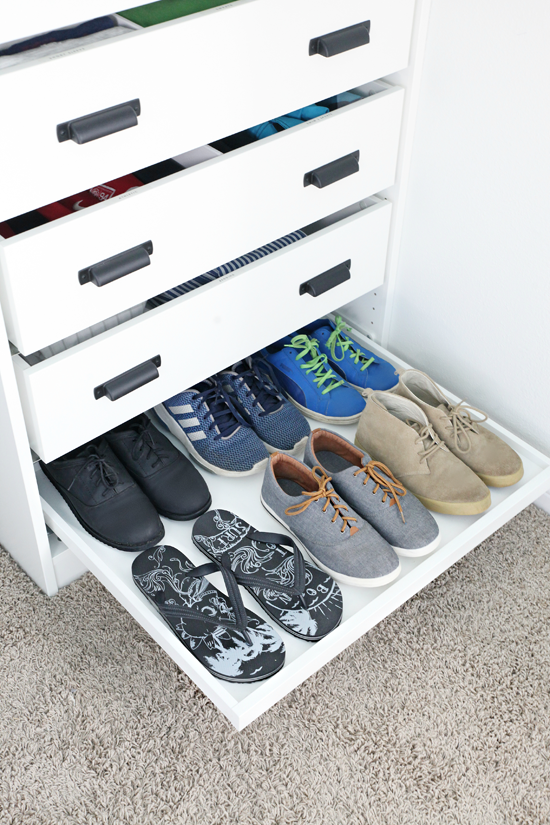
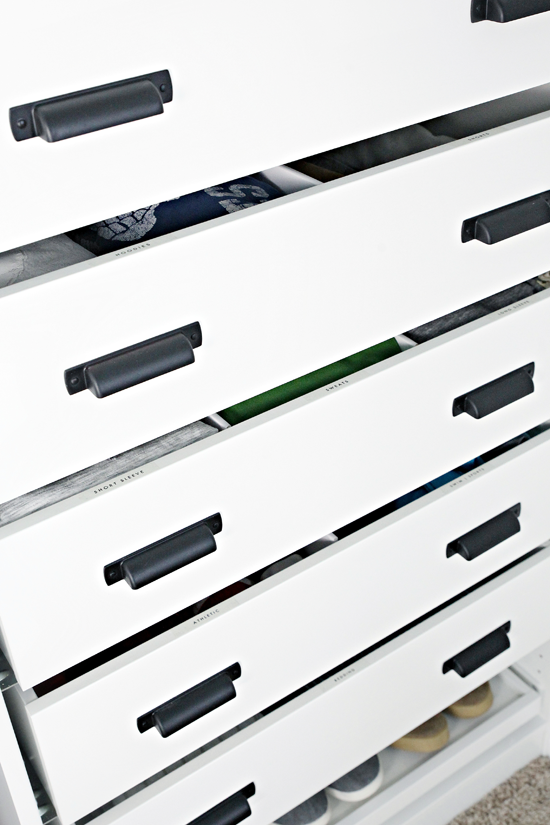
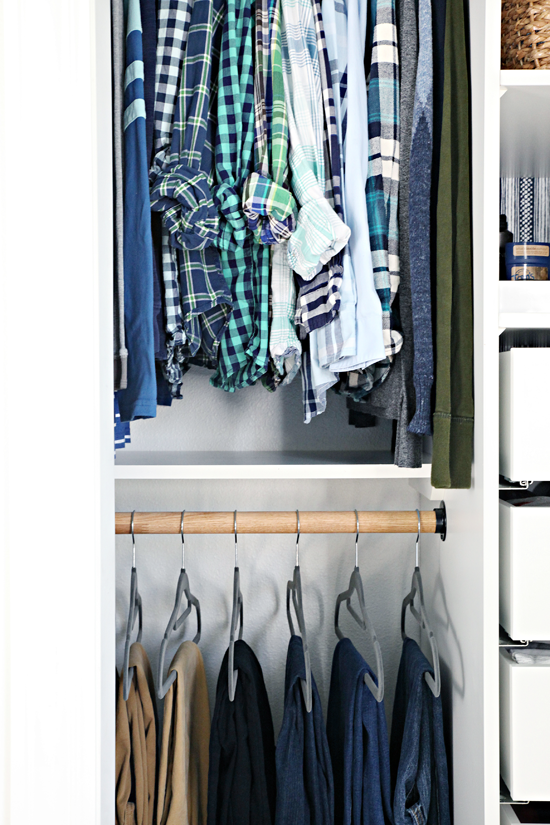
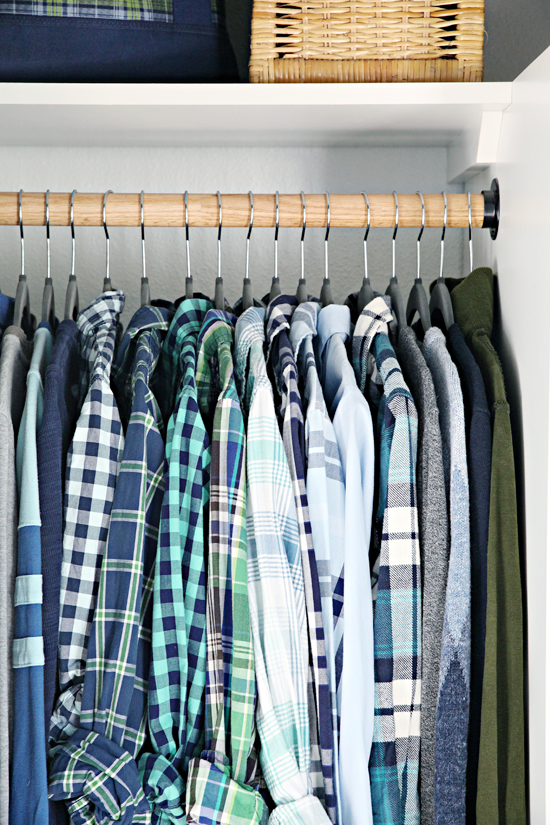
As far as the organization goes, you can see that it is maintaining nicely! The only change is that all of his clothes have basically doubled in size. Oh! And we actually swapped the bottom shoe tray with a drawer we took out of our pantry cabinet (hoping to share more about that soon). We like that the drawer hides the shoes (yet they can still breathe), and that it can serve a different purpose all together down the road. You can read every last detail about his closet organization here.
Here is a shot of the door closed. It does leave a blank space to the left and I haven't decided if I want to do anything there yet (we could add something up to the thickness of the door trim without any issues, but are OK just leaving it for now). The color of the door works really great with everything else he has going on, and although the door is quite large, we all love the addition and interest it has added to the room.
I have one more big project I want to take on in this room (a DIY headboard), and then it will be FINISHED. Oh, what a feeling!
You can catch up on our previous teen bedroom posts below:
]]>IHeart Organizinghttp://www.blogger.com/profile/05084013302005288836noreply@blogger.com14tag:blogger.com,1999:blog-8864666002840991252.post-13480190440888902182020-01-07T16:22:00.000-06:002020-01-15T18:57:37.253-06:00Happy New Year: Free Goal Setting Printable! A new year means different things to different people, and although all of the highs and lows of years prior don't just disappear when the clock strikes midnight, January 1st does seem to signify a fresh start. I am here to say "cheers" to that!
Some years I set goals, and some I don't. There are times I worry about setting resolutions because of the fear of failure, or because I figure that they will all be forgotten by February. I also tend to over-analyze everything and can take goal setting too far. If goals become overly complicated, or out of touch, then I find I am less likely to feel motivated and encouraged. What I have found to work best for me is to:
Select 2-5 large scale goals for three areas of my life: Personal, Business, and Health. This is for the entire year!
Use those goals to set smaller, bite-sized targets each week that ultimately correlate with my overall vision.
All of that said, I really want to give goal setting a real shot this year! Without specific goals, it can be easy to end up on a hamster wheel or to feel lost at sea. Using the method I find works best, I set out to create some printables to help organize my ideas. I am heading into this process with a mindset of why these goals are important to ME! It can be easy to select goals to fit a specific mold, or generic resolutions that have been set by society, but doing so doesn't ultimately aid in personal growth. I am also keeping in mind that I am not trying to give myself a total makeover, or change who I am at my core. The entire point of goal setting is to look at opportunities for improvement and to drive myself to succeed.
So while "getting more organized" and "go to the gym" and "budget" are all completely fine resolutions, I am going to challenge myself to think outside of the box, get specific about exactly what goals I am selecting (and why), and jotting down simple action plans to help me get there.
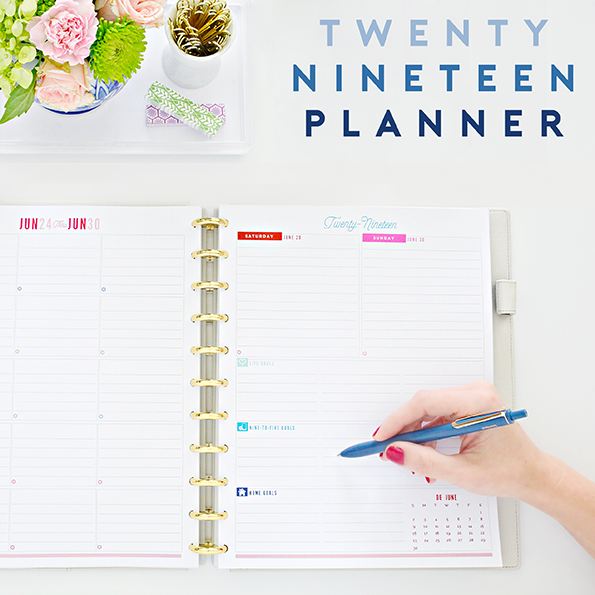
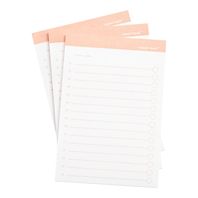
The printables I designed are intended to get us thinking and to put a pen to paper. The best part is that I left these pages free of timelines and dates, so they can be printed and reused or updated at any time of the year. I plan to clip mine to the front of my new planner pages so that I can check in on them as I do my weekly scheduling/planning/to-do lists.
To download, click the link below the image to be directed to the PDF file. There is no need to sign up/sign-in, you should see a 'Download' button at the top of the screen to access the files for free.
I created an option for either Business or Educational goals so these can be used by anyone of any age! My boys tested them out and were able to use them with ease, and enjoyed sharing some of their responses with all of us during dinner the other night.
__________
Although I didn't post nearly as much as I would have liked/hoped this past year, I had some really wonderful opportunities that gave me fresh perspective, confidence, and excitement for what I do. I am so excited to see what is in store for 2020 and I am endlessly grateful for all of you that have stuck around through this crazy roller coaster of life.
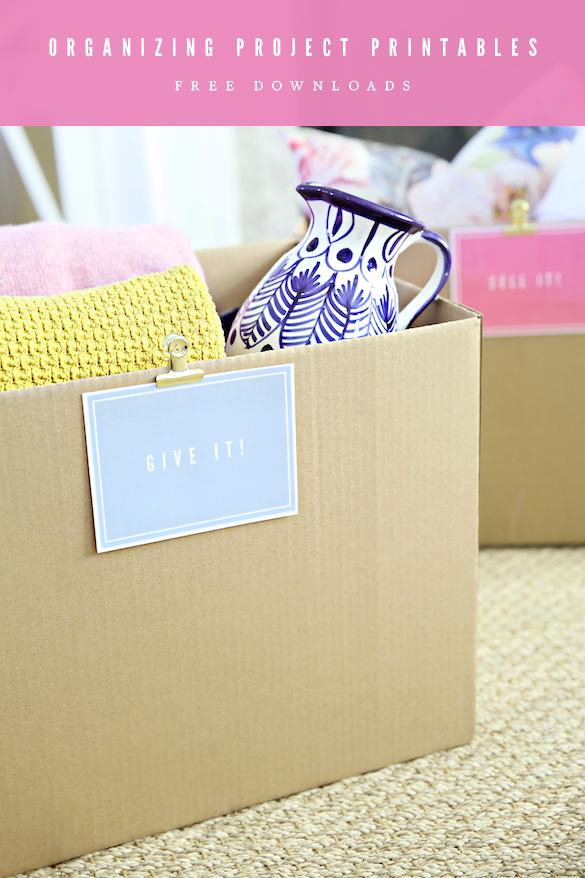
If organizing is a goal on your list this year, but you don't know where to begin, you can get a head start by collecting one item per day to discard from your home. Set up a box for donations that you can easily access and try to fill it by the end of the month. Less is always more when it comes to organization, and the small act letting things go is the best way to get started.
I also encourage you to take on organization in bite-sized projects. Focus on one small space at a time, and select areas that you utilize and touch the most frequently first. Organizing is always a process and you can't organize your life overnight. I have a few areas around our home that could use some zhushing, and I hope to share those this month as I tackle them. My personal organizational goal for January is to organize one thing that I have been putting off, and I have a few of those projects to pick from!
Last year I put together a super-sized series of posts with all of my favorite tips, tricks, and products. I am going to link them below as a quick refresher:
2020 here we come! Tell me, are you a goal/resolution setter? What organizing projects do you hope to tackle this year?]]>IHeart Organizinghttp://www.blogger.com/profile/05084013302005288836noreply@blogger.com11tag:blogger.com,1999:blog-8864666002840991252.post-52629410828841915552019-11-14T21:59:00.003-06:002020-01-08T11:18:52.386-06:00Our HGTV Urban Oasis ExperienceHGTV Urban Oasis giveaway house is located right in my backyard? That's right! This year it is located in Minneapolis, MN and you are going to want to hurry and enter to win this beauty!
I know many of you come here for our organizing and house projects, but this quick story is just too great not to share! And I would be beyond thrilled if one of my readers happened to win this amazing home (and then invited me over for chips, salsa, and margaritas).
I have really gotten to know designer Brian Patrick Flynn over the past few years, and he is one of the most generous and kind humans I have ever met. He is ridiculously encouraging, really supports independent artists and small businesses, has an impeccable design eye, and can find beauty in just about anything.
Brian is the designer of the HGTV Urban Oasis home and he asked ME to be the organizing stylist! Organizing a house that no one actually lives in is slightly different than my typical duties; it has its own set of challenges but it is a bit of a dream at the same time. You have to work within the parameters of specific sponsors and design styles and be sure it is editorial, while also being able to use beautiful props. The ideas still have to be relatable and sensible, which of course is my favorite part! I wanted the folks that are entering the giveaway to be able to see the organization as possible solutions that they would be able to incorporate into their daily lifestyle.
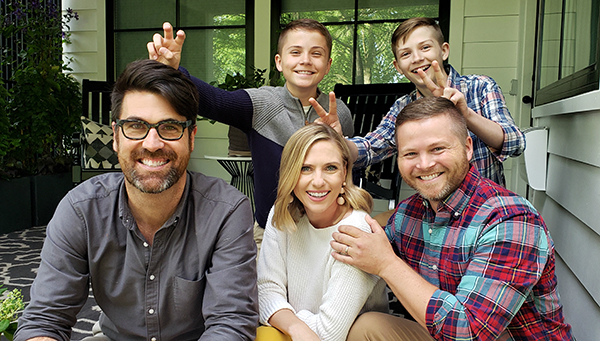
After the organizing was complete and the Urban Oasis was being prepped for media, Brian asked me back again. This time he had me bring my crew to be photographed enjoying the Hygge lifestyle at the house! My oldest son had college prep and work so he couldn't be there, but my younger boys were absolutely thrilled to take part of a really fun HGTV photoshoot. These pictures were such a treat and we will cherish the opportunity forever. Kelly Christine was the photographer behind the camera and she did such a great job of capturing us as a family pretending to live our best Minnesotan lives. As you can see, they definitely wanted to show the relaxed, comfortable, family-friendly lifestyle that this home provides. My son couldn't believe that he had a once in a lifetime opportunity to jump on a sofa and get away with it!
This year's Urban Oasis is a Modern Scandanavian Farmhouse, which is an extremely popular design aesthetic around here. It is not necessarily my personal style (I lean more colorful and traditional), but I was still able to find so much inspiration throughout the entire home. It instantly hugs you when you walk through the front door and the entire place feels like a cozy nordic sweater. It is layered with plush and textural textiles and has art sourced from really incredible talent. And don't even get me started on the finishes and hardware and oak kitchen cabinets... #sigh
You can tour the entire house here, and enter to win here (GO DO THAT NOW!). Although this post is somewhat of a "check out this cool home and our awesome experience", I also wanted to share some images of my favorite no-fuss organizing tips that anyone can incorporate into their living spaces.
__________
As soon as I was hired, I searched Overstock.com (the sponsor website) to recommend some of my favorite organizers ahead of time and crossed my fingers that everything would be fluid enough to work when I was finally able to see the home in person. My first day on location everything was a blank slate of freshly painted walls and empty cabinets and drawers. It was an experience in itself to watch the house transform as the team worked to install and style all of the rooms.
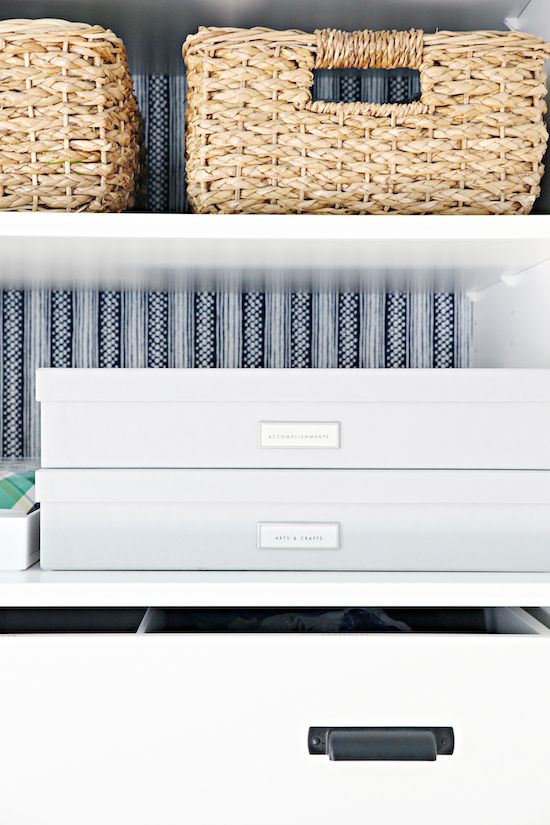
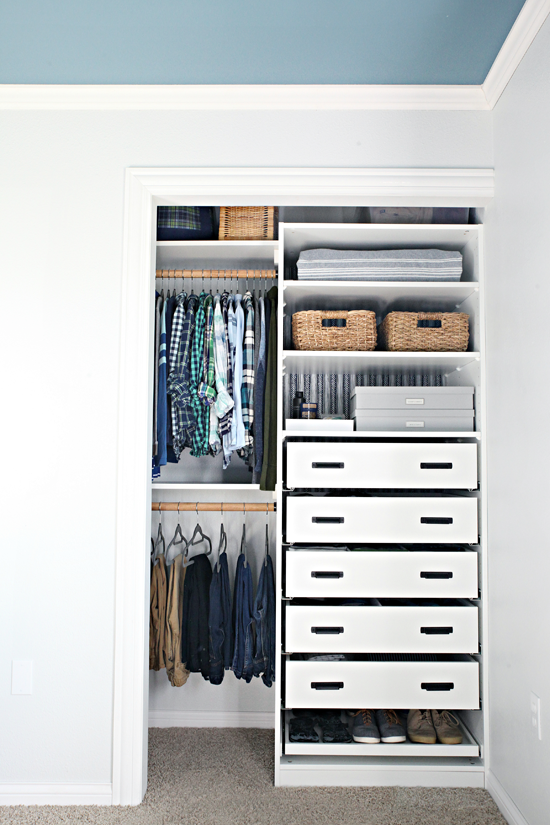
My biggest money-saving tip is to try and source products that are versatile enough to work in a variety of spaces and can move and evolve right along with you. I knew I would be tasked with organizing the master bedroom closet and bedroom, the studio armoire, and many of the kitchen cabinets/drawers. The key items I sourced were a mixture of wire and woven baskets, spring-loaded drawer dividers, clear bins, wooden hangers, and glass jars. I was able to mix and match these items in each area that I touched, which made my job much easier in the end. I do believe in measuring and purchasing storage that makes sense for each project, but by selecting items in basic and natural finishes, you are guaranteed that they will stand the test of time.
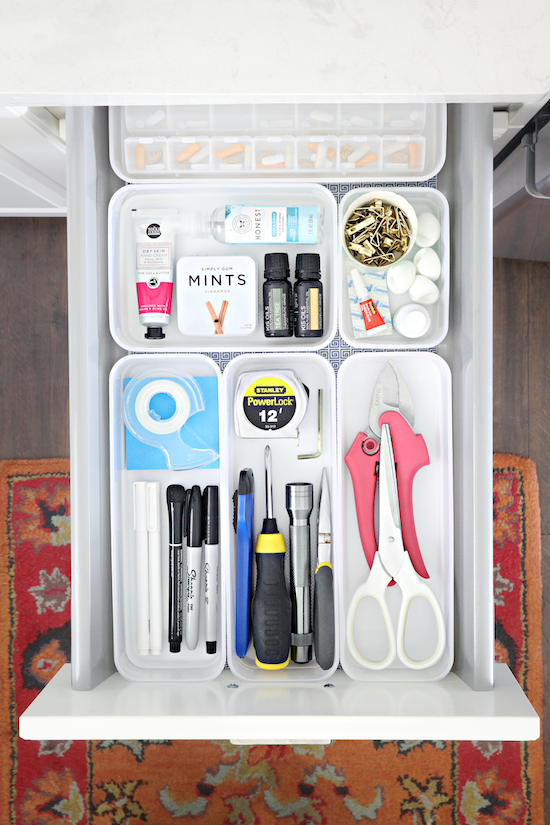
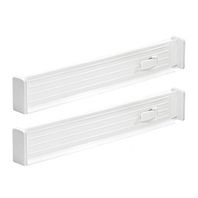
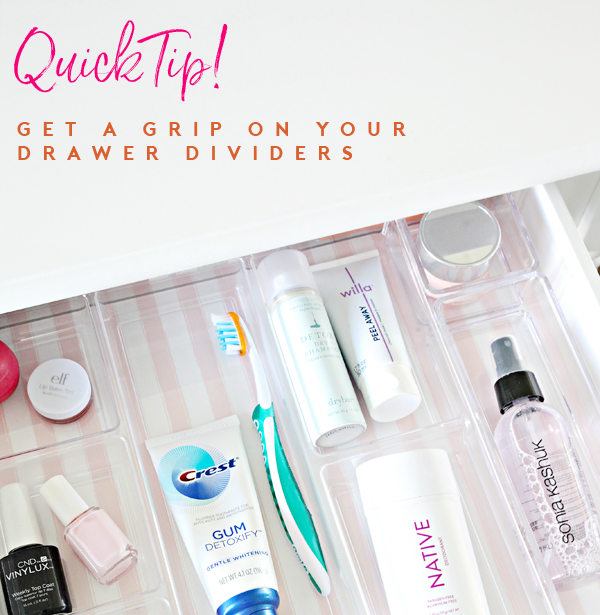
TIP #2: SPRING LOADED DRAWER ORGANIZERS ARE AMAZING
I have mentioned before that sometimes I am the last to hop on any trend train, and for some reason I wasn't quick to take advantage of spring-loaded drawer dividers. This experience flipped me completely. I am IN LOVE. I used the dividers throughout the kitchen and I now want to be the poster child for these special organizing tools. They were so easy to use (ANYONE can install them in a jiffy), and they instantly created flexible drawer dividers for all the things.
I used them for the maintenance drawers, utensil drawers, and even to hold pots, pans, and lids in place. A bonus is that the natural finish of these particular dividers fit right in with the custom wood drawers. Swoon.
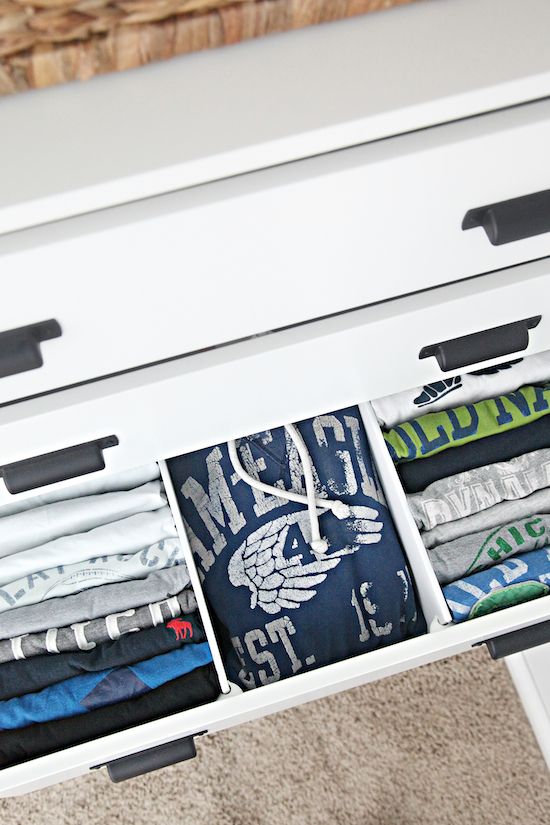
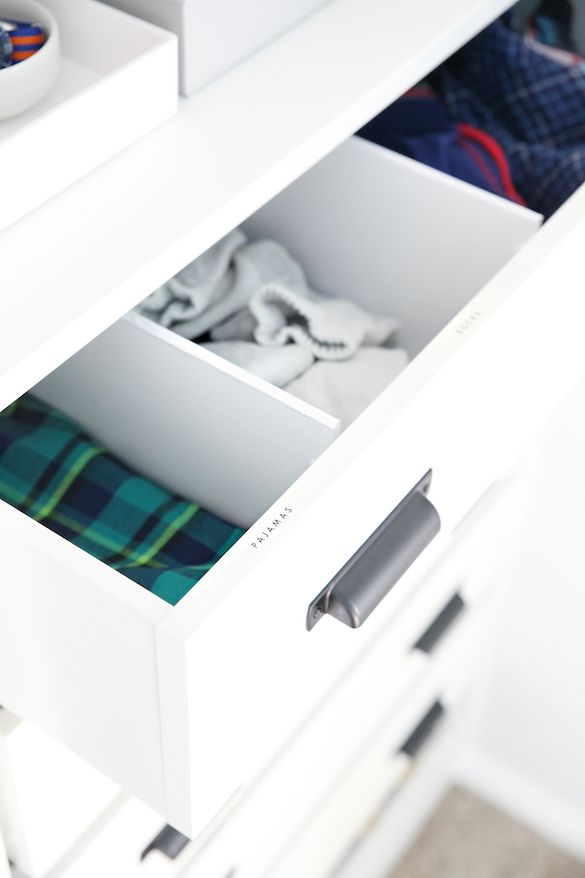
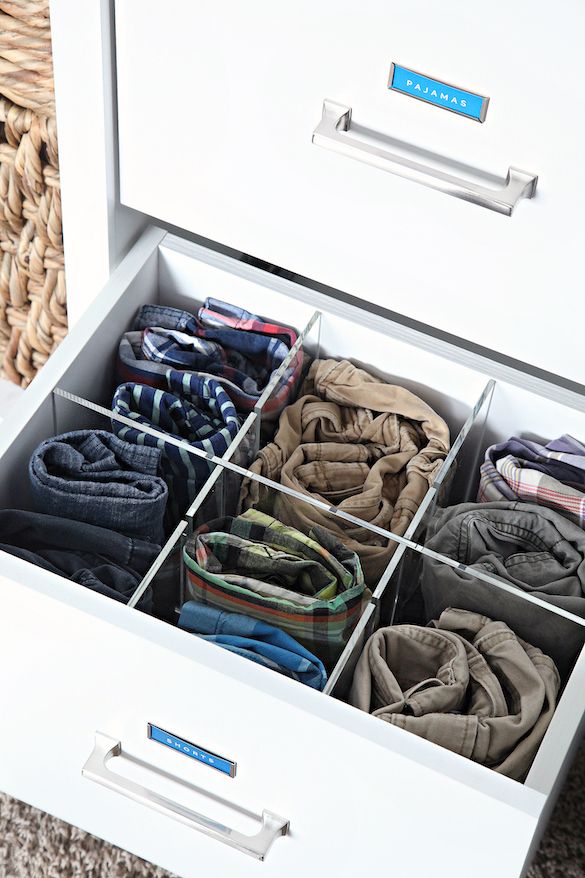
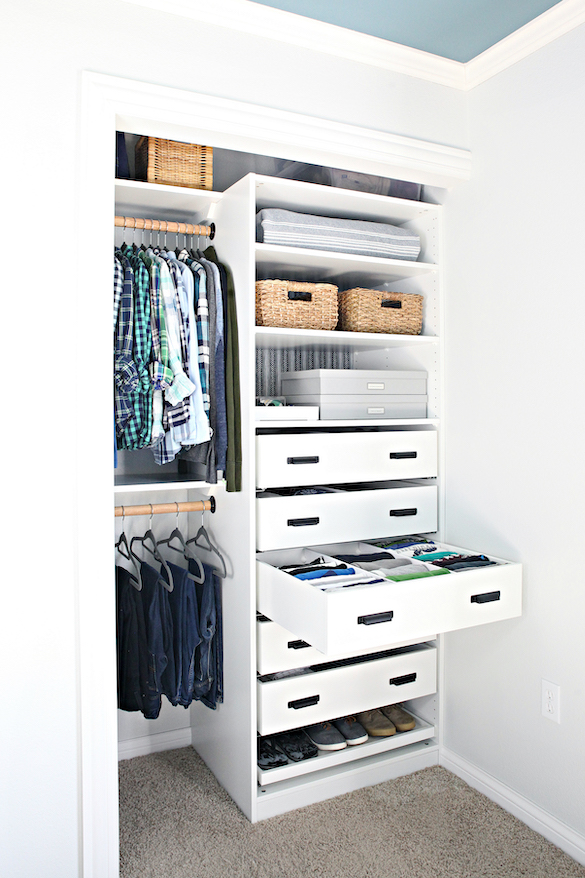
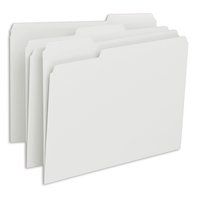
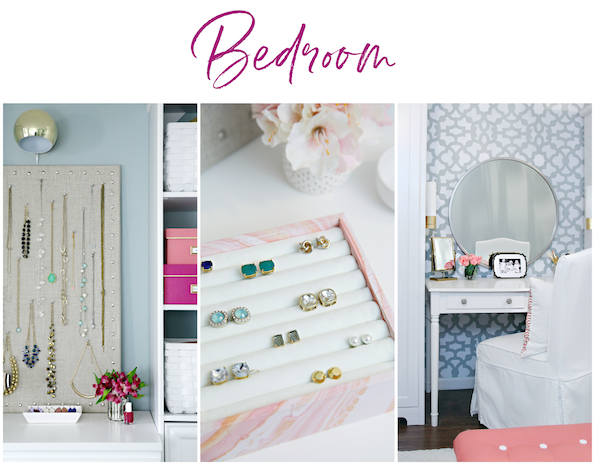
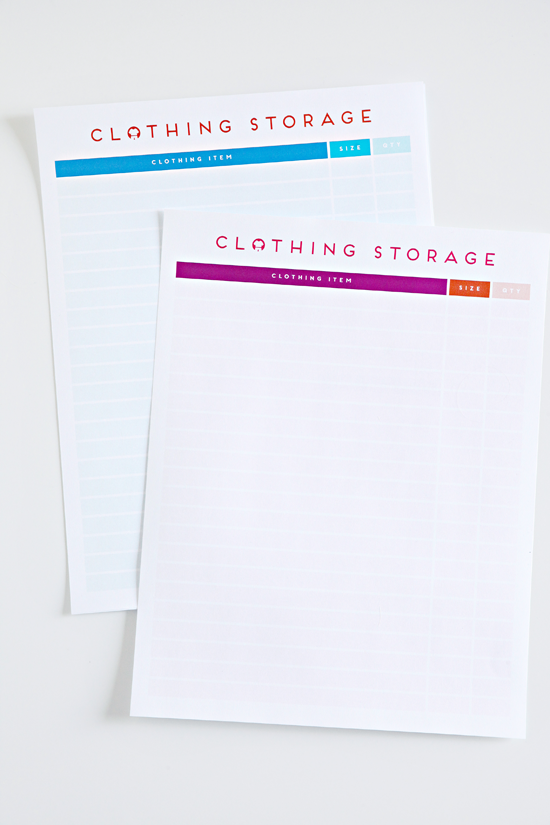
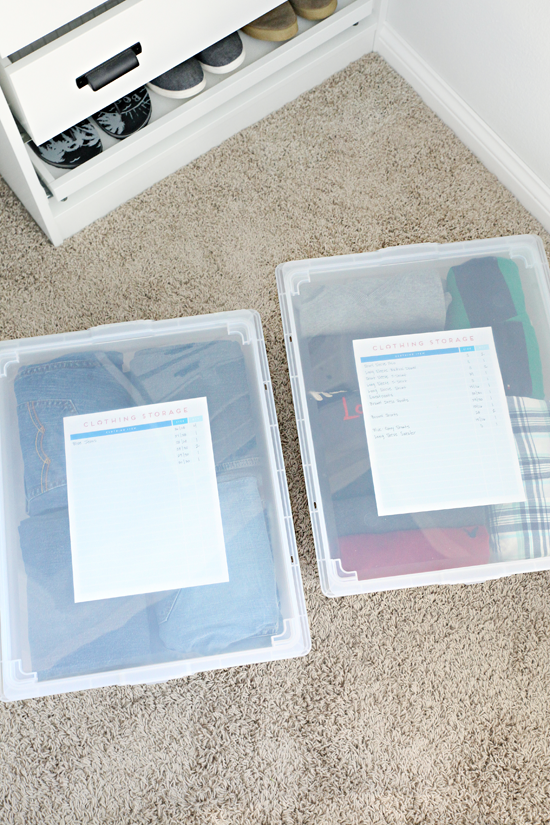
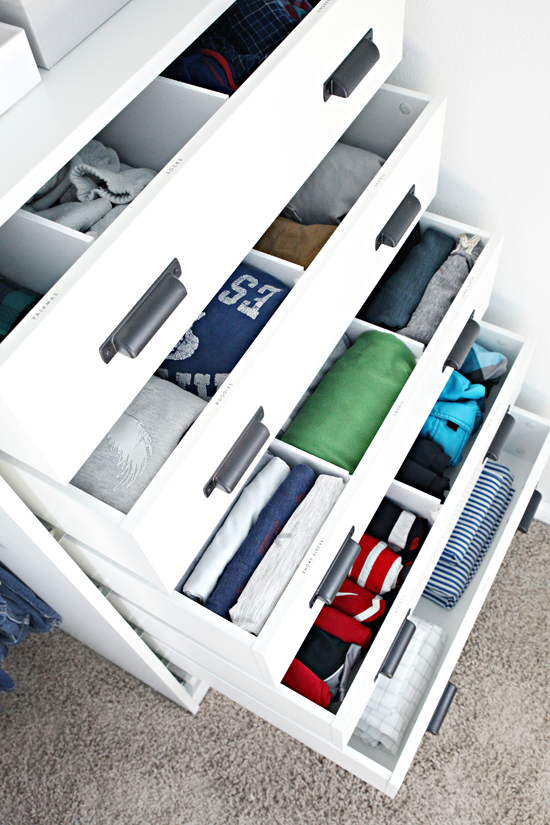
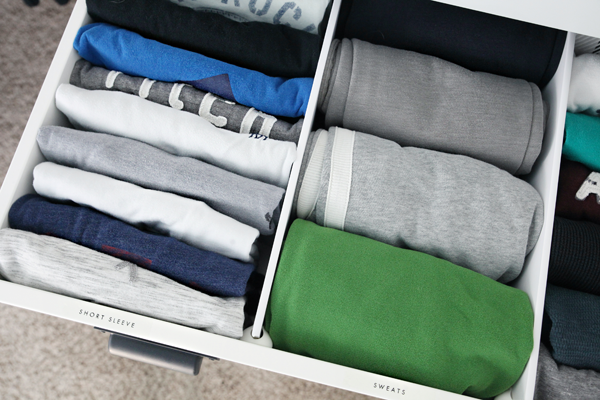
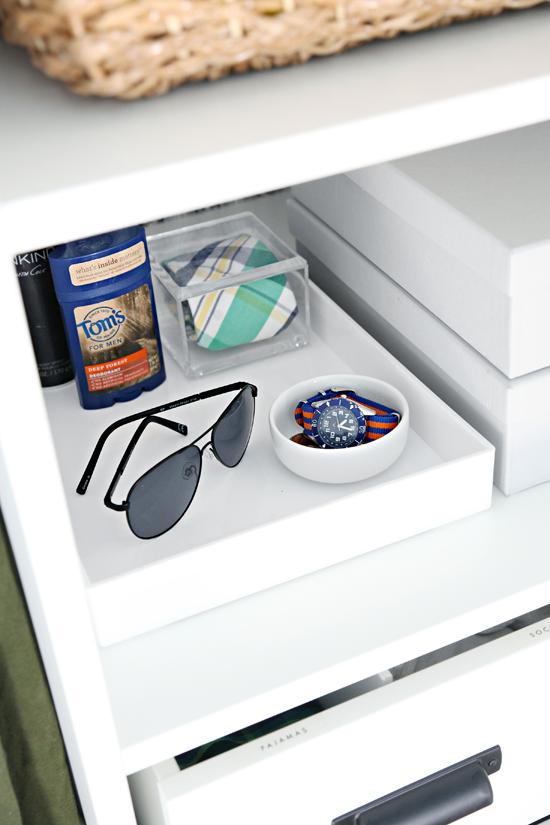
TIP #3: FILE YOUR CLOTHING
I know that most of you know this by now but it is always worth mentioning. File your clothing. If your clothing is filed, it is always easier to see exactly what you have. It is also infinitely easier to take clothing out and put it away.
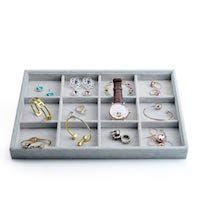
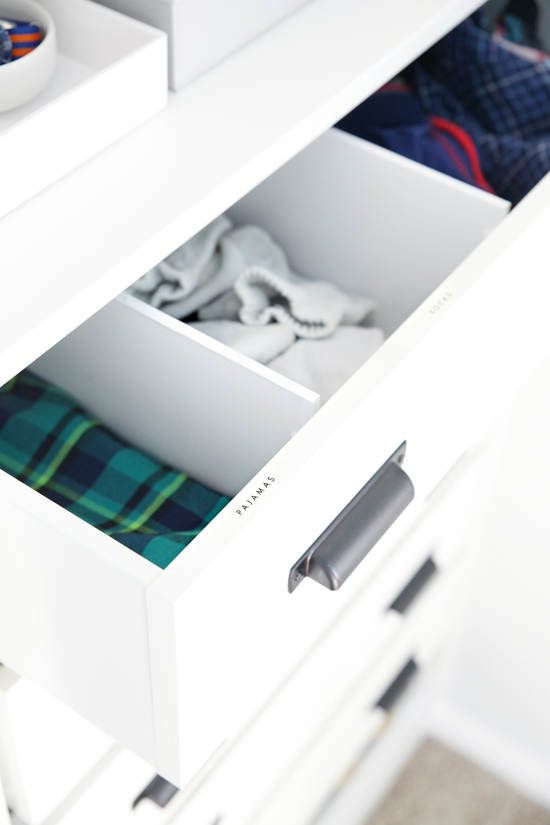
BONUS TIP: Use small bins and baskets inside of your drawers to corral the little things like undergarments and accessories. Sometimes the most obvious ideas are the most helpful.
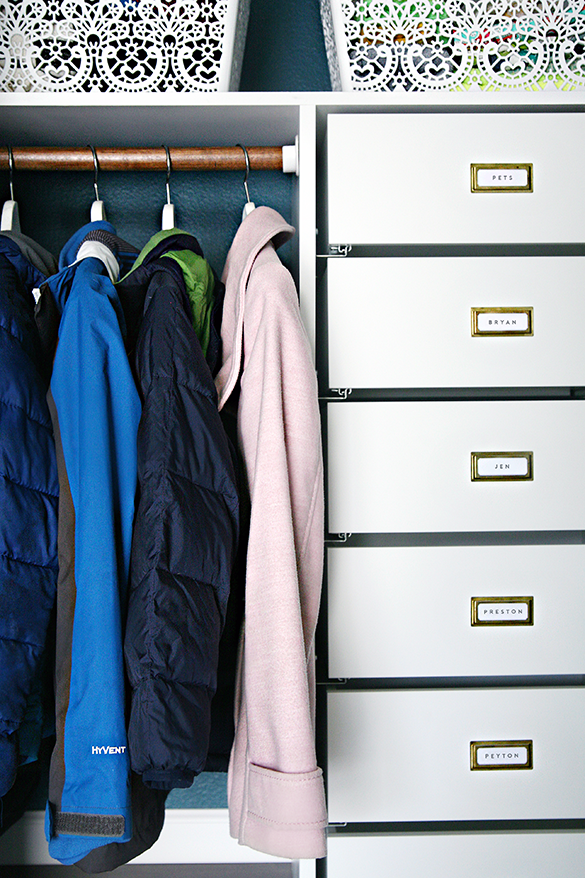
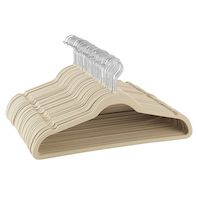
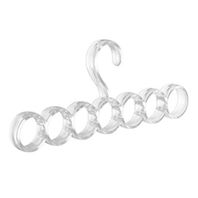
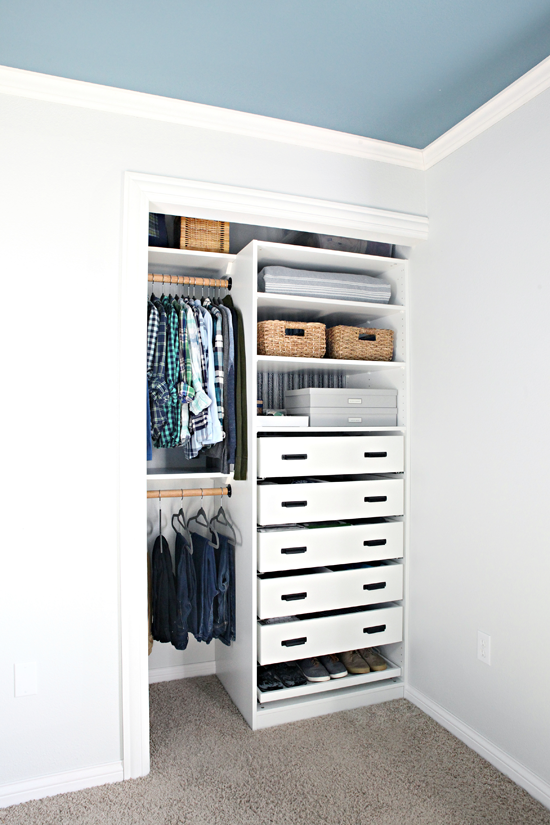
TIP #4: MATCHING HANGERS
Hangers have come a long way over the years. Wooden and velvet options are both readily available and are fairly inexpensive in bulk. Anytime you can, swap out all of your mismatched hangers for ones that match. It will instantly take your closets up a notch and help them feel more uniform and calm.
BONUS TIP: Color blocking the items hanging in your closet will have a similar effect. I like to hang items in order by type first (jackets/cardigans, long sleeve, short sleeve, sleeveless), and then color within each category.
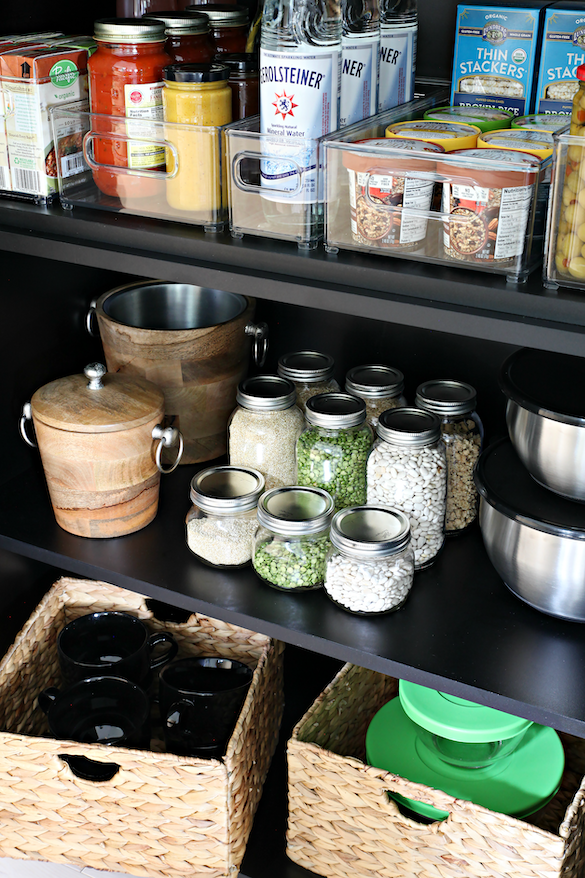
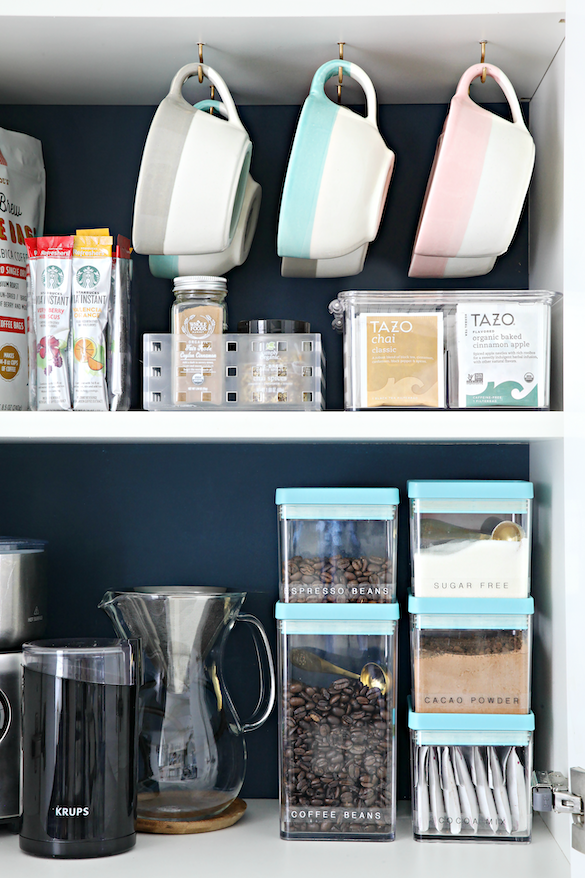
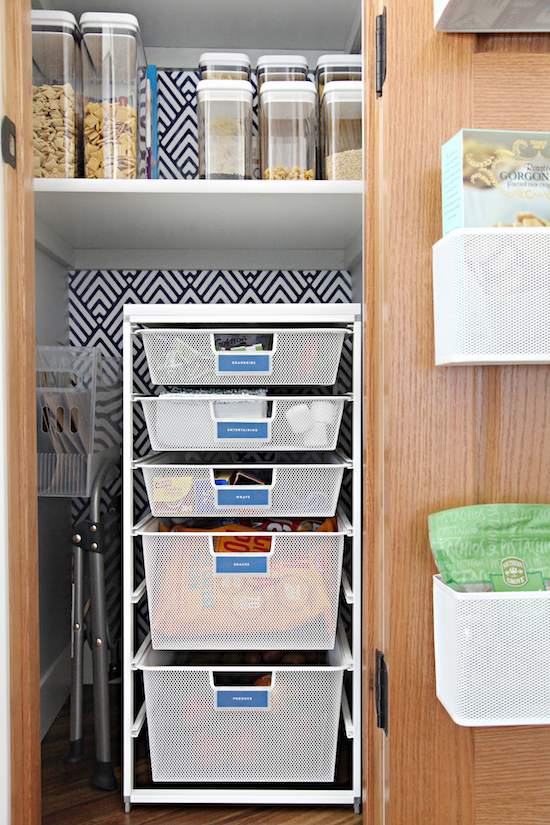
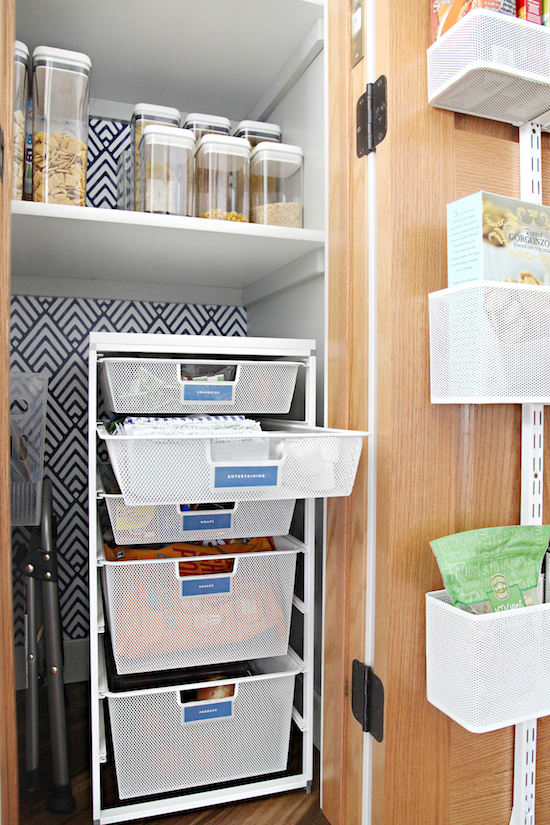
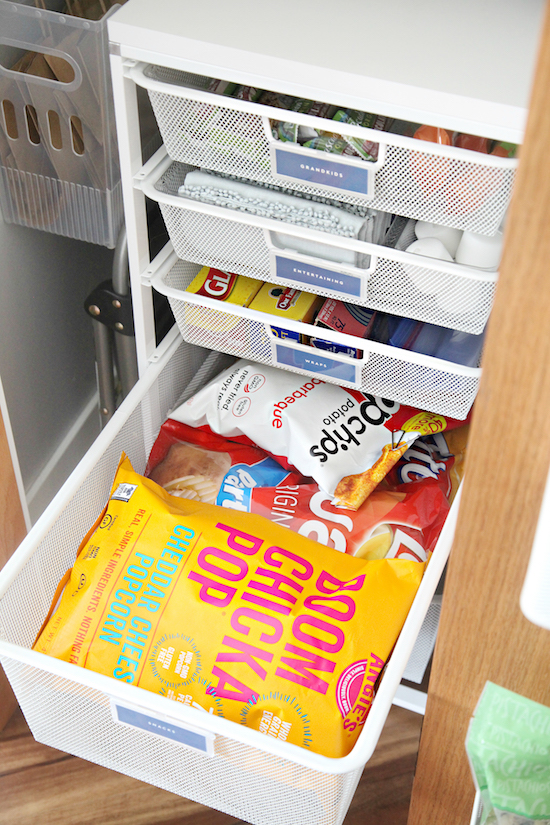
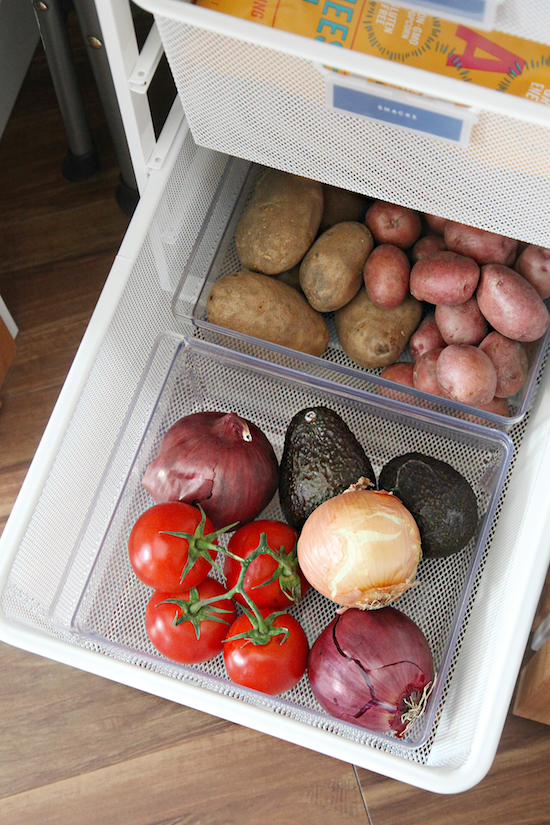
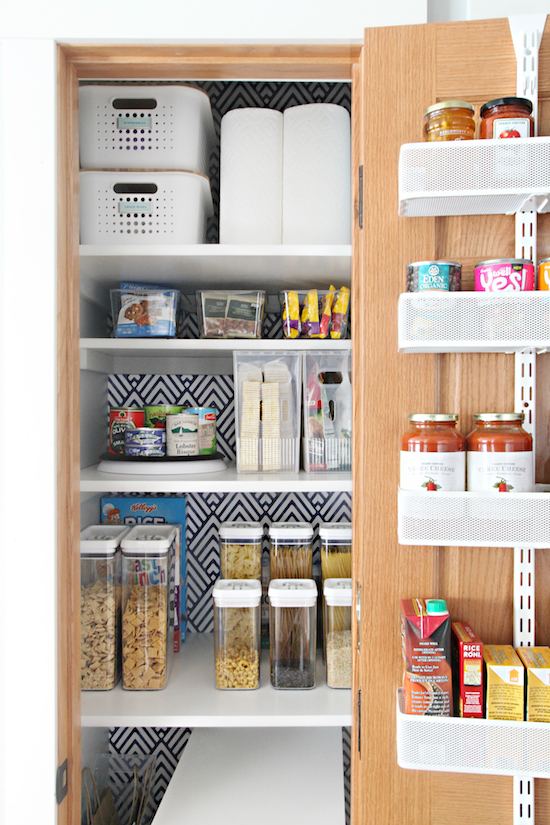
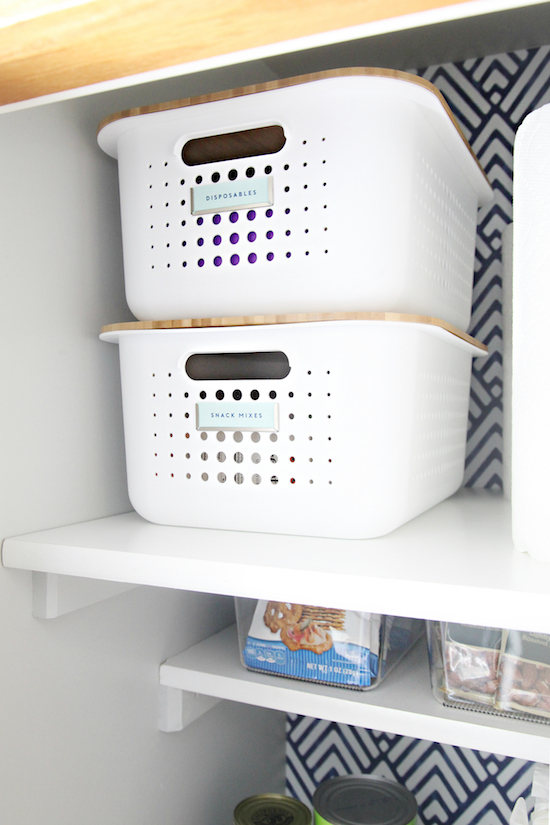
TIP #5: USE DEEP BINS IN DEEP CABINETS
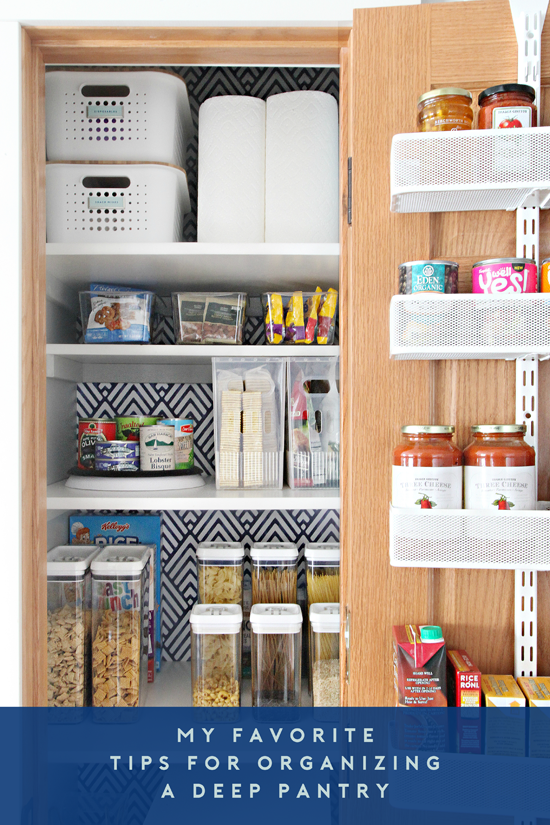
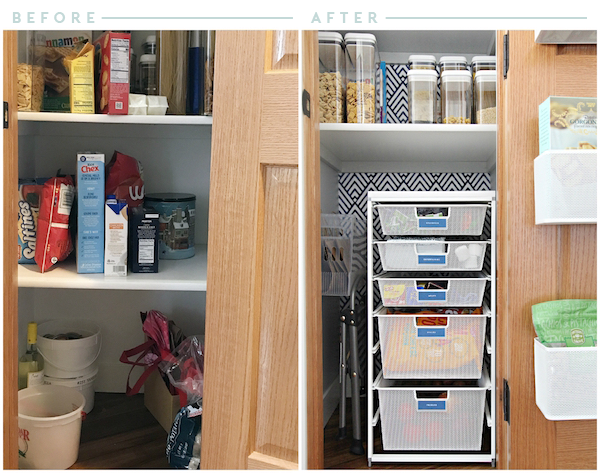
Organizing deep cabinets and pantries is always perplexing. It is truly wonderful to have all of that extra space, but making sure items are not being lost in the back can be a major problem. It is my goal to find the deepest bins possible in this situation because they turn into instant drawers. These bins not only categorize everything, but they also take items from the back to the front in a single motion. Also, whenever possible I like to organize from shortest to tallest. If space permits I will also add lazy susans to the mix.
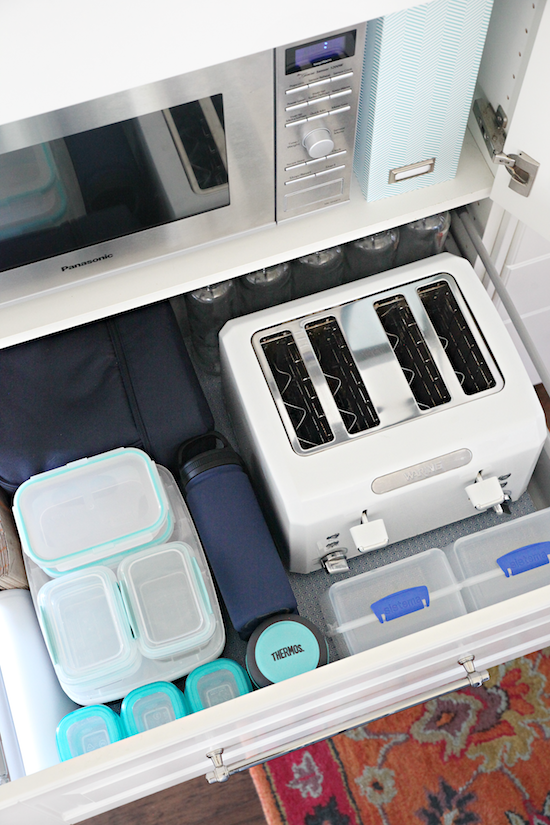
Another tip is to place your small appliances inside of the deep cabinets and relocate your more frequently used items and foods into your standard cabinets and drawers. Small appliances are generally only used on occasion, so it may make more sense to store them in places that aren't as easy to access as the items you use every day.
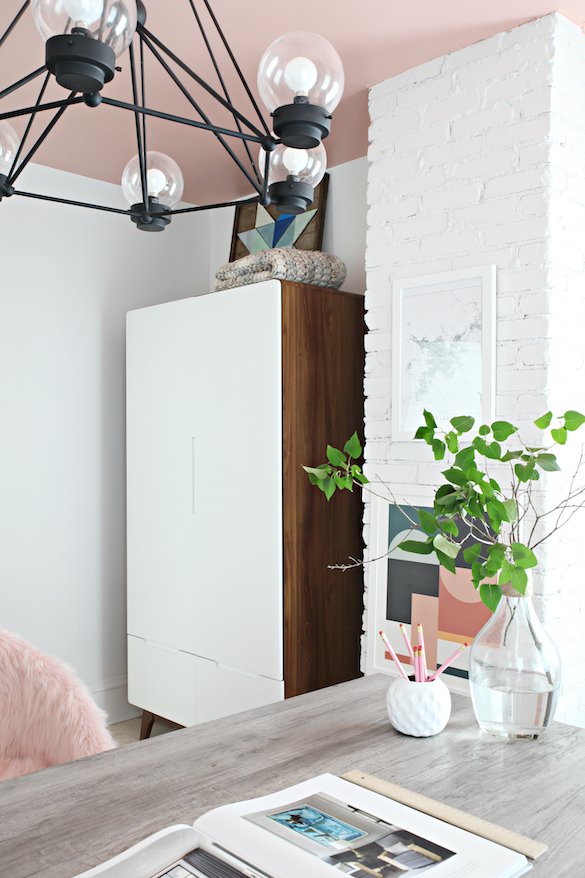
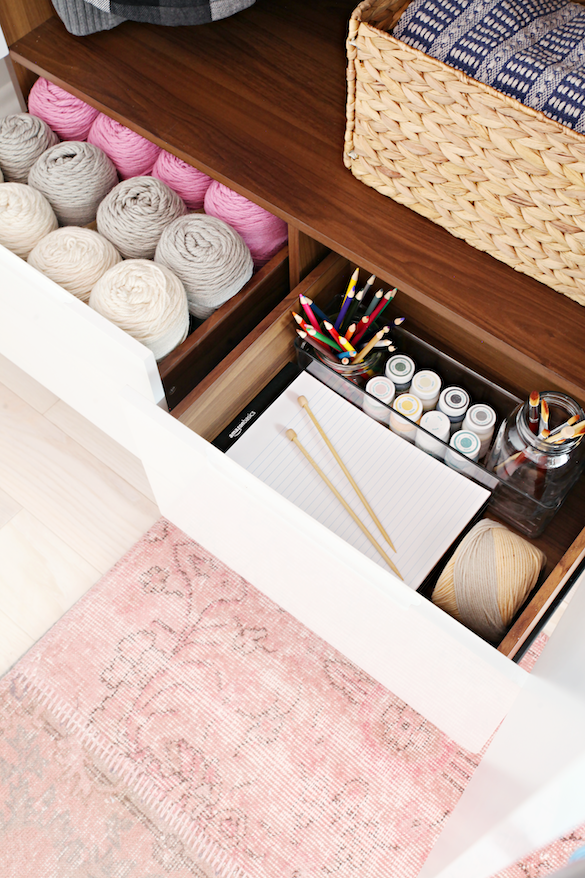
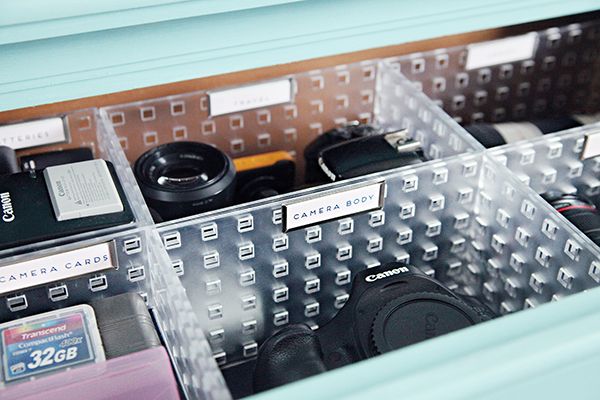
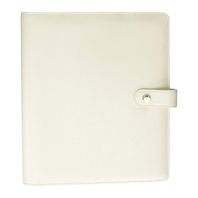
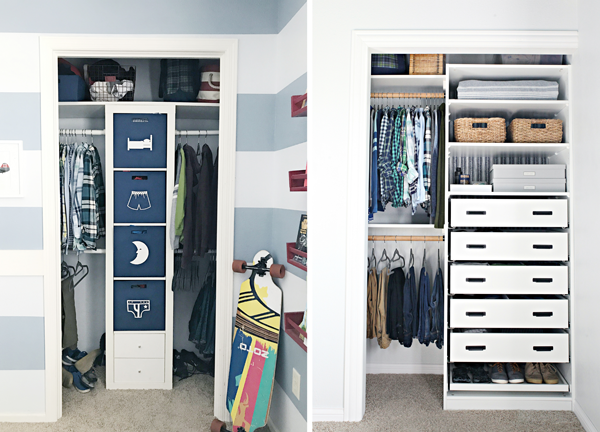
TIP #6: A+ ARMOIRE
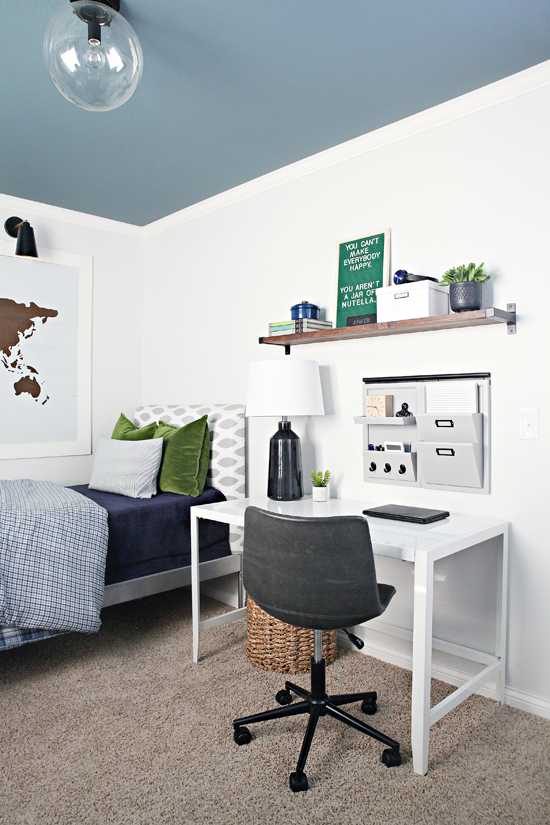
This house didn't have closets in the two main bedrooms (one styled as an office, another as a guest room), so armories were added in their place. We use armoires in our own home where we are lacking in built-in closets also, and I love that they can offer customized and space-saving storage opportunities.
I especially appreciate the option of adding them to a home office, as they are an ideal way to conceal anything from printers, electronics, and craft supplies, to cozy sweaters and work totes. A clear workspace translates to a clear mind.
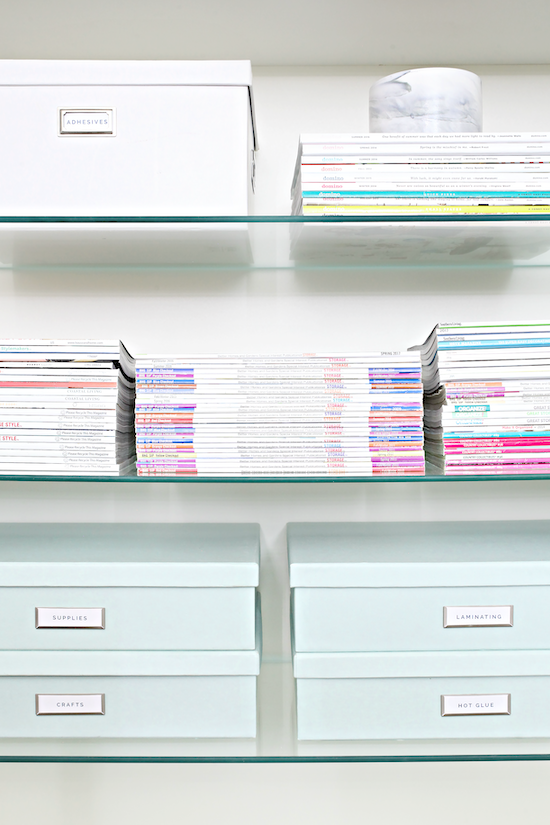
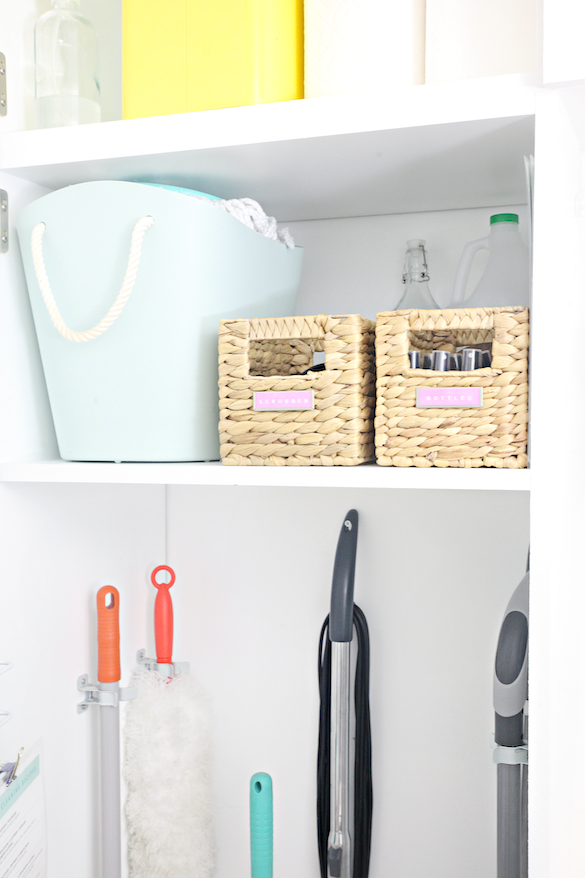
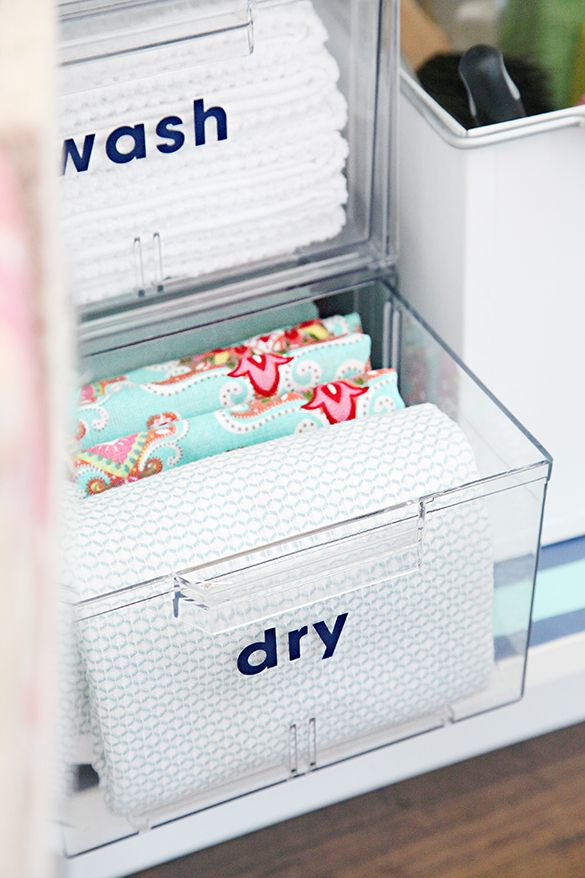
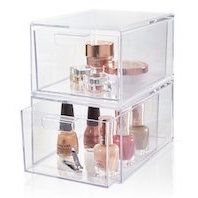
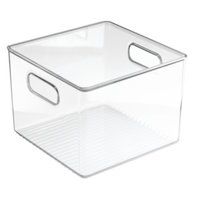
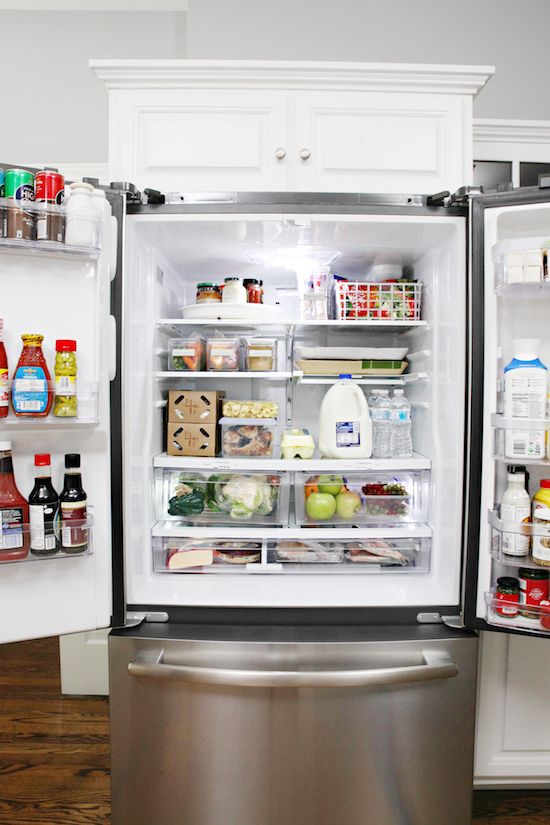
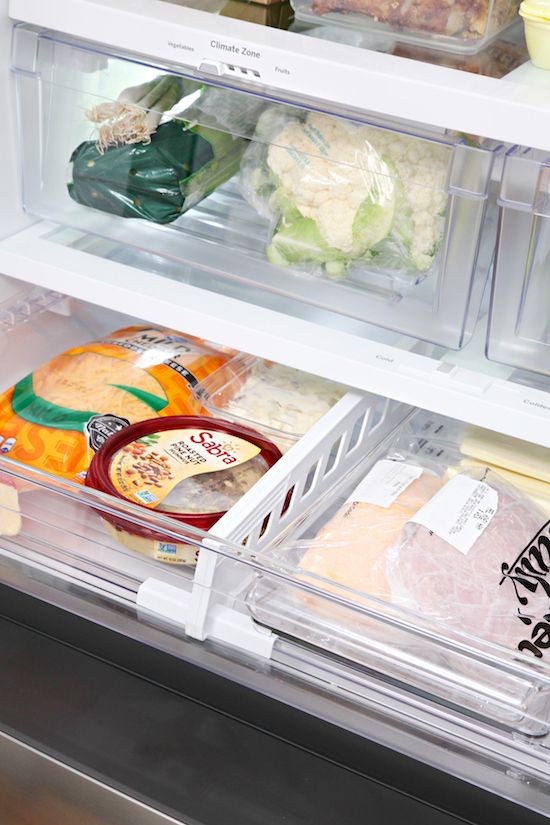
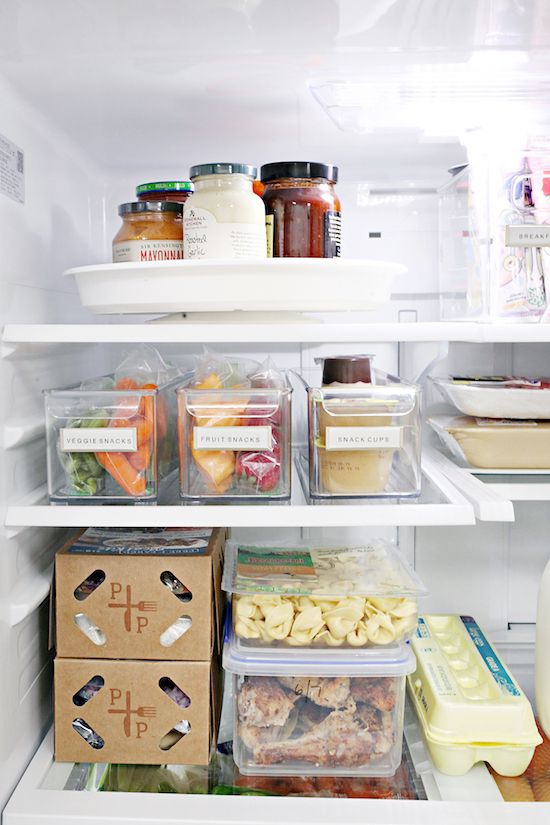
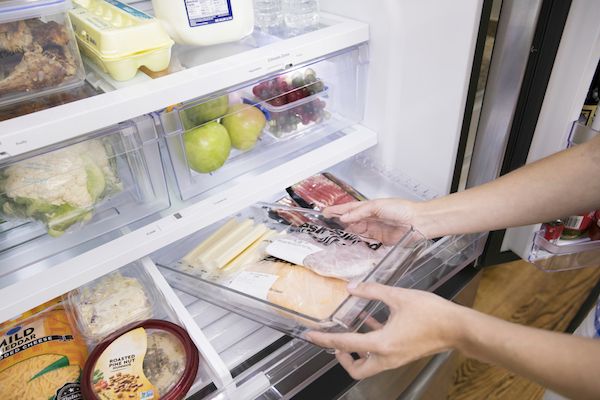
TIP #7: CLEAR SOLUTIONS
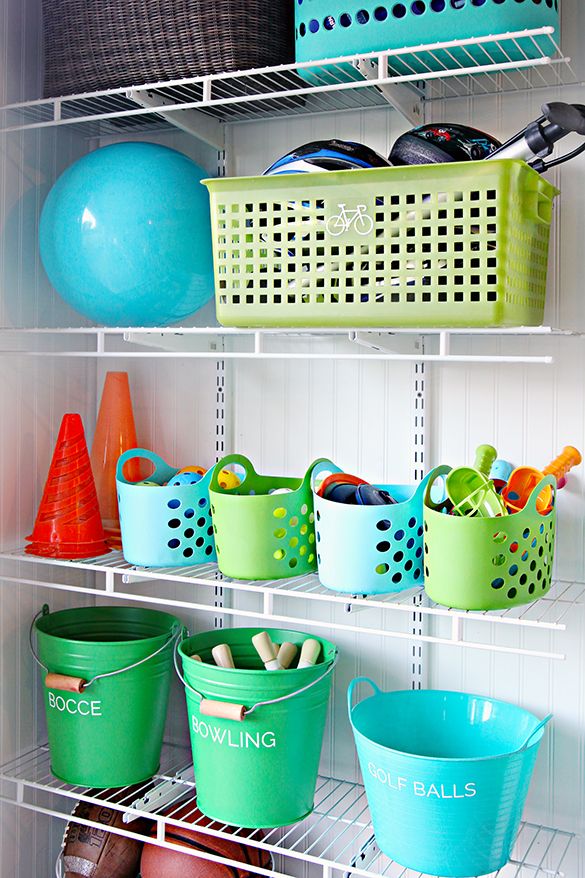
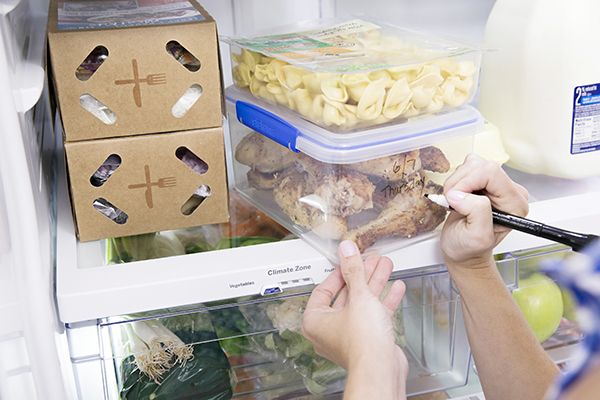
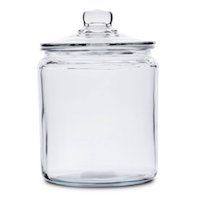
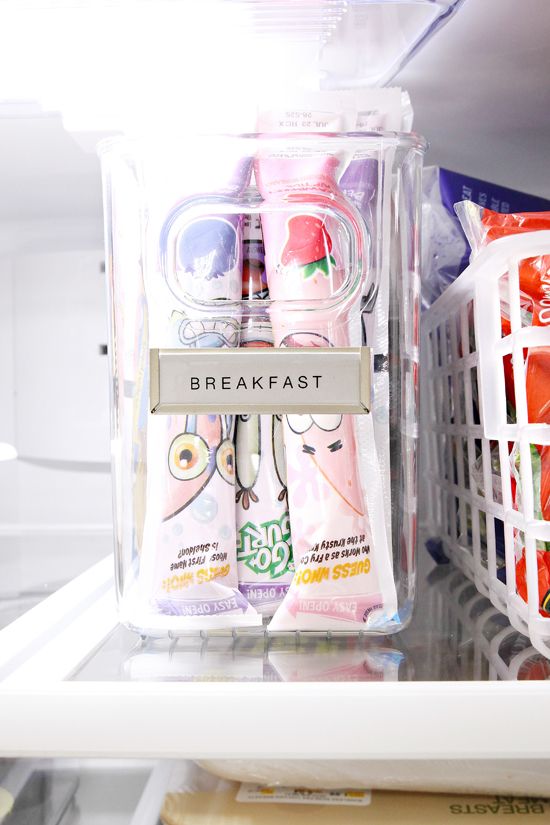
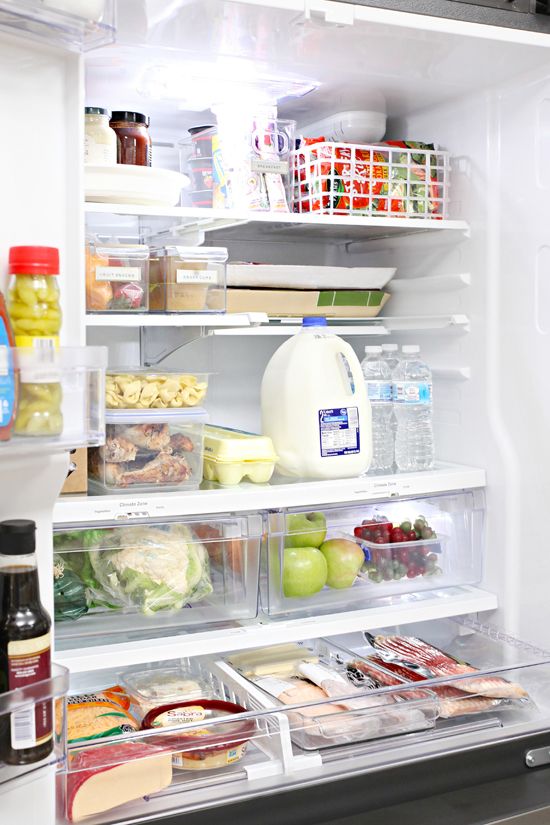
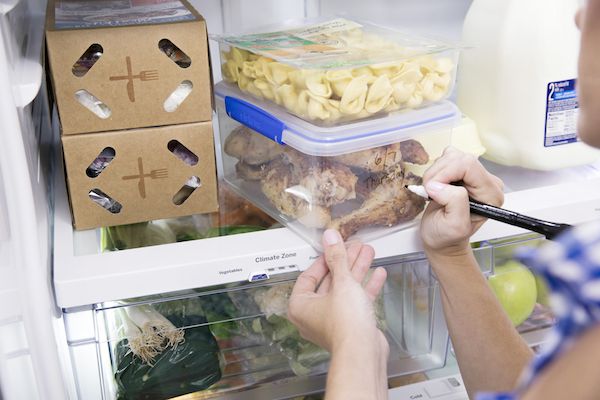
Speaking of clear... I love a good woven basket when I am actually trying to conceal and streamline visual clutter, so I find they are a great option for open shelves and in open areas. But when it comes to organizing behind cabinet and fridge doors, I say the clearer the better. Anytime you can quickly see what you have on hand, you are one step ahead of the game. It also allows you to identify items without the need for fussy labels. Heading to the grocery store? Clear jars and bins will give you a quick look at what you have and what you may need.
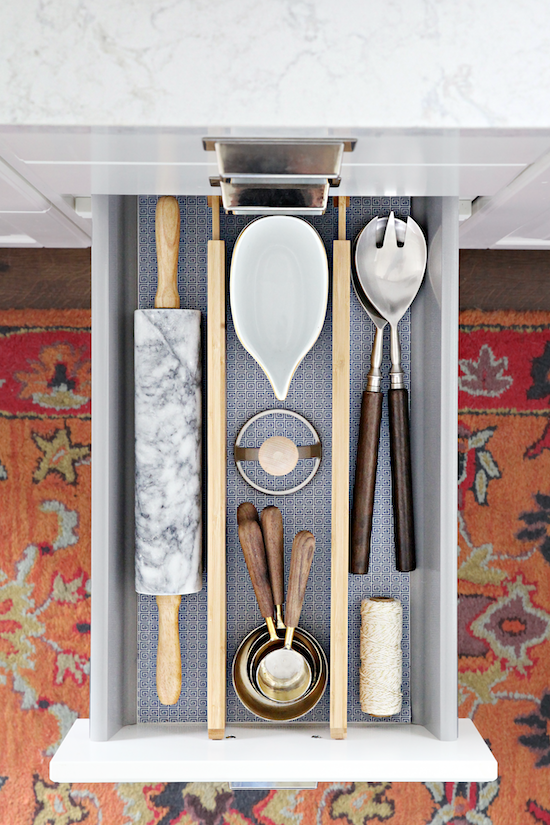
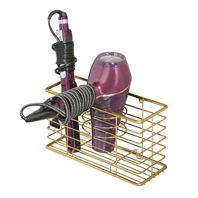
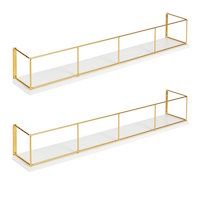
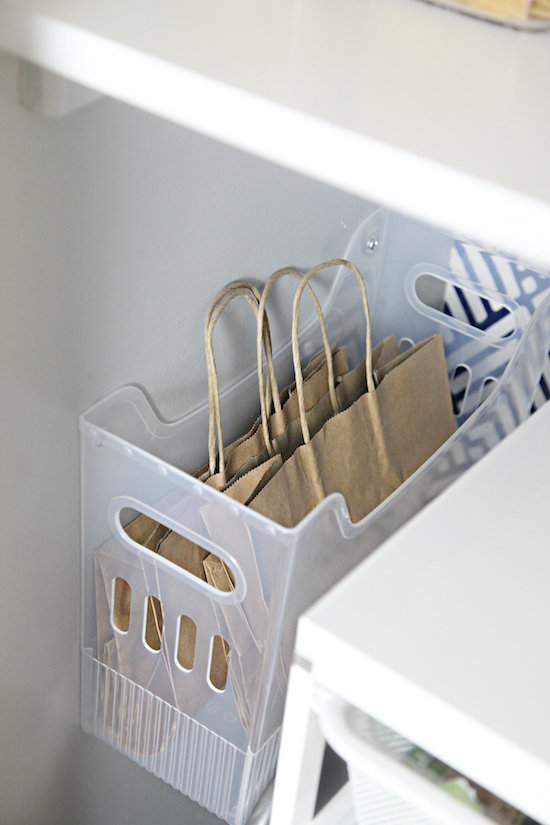
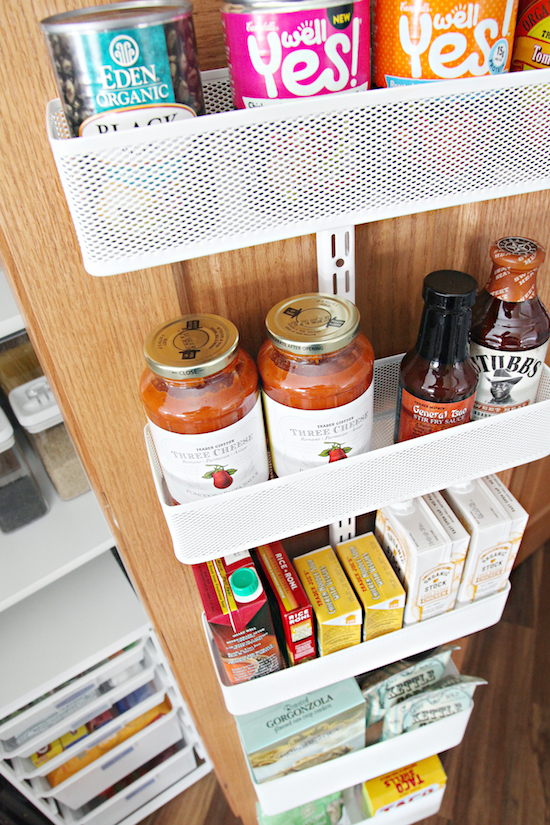
If you are limited on space, or even if you just love to keep things right within reach, find creative ways to use the walls as both decor and storage. Just off of the mudroom, Brian installed the most darling rail system and I was absolutely obsessed over how it was used to display and organize the ordinary in such a beautiful and organic way.
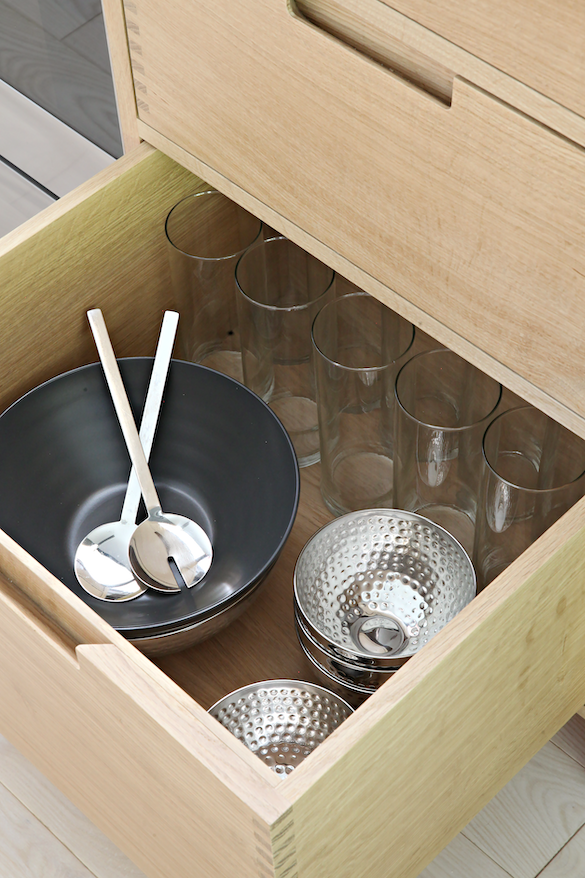
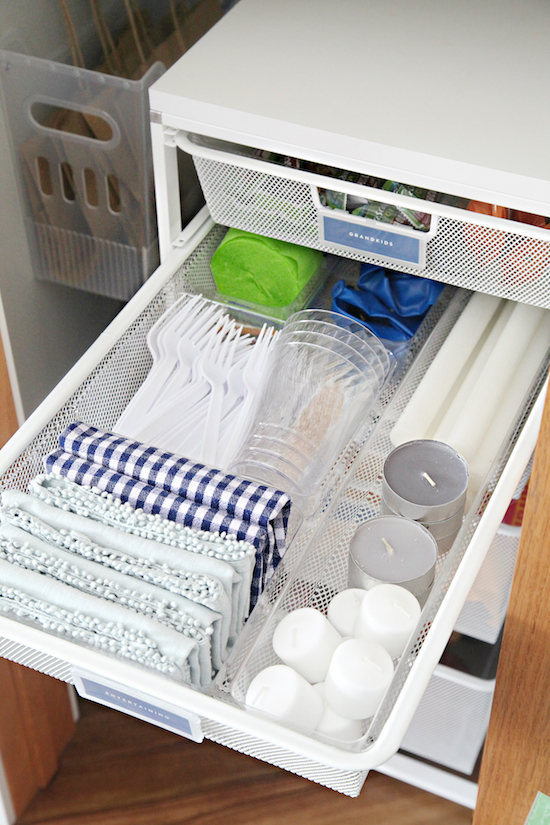
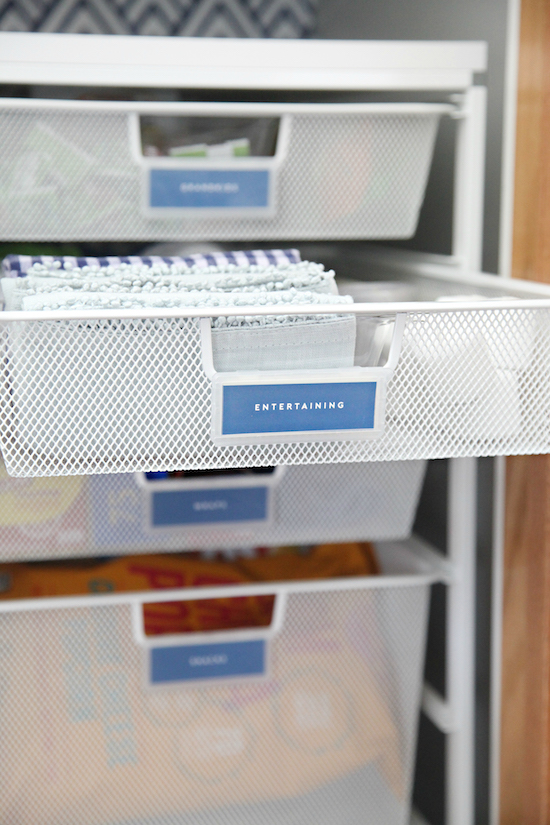
TIP #9: ENTERTAIN THIS IDEA
Dedicate a spare cabinet or drawer to entertaining essentials. Our homes are best when filled with folks we love, so be ready to entertain at a moment's notice by keeping a drawer stocked with your favorite linens, candles, vases, napkin rings, serving dishes, etc...
This eliminates the stresses that come with hosting last-minute dinner dates and happy hours, or at the very least, quickly and easily elevates the setting for a nice mood boost.
TIP #10: DRAWERS ALWAYS GET MY VOTE
I was recently having a discussion with a friend about kitchen planning and storage and whether she should install lower cabinets or drawers. Drawers always get my vote if there is an option between the two. I typically find that lower base cabinets are a recipe for that deep and dark area of doom (standard depth is around 24"). Sure, you can add pull out drawers and mechanisms inside of the cabinets, but you have to open the cabinet doors all of the way, navigate around them, and then pull out the contents. A drawer is a quicker way to access everything while ensuring nothing is getting lost. Drawers are also much easier for kids to use and maintain while maximizing overall space (no need to install any extra components).
__________
Last but not least, let's just celebrate this amazing backyard moment. I am so envious of this year's lucky winner!!
ALL STORAGE SHOWN WAS PROVIDED TO URBAN OASIS BY THE SPONSOR OVERSTOCK.COM. IN THE EVENT OVERSTOCK NO LONGER CARRIES THE SPECIFIC ITEM, I SOURCED A SIMILAR ALTERNATIVE
These wooden peg rails are popping up all over in stores at a variety of prices. Some less expensive than others, but none as inexpensive as the one we were able to make ourselves. Plus, isn't it always the greatest when you can customize it to fit your space in size and color? Yes and yes.
To get started, I ran to Home Depot to pick up a 1" x 2" oak wood board, which I purchased by the linear foot (2 feet @ $0.81/foot). I also found an oak dowel to coordinate, and decided to go with the 3/4" diameter. The best part about this project is that you can determine the length and number of pegs that you would like select your sizes accordingly.
Step one is to measure the desired length and cut the 1" x 2" board to size. I only had a small spot to fill and planned to use the rail to hold hand towels and small cleaning supplies, so I decided on 16" in length.
I then decided that I wanted the rail to have a total of four peg hooks, so we cut a portion of the dowel into four, two-inch pieces.
To inset the pegs we used the 3/4" spade bit and our drill.
To determine the spacing on the rail, I decided on how much space I wanted on each end and marked accordingly. Then, I measured the distance between the two endpoints and divided by three to be sure the spacing was balanced. I also wanted the pegs completely center on the rail.
The final step in assembling was to use wood glue and insert the pegs.
Quick Tip: Pay attention to the wood grain on the end of the peg during this process. I didn't and later noticed that the grain on each peg was going in a slightly different direction. I will call it charming character, but if those things bother you, this is the time to take notice.
You could add weight to the top of the pegs while the glue sets and dries, but we didn't and just let everything cure overnight. The pegs are extremely secure and feel fairly strong for holding anything from cleaning tools to towels to wet clothing or a jacket.
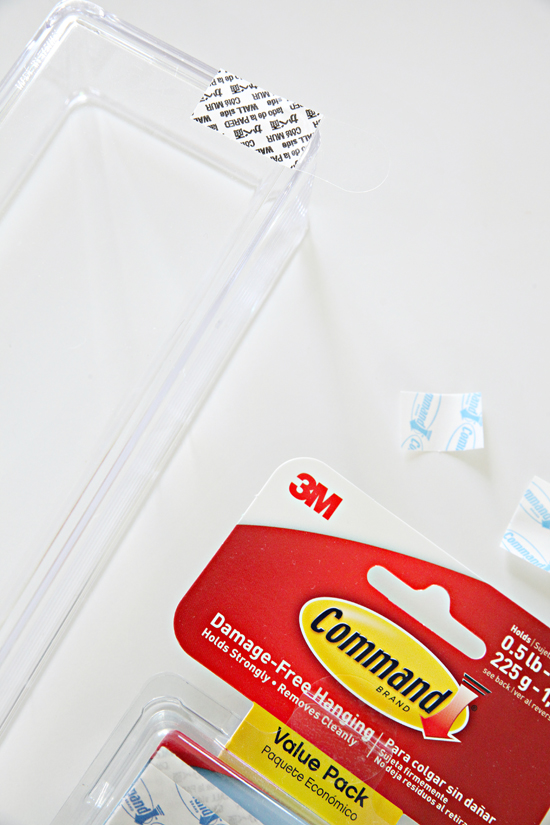
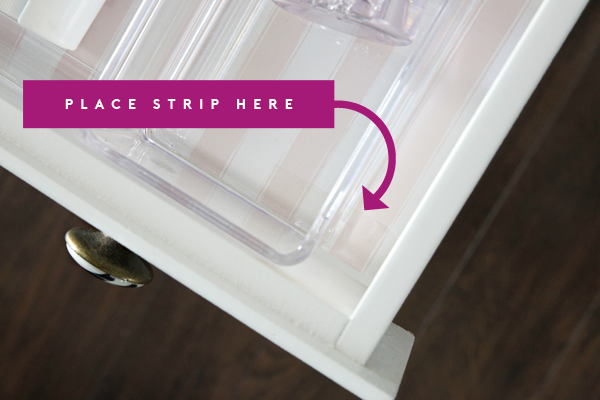
To install the rail of hooks I used two large picture hanging Command Strips that hold up to 16 pounds of weight (which is plenty for how we are using the organizer). You could also drill through the rail and affix it to the wall with screws.
Prior to installing I also quickly stained the rail in a natural finish to match the other wood tones throughout the room. It could also be painted or waxed, whatever you wish!
]]>IHeart Organizinghttp://www.blogger.com/profile/05084013302005288836noreply@blogger.com4tag:blogger.com,1999:blog-8864666002840991252.post-35772901316315180692019-10-14T08:00:00.000-05:002019-11-11T11:21:49.403-06:00Doubling up on Under the Sink Storage Space
I will help my kids with their chores from time to time, but for the most part, they take complete ownership of keeping up on their spaces. It is always my goal to give them systems that are easy for them to maintain on their own, but I definitely didn't do that here. Under this bathroom sink was a mish-mash of random baskets and bins with no designation or reasoning...
After I painted his bathroom walls awhile back, I left the can under his sink for touch-ups. There were also some accessories waiting to be used, toiletries, cleaning supplies, a random towel which he uses as a floor mat, travel items... All thrown in there somewhere. Yikes.
The problem I find with most of these stock bathroom cabinets is the lack of storage that is provided. There is plenty of space inside but not an easy way to make the most of it. And with the sink and plumbing, it can be challenging to find the right stacking drawers or bins to take advantage of all the vertical space.
This cabinet is nearing 20 years old and on our list of items to update in the future, but I still wanted to find a quick, inexpensive fix to get the bathroom storage up to par.
The process I take with every organizing project no matter what the size/scale is as follows:
Empty everything out
Clean the empty space
Sort through all of the belongings
Decide what we need in the space vs. what we currently have
Put everything back
So I emptied everything out and was left with some loud liner...
I replaced it with something more subtle.
My ultimate goal was to add a second layer of surface area halfway up the cabinet. Our local Home Depot sells white laminate boards, so we purchased a single 3/4" thick, 2' x 4' board.
The one board would be enough for us to cut down to use as a shelf and to also add supports for the shelf below (the bathroom cabinet is a 3' wide cabinet).
Because the cabinet has a trim piece that runs down the front center of the door opening, the new shelf couldn't be left as a single piece that runs the entire inside length, it wouldn't be possible to get it into the cabinet. We decided to cut two separate shelves, one for each side, also notching out the plumbing area.
For the notch, we measured the amount of space clearance needed for the plumbing and used the lid of a container to trace out the curved area. The nice thing about the laminate board is that pencil washes off quite easily after you make your cuts.
I originally thought we would just nail ledger boards around beneath the shelves, but because the front and far side have no support on the outside of the cabinet, Bryan decided to just make some legs to hold the shelves instead.
Above you can get an idea of how we dry fit things before finishing off the edges and air nailing everything in place.
There is a small seam where the two boards meet in the middle, but we opted not to caulk it in case we want to easily remove the shelf down the road.
Look at that! Double the storage area!
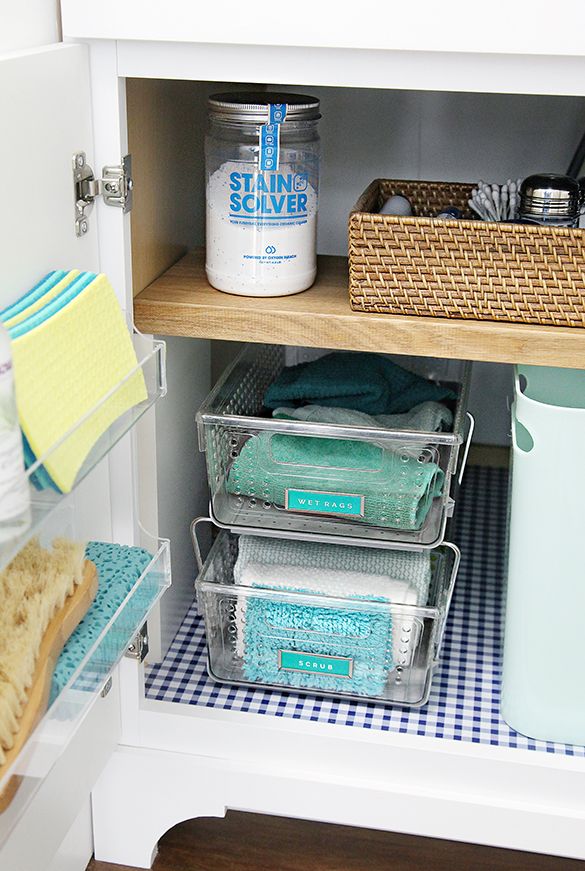
To now give my little guy (and guests) some easy organization, I categorized everything into their own pull out drawers and bins.
I prefer to use drawers instead of stacking lidded bins any time I organize because they ease the taking out/putting things back process. That is especially important when kids are involved.
The top two drawers hold my son's personal care items (toothbrush, toothpaste, floss, hair care, deodorant, etc...)
While the bottom drawer holds smaller sized toiletries for guests or travel, as well as bars of soap and an oil diffuser.
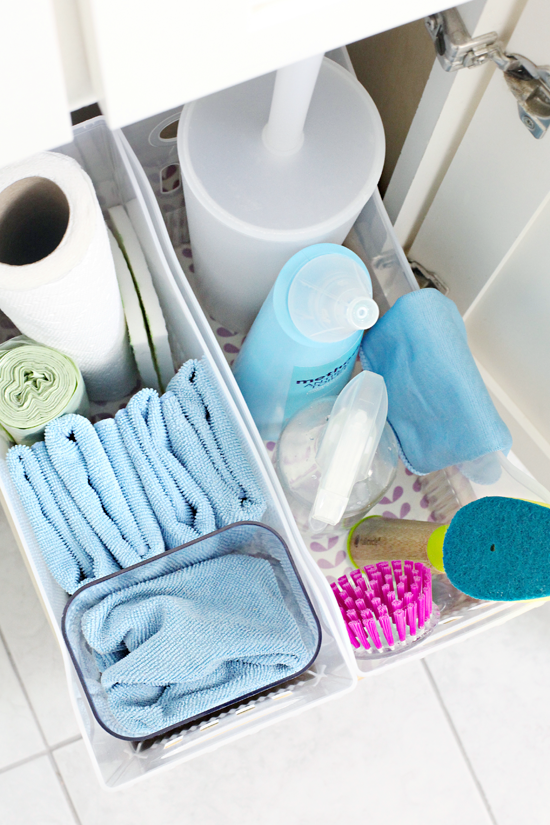
On the other side, I used two taller bins to wrangle the bulkier items. One has additional personal care items and our son's travel toiletry case. The other has all of the cleaning supplies for the bathroom.
I love that these inexpensive rolling bins have flexible dividers inside that allows them to be easily categorized while also keeping the contents separate and contained.
The upper shelf is the perfect spot for extra towels, and now they can be stored up and away from everything else in the cabinet.
I had the same question for my husband that you may have, "Is this setup going to be an issue when we need to change out the faucet?"
Well, a couple of days after we installed the shelves we did just that without any problems. There was enough clearance surrounding the pipes that we didn't have to pull the shelves out, but we could have easily if necessary.
With that, if we could have done one thing differently, we would have considered the location of the water valves a bit more vs. only measuring for the height of the bins when determining the final height for the new shelf.
Because we all heart a transformation before and after, a reminder of the difference this quick makeover gave us:
The storage bins are definitely a key component in categorizing and helping to keep this area of our son's bathroom organized, but by adding a second layer of storage space we were able to really maximize how the cabinet is used. The bonus is that I have sourced a few under-the-sink-shelves in the past at various retailers, but they tend to be flimsy or not expansive enough. For less than what most of those ready-made shelves cost, we were able to come up with something out of a single board that is custom and substantial. Double the storage, double the organizational win!
]]>IHeart Organizinghttp://www.blogger.com/profile/05084013302005288836noreply@blogger.com19tag:blogger.com,1999:blog-8864666002840991252.post-17697942545409322802019-09-18T18:42:00.000-05:002019-10-15T12:27:07.902-05:00Our Laundry Room Todaysweet and simple nightstand drawer before | after post. I am excited that those smaller projects are just as fun for you as they are for me! I have a few more small scale organizing projects up my sleeves that I can't wait to tackle and share.
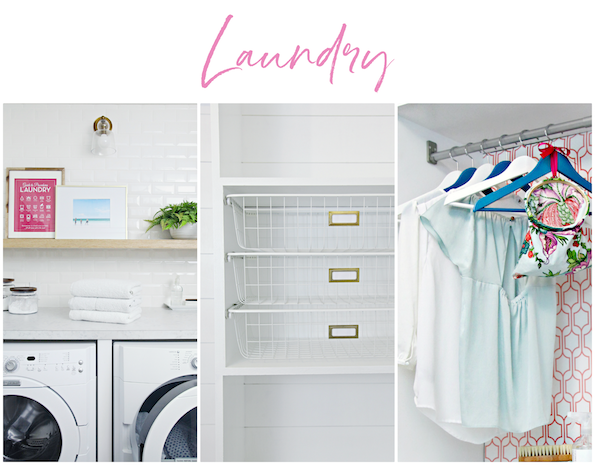
Today, I wanted to give you an update on our laundry room!
In my last laundry room update a few years ago, I excitedly shared a peel-and-stick wallpaper that I had just installed. Shortly after that, a funny thing happened. I was so in love with it when I found it, but then I became stuck. I attempted to source finishing touches for the room and it all seemed to compete with the paper. Just because I loved the colors and design of the wallpaper, doesn't mean it was right.
But I waited on it. I lived with it for awhile and really tried to make it work and be sure I wasn't acting impulsively. I felt that guilt we all do when we invest in something and don't want to be wasteful. I refused to remove the paper until I could find a way to save it to reuse or pass on. Peel-and-stick paper usually comes packaged on a glossy paper backing, and after some digging, I found a wide freezer paper that is plastic coated. Turns out the freezer paper is the perfect way to take down the adhesive paper from the wall, roll it up, and save it to be reused in another way. In fact, our laundry room paper has already been repurposed in my niece's bedroom lining a bookcase and we all couldn't be happier about that.
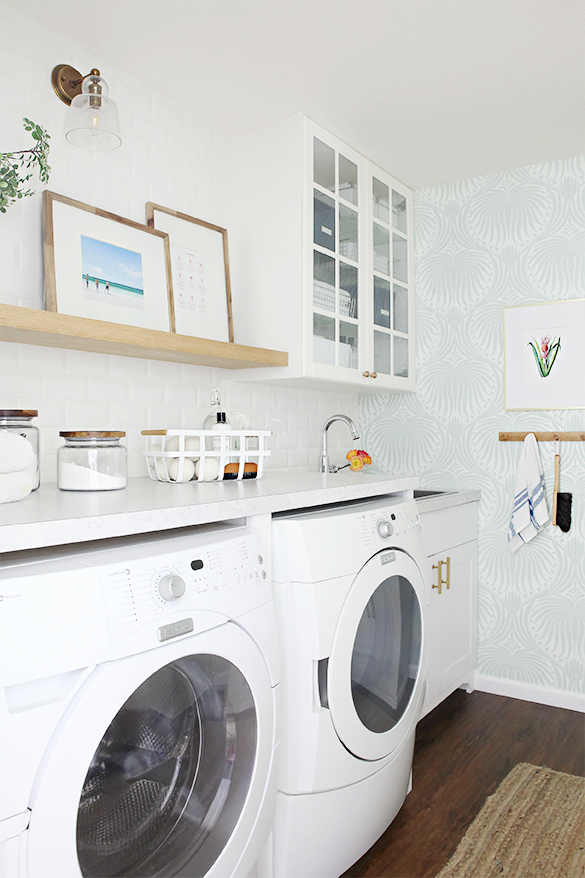
So with that, let's look at where our laundry room is today. It has truly become a room that I look forward to going to and gives me this warm and fuzzy happy feeling.
After some searching, I came across a Farrow and Ball Lotus wallpaper on eBay for a really great price. Two full rolls for $100 less than the typical cost of one single roll. And being that I was only doing one wall, two rolls would be plenty. I pulled the trigger because it just felt so much more in line with my ultimate vision for the room. The last paper was colorful with an extremely busy pattern. I still wanted pattern and color but now knew that a tonal option would probably give me a similar effect without overwhelming me this time. It would still offer visual interest, but wouldn't compete with all of the other elements in the room.
We installed the new wallpaper about five months ago now and I still get butterflies every time I walk into the room. It feels so much more refined and timeless while still offering something interesting and beautiful. (We followed this wallpaper installation tutorial here.)
After that, things very slowly started to fall into place. And although the rest of the changes we made were not big ones, they were still impactful.
For example, I realized that the open glass doors of the paint cabinet were visually competing with the open glass cabinet doors over the sink. Having multiple door styles in the room really created a weird imbalance, especially because the space is small and windowless. I initially tried to add a frosting to the inside of the glass, which helped, but eventually just primed and painted them so that the cabinet could just sort of fade away and hide the clutter behind the doors (I wouldn't normally do something like that on a nice piece of furniture, but this cabinet was DIY'd by us years ago and serves the purpose of storing all of our paint supplies, so it was a nice fast fix in this instance). There is a lot of white in this space which is good being that there are no windows, but I have been keeping my eyes open at thrift stores and on FB Marketplace for an interesting old cabinet to bring in another layer of character.
When we first DIY'd our built-in wall, we partnered with Home Depot to come up with some custom storage for our laundry room. We have never stopped loving the storage that the entire wall offers; we use it for cleaning supplies, beach gear, seasonal items, sewing supplies, laundry hanging, and now even for feeding our pups. We modified it a while back to add some decorative shiplap backing and laundry baskets, which gave it a fresher look. Five plus years in it had become clear that we could have initially used a better method for making the cabinet doors. The doors we originally constructed were quite heavy, built from MDF, hung with external hinges, and weren't perfectly square. So this summer we built all new doors!
The new doors are infinitely better. They cleaned up the look of our built-in and the panels are now truly inset (I plan to share how we built them soon). We also installed concealed hinges which makes such a wonderful difference. At that same time, the entire unit received a fresh coat of paint, trim, caulk, a new acrylic hanging rod, and a built-in feeding station. Yes, yes, and yes!
The counter is a piece of butcher block that is extremely solid and ties to the floating shelf above the washer and dryer.
For the pup feeding area, we researched the best eating height for our dogs and installed a pull-out shelf that we cut to insert their bowl inside (we used a basic white laminate shelf paired with these drawer slides). The bowl is just floating in there so it can easily be removed and washed at the nearby sink after feedings.
Originally I wanted to store their food in the drawer below, but pet food really should be stored in its original packaging, or an airtight container that can be easily cleaned between refilling. So now the drawer just holds all of their supplies, which also works out really great! Their food is sealed in a rolling bin in the tall cleaning cabinet.
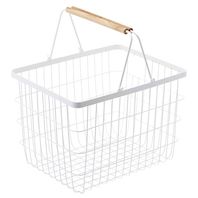
The wire baskets continue to function really well for our family. We use them when the clothes come out of the dryer to bring the folded/hanging clothes back to our rooms to be put away. The larger woven basket is for linens for delicate wash items.
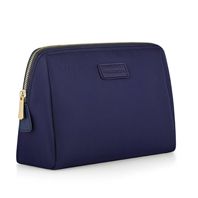
As we continue around the room, I added a pair of really pretty brass hooks to hold towels and beach/summer gear. I use hand towels all over this room for cleaning the feeding area, drying the bowls after washings, wiping down the washer door, and of course for general hand drying. Multiple hooks are a must!
The art above the hooks is a print from Juniper print shop; the colors are so great and it reminds me of many scenic drives that we have taken over the years.
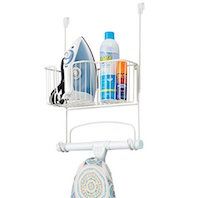
The room is all white so that the wallpaper can be the star. But the back of the door was begging for something, so it received a coat of Benjamin Moore's Newburg Green. It is a stunner of a color and I want to use it again and again. I also added an over-the-door organizer for the iron and ironing board. We still need to change all of the hinges to black throughout the entire lower level.
Our washer and dryer are Maytag and they have been workhorses for us for over ten years now. As a family of five, we do laundry every single day so we couldn't be happier about the amount of use we have gotten out them so far. We lowered our hookups and built them in a few years ago and it was one of the best things we could have done. The folding counter has been such a game-changer to my laundry routine; I absolutely love all of the space there is to spread out and fold piles of towels or to layout my sweaters to air dry. Being that the units are now built-in, I am a little nervous for the day the washer/dryer goes out and we have to upgrade. I will be sure to share what that process looks like should that happen down the road (no jinxing it!).
The counter we selected is holding up great, no bowing or wear and tear from the daily use. Of course, I would have loved to have installed solid surface counters, but these were so much more budget-friendly and serve us perfectly well.
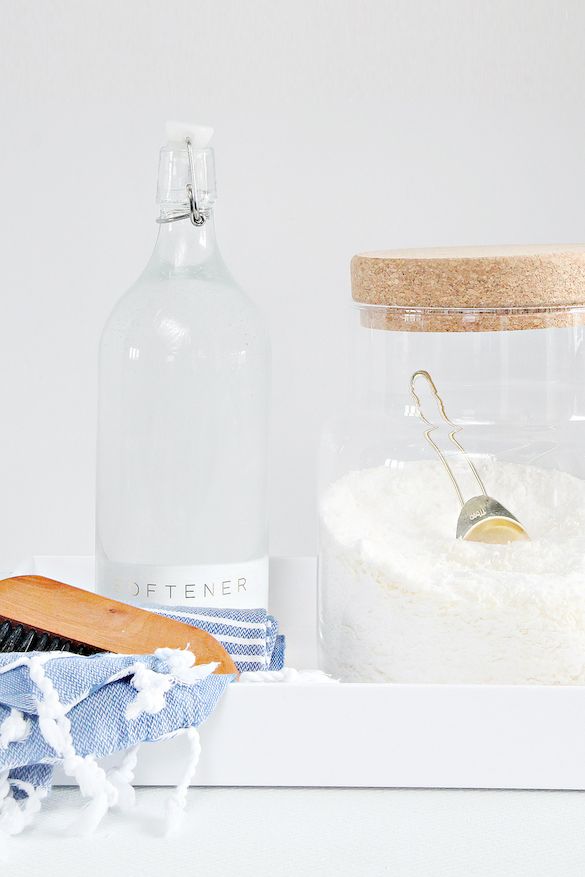
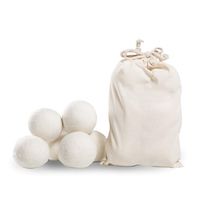
While the smaller essentials such as dryer balls, delicate wash, stain remover, and a lint brush, are all stored in a handy wire basket.
I continue to be a superfan of the deep stainless sink; it has been used for dish washings, mop bucket fillings, stain soakings, and paint supply cleanings. It cleans up so nicely and is everything I could ask for.
As far as the faucet goes, although there is a pull-down nozzle, there is very little spraying power so that will probably get swapped out at some point. The faucet itself is of high quality and a really beautiful option.
Sidenote: Aren't those flowers absolutely beautiful? They are the prettiest colors and I clipped them straight from our yard. #staysummerforever
The cabinet above the sink holds all of our frequently used home maintenance items; lightbulbs, extra paper products, sewing boxes, puppy linens, stain remover, etc...
Last but not least, how sweet is that little wooden rail of hooks? That is another DIY and I will share that tutorial soon as well. It was incredibly easy and inexpensive and it turned out to be one of my favorite accessories in the entire space.
Bit by bit, one project at a time, our laundry room has evolved and changed so much over the years. This room is used multiple times per day so it is nice to have it fully functioning and feeling more complete. Chores are definitely more enjoyable when you are feeling good in your surroundings!
Laundry Room Wall/Built-In Color: Benjamin Moore Simply White
Laundry Room Door: Benjamin Moore Newburg Green
]]>IHeart Organizinghttp://www.blogger.com/profile/05084013302005288836noreply@blogger.com40tag:blogger.com,1999:blog-8864666002840991252.post-84591021230805768332019-08-07T13:14:00.004-05:002019-09-17T12:44:03.018-05:00Before & After: An Organized Nightstand Drawer Most of the drawers around our home are set up in a way that they self maintain, but there are a couple that demand attention more often; our junk drawer in our kitchen, and apparently, my nightstand drawer both top that list.
I clean out the junk drawer every month or so, because even with dividers, random items that don't have an instant home, end up in that very popular drawer. Being in such a high traffic area that we all utilize, I am pretty good about tackling it frequently to keep some semblance of order.
But my nightstand... that's another story. I generally only see it late at night or during a quick surface cleaning session. It was time to finally do something about it.
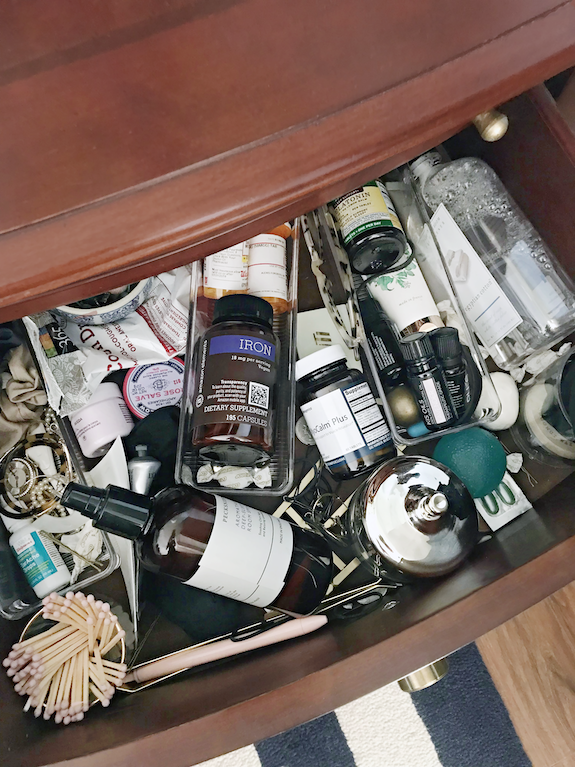
Sometimes these projects are brought on last minute when I just can't take it anymore. I generally just tackle them and never think to blog about the before and after. It's just a drawer after all. But dang. Anytime I see an organized drawer, or a before and after, I am 10000% more motivated to tackle one myself. So this time I grabbed my iPhone and took a quick picture of the before and decided that I would share the process. I am encouraging all of you to do the same! It doesn't have to be a nightstand drawer, it can be ANY drawer! Just one. Let's do it!
Wow, really Jen?
Let's see, there were candles, linen sprays, essential oils, cold and sinus medications, drawer hardware, jewelry, prescriptions and supplements, hair accessories, lotions, cough drops... the kitchen sink is about the only thing missing from this drawer. Remember, this is a no judging zone.
Clearly, I would use something and then just toss it inside.
First step was to sort it all out. I found two random bins/baskets and used one for "Keep" and another for "Relocate". The keep items would stay in the drawer and the rest would go back where it truly belonged.
Ha! Look at the difference!
I also gave my nightstand a good cleaning and thought to myself that the old, velvet-esque drawer liner was dark and dirty.
I had a couple of foam core boards so I cut them to the shape of the drawer and wrapped them in a scrap of light blue linen fabric. I did this for both of my drawers.
This was an added step, but I felt like it would just freshen up these old and dated nightstands without much effort for now. And I really believe these small changes make a big difference in the end result.
I dug through my stash of organizers and pulled some dividers and a random bowl that I thought would better fit the drawer and help me maintain things better going forward.
The bottom drawer just holds a massage pillow, oil diffuser, and my daily journal.
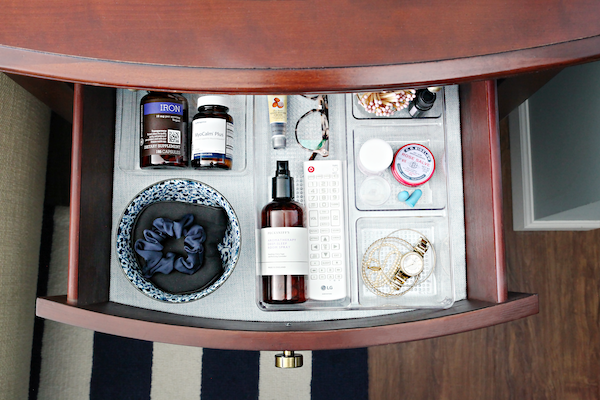
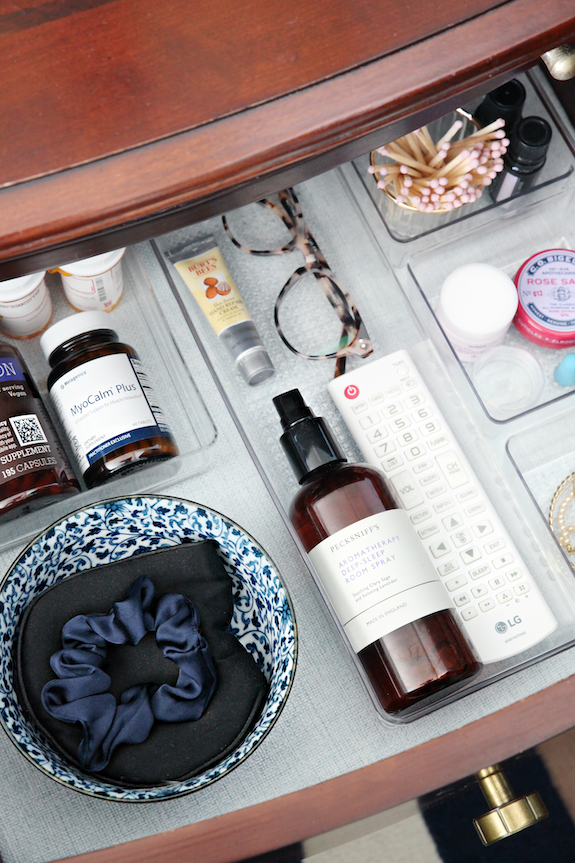
And here is the after of the top drawer:
The back organizer corrals all of my morning/nightly meds and supplements. The bowl holds my sleeping mask and silk hair scrunchie.
The larger organizer holds the remote, a single sleep spray, my glasses, and hand lotion.
Also matches, essential oils, lip treatment, earplugs, my grinding guard, and daily jewelry items.
It's like an entirely different drawer and only took me about 20 minutes to take a couple of really easy, anyone-can-do steps.
Now that I shared that, I dare you to take on a drawer too! Start small and simple! That's what it is all about. And this one little change really does make me happier at the end of the day. I have also become much more mindful of what I am tossing back into the drawer.
Yay or nay to more of these types of posts? I think we should share these types of transformations over on the #ihearttransformations hashtag on Instagram. It will be fun to take this small challenge to that community and see some before and afters from all of you! Ready. Set. Go!
My niece has had a passion for baking as long as I can remember. And that passion was slowly taking over their home. They have a modest size kitchen sans pantry and it could no longer accommodate all of her baking trays, decorating tools, toppings, mixes, powders, utensils, trays, etc...
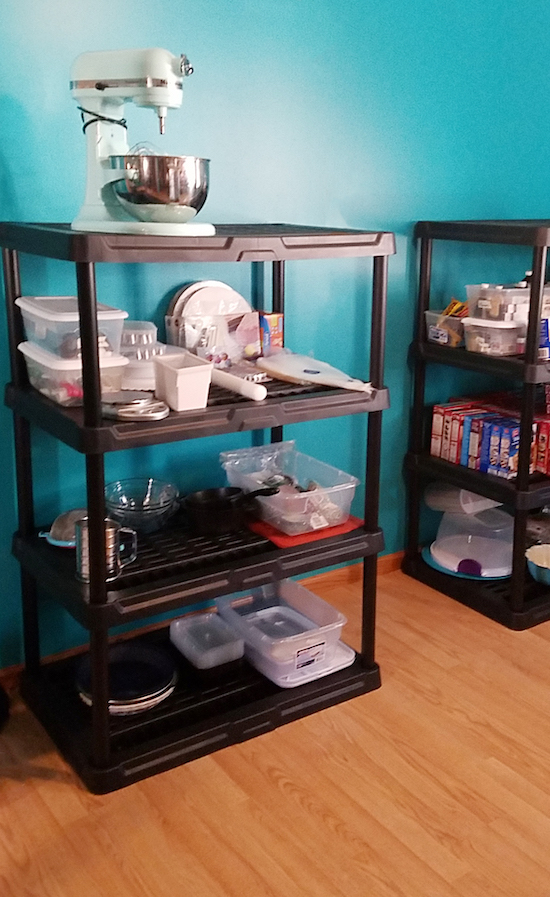
So, they turned a spare room into a bit of a makeshift storage pantry that she could call all hers. It was a blank slate room with two stacking shelves, a fridge, and a large bookcase to corral it all.
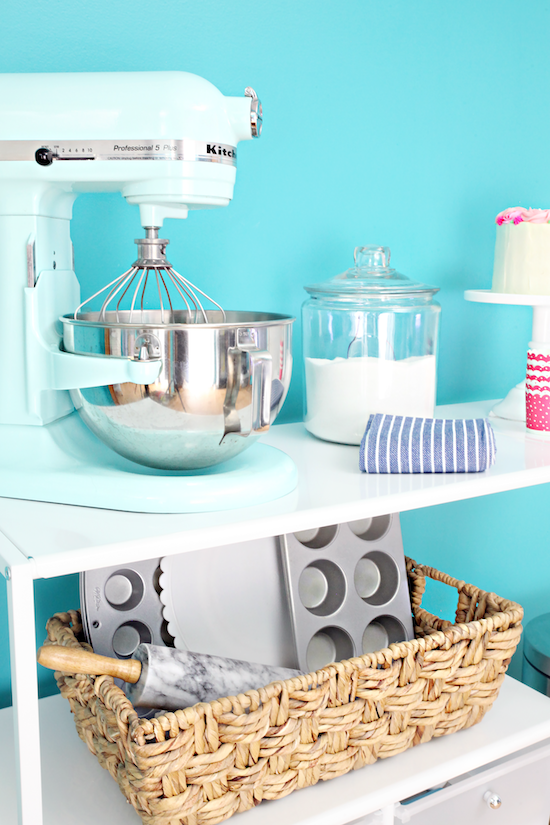
Because she bakes almost daily, she takes multiple trips into the room to haul everything back and forth, including her heavy stand mixer.
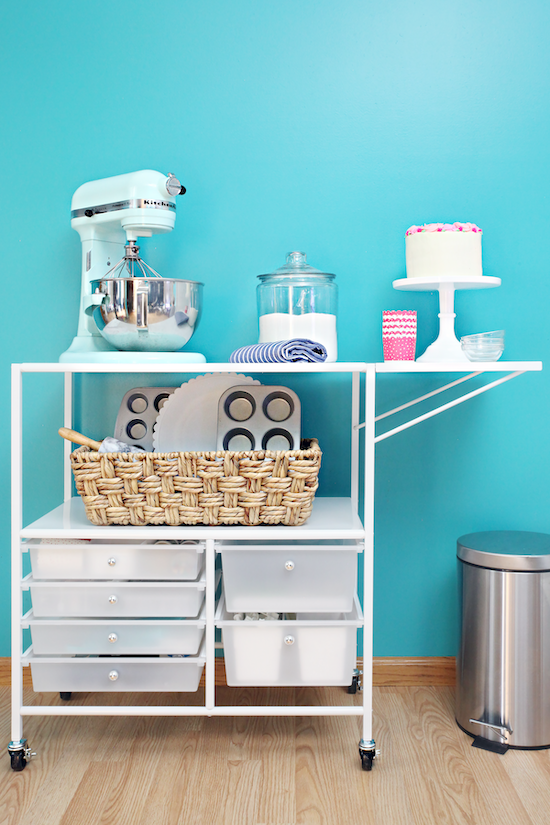
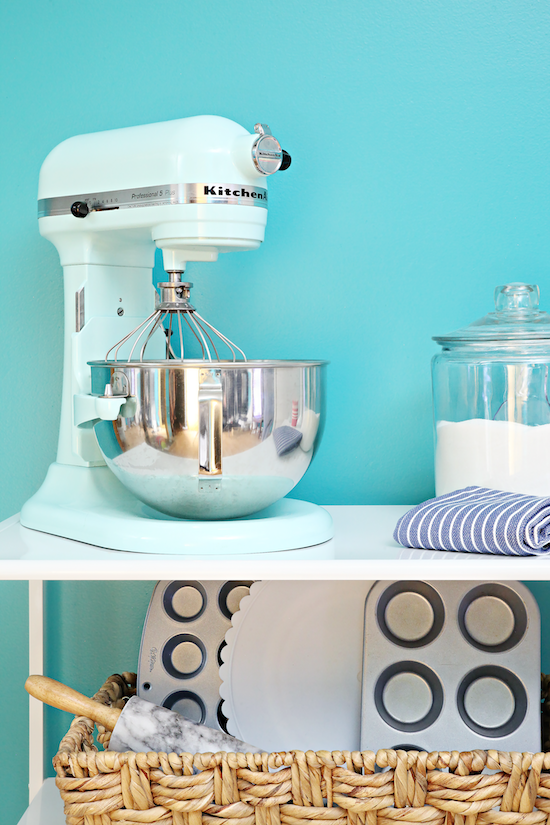
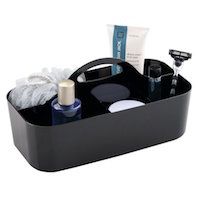
A few weeks ago I received an email from Michaels Stores and they asked if I would be interested in sharing my experience organizing one of their rolling craft carts on my social media. I knew instantly who would benefit from one of these versatile storage stations (my niece), and quickly asked her mom to text me a photo of their current setup (above).
Let's chat about a few ways that rolling cart can be functional organization around the home and why they are truly and organizers dream:
Craft Supplies (for kids or adults)
For Guests (towels/linens, water, snacks, toiletries, flowers, candle/matches, etc...)
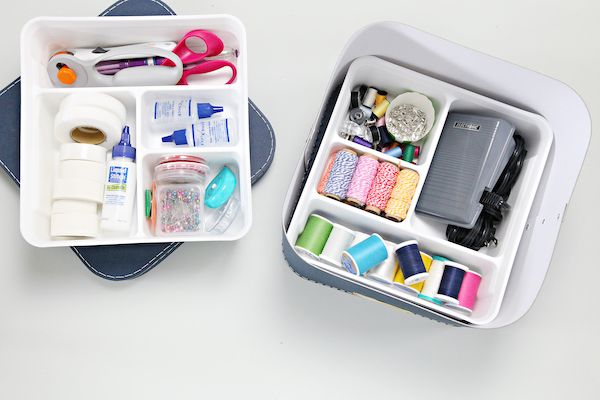
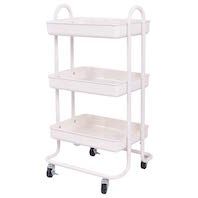
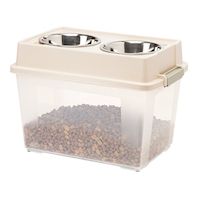
BAKING! This was the ideal solution for my sweet-as-pie niece. A rolling cart would help her to transport all of her belongings out to the kitchen each day. And I know that this situation is probably unique but if you have a pantry, or even just some extra room in your kitchen, this cart could be your best baking buddy. There were a few options for me to select from, but I decided the Essex Rolling Cart was the best due to the drawers and expandable work surface. After it was easily assembled, I was honestly shocked by just how much I was able to store in this small but mighty cart (definitely emptied an entire shelving unit in her room).
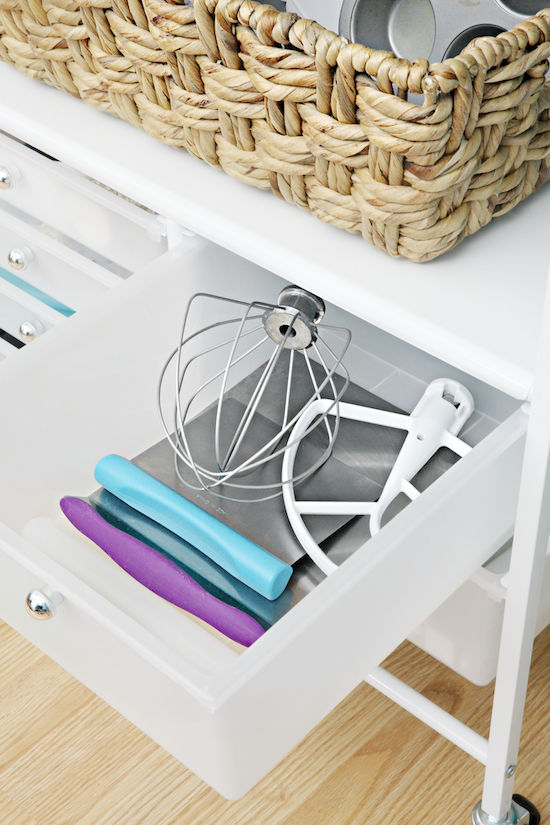
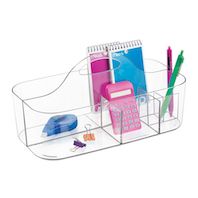
You might think I am exaggerating, so I will show you how I organized each drawer. But first, I added a wide basket to the open shelf so that she could easily load it up with any bulkier items like her cake decorating turntable, drying racks, baking sheets/muffin tins, etc... based on what she is working on for the day. The basket prevents the items from sliding off of the edges while she is carting things to the nearby kitchen.
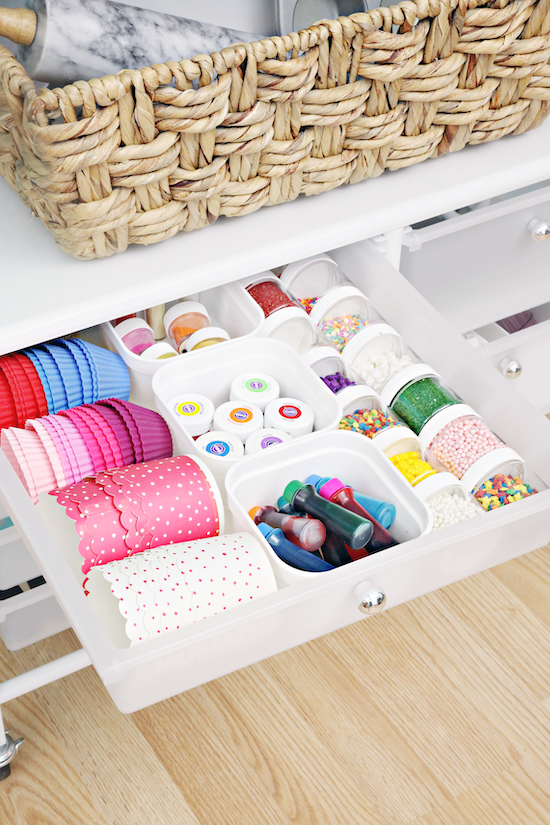
OK, now, onto the drawers, which are always stocked, loaded, and ready when she is.
Drawer number one is full of colorful goodies: cupcake liners, food/icing coloring, food-safe dusting powders, and sprinkles!
The next drawer is so intimidating to me because I have no idea what to do with all of those icing tips, but I have watched my niece decorate her creations and she definitely puts these to use and appreciates all of the options she has collected over the years. All of the tips and couplers are organized in divided craft boxes or drawer organizers so she can quickly find exactly what she is looking for.
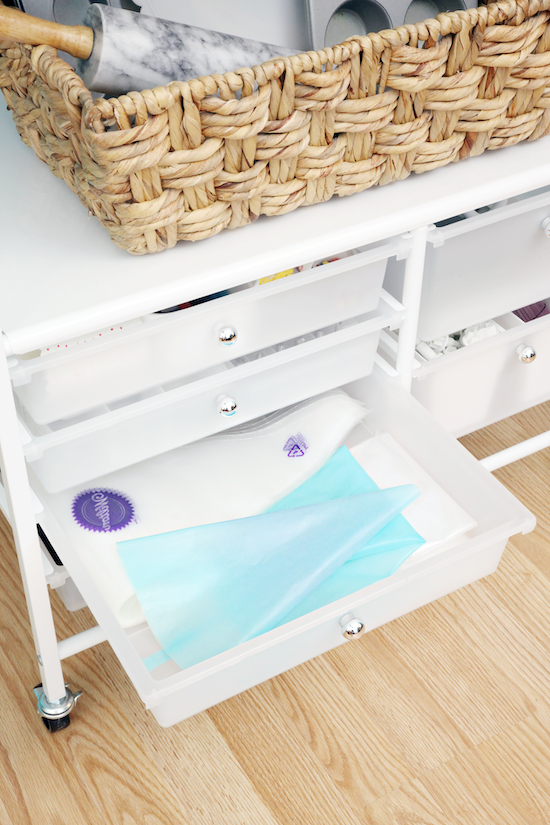
Drawer number three is an extension of drawer number two and holds all of the piping bags of various sizes.
The bottom drawer is sized just right for spatulas and measuring utensils.
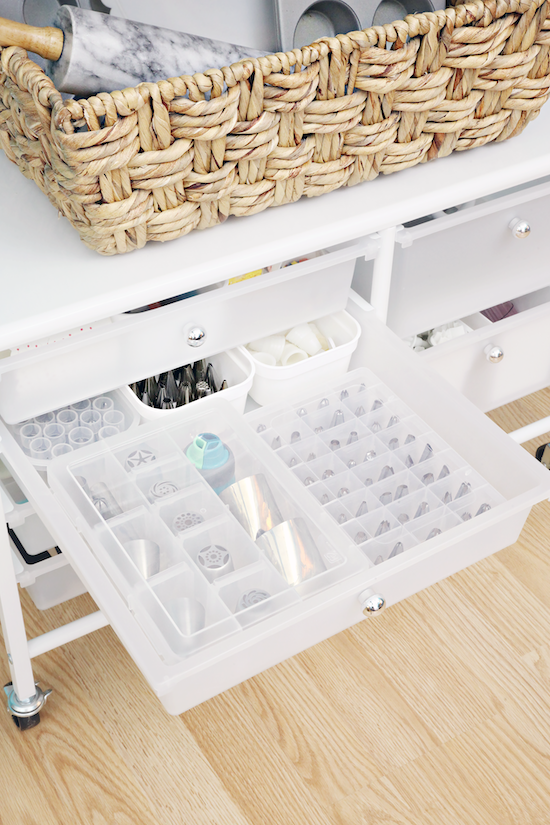
There are two rows of drawers; four shallow and two deep options.
Mixer attachments can be bulkier, so the deeper drawer was ideal for those. But there was enough room to add a fondant roller and a variety of scrapers.
Finally, the bottom drawer is divided out in a plethora of fondant molds and tools, as well as more icing scraper attachments.
My eyes have been in heart shapes since I filled this cart with her goodies, and I think she would tell you the same. She was so excited and grateful and got right to work baking me a thank you cake. We both won.
After she loads up the cart with any supplies for her project and takes it all out to the kitchen, she can flip up a small shelf to expand her overall prep/working surface.
This cart will remain her baking bff for years to come, and should her needs ever change, I love knowing there are 101 other useful ways she can make it work for her.
In full transparency, Michaels provided me with the cart, but only sponsored my social media content. I really wanted to also share the story here because it was just a feel-good day to be able to pass this small gift of organization on to my niece, and I 100% stand behind the functionality. The cart was a really good value (especially when you use a coupon or watch for sales), rolls smoothly, and has more storage than I was expecting. Even if you don't bake, hopefully, you are now able to visualize alternative ways that rolling carts can be handy household helpers.
That said, I would love to know if you have a rolling cart in your home, and how you make it work for you. Did I miss any other helpful examples?
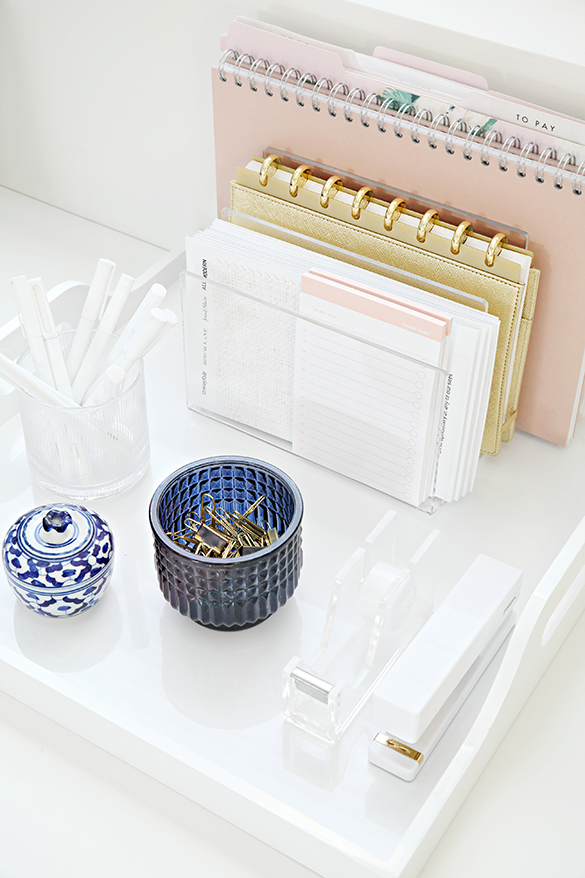
]]>IHeart Organizinghttp://www.blogger.com/profile/05084013302005288836noreply@blogger.com17tag:blogger.com,1999:blog-8864666002840991252.post-36145532306230204512019-07-26T17:00:00.000-05:002019-07-30T10:56:22.730-05:00Charging Cabinet Organization Check-In When I posted about my all-time favorite organizing tips, I received a lot of emails about our docking/charging station. It seemed like the perfect opportunity to do another post for anyone newer around here, or for those wondering how it has worked for us over the years.
We have a cabinet located in a sideboard in our dining area that we dedicate to all things technology and school. I am a really big fan of creating zones in our home dedicated to specific tasks, and because we go through schedules and homework and do school-related projects at our dining table, this cabinet has been so very valuable and handy to us over the years.
This is one of those projects where I can honestly say, that other than some supplies, not much has changed in what we keep here or how we utilize the original systems in place. That makes this a true thumbs up of a project that has remained extremely useful as our boys have gone through elementary, middle, and now high school.
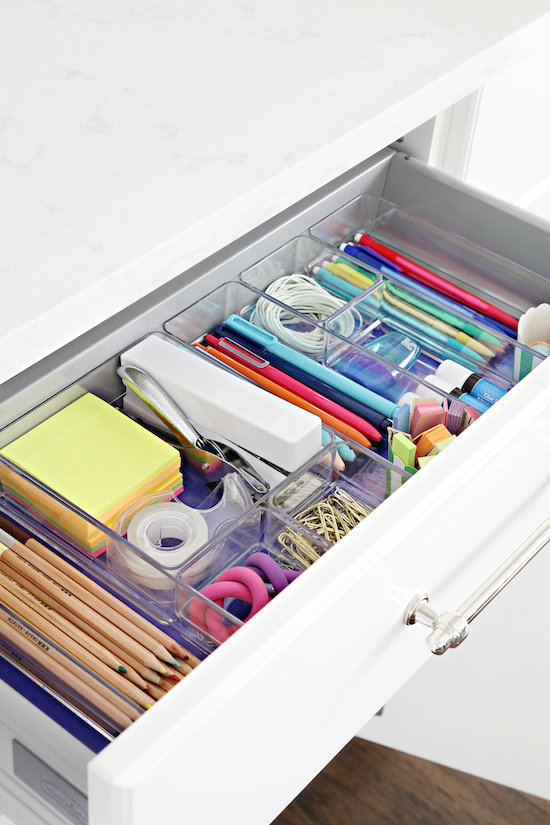
Before diving into the specifics of the cabinet, a key partner to the setup is the drawer located just above, which I stock with fresh supplies at the beginning of each school year.
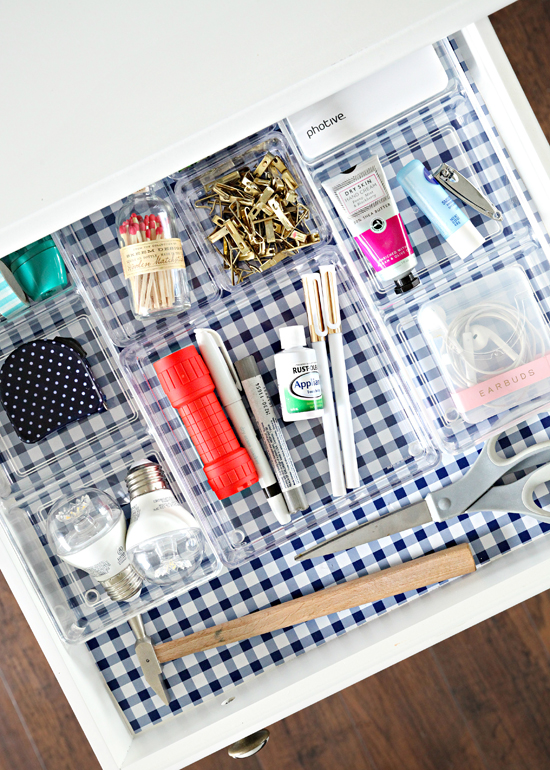
This drawer typically contains erasers, paperclips, Post-its, stapler, scissors, pens, rubber bands, color pencils, page flags, a ruler, hole punch, pencils, sharpener, glue, and tape.
These are items that seem to be required to accomplish the majority of their homework and projects.
Now, back to the cabinet...
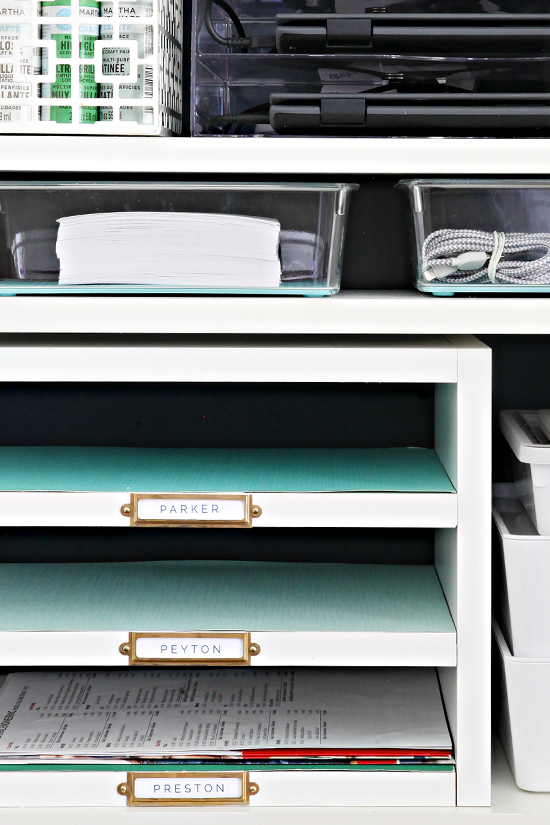
We built a paper sorting inbox for the kids to manage any necessary school paperwork: newsletters, calendars, details about extracurriculars and athletics, lunch menus, etc... (find the paper sorter DIY tutorial here.) Once a week I just go through each slot and recycle anything that is no longer relevant. Because it is currently summer break, we only have a few college (!) related materials that we need to keep track of.
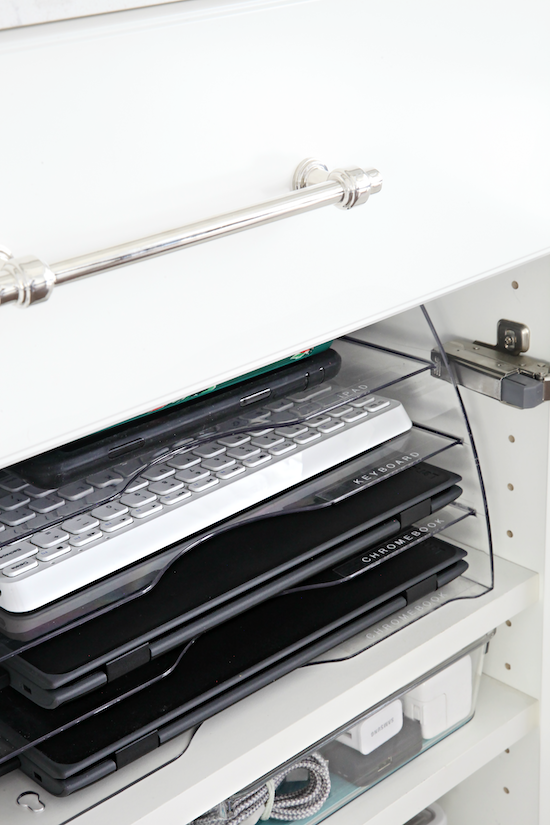
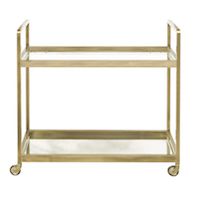
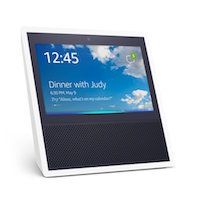
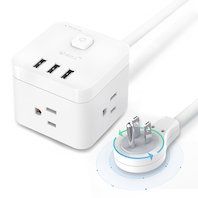
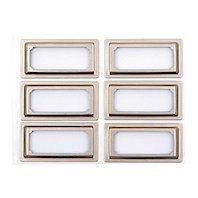
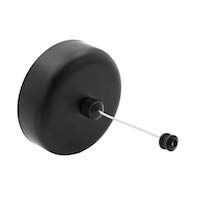
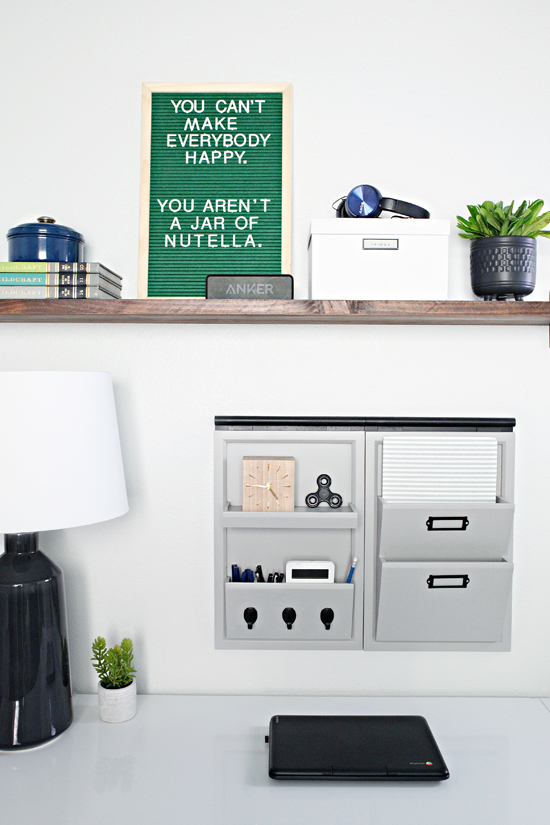
I received a lot of source questions specifically about the tiered charging station. I love this thing, and would you be surprised to know I just purchased an office file organizer? Yep! Which means you really can use it to file paperwork and charge your electronics if you wish! All in one very handy spot!
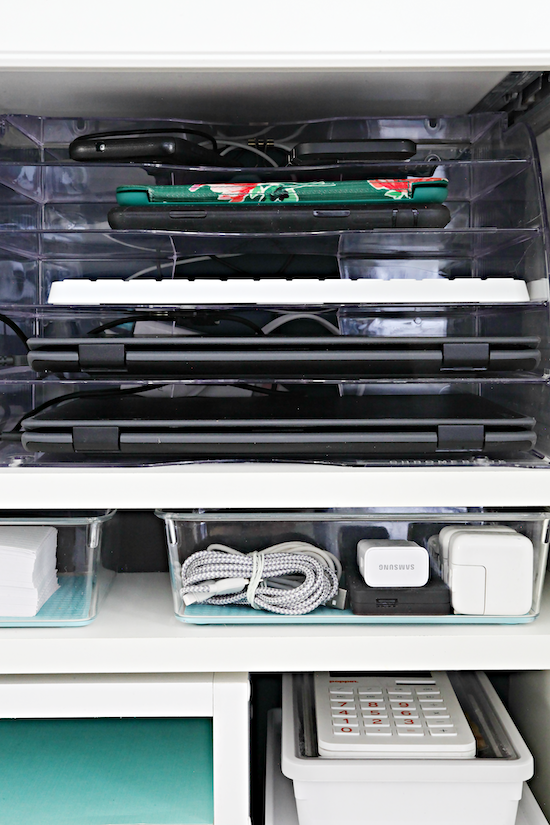
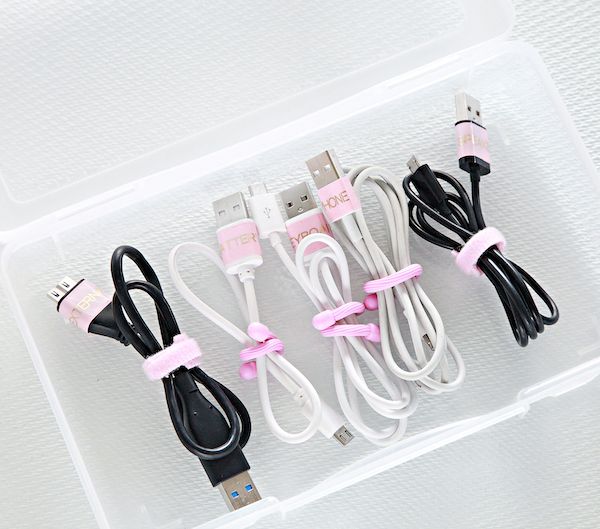
There is an outlet in this cabinet that allowed us to feed cords into the sorting tray and run them into each divided compartment through an opening in the back (we used a USB strip to cut down on bulky bricks). The tray is wide enough we can fit 2-3 phones in a single slot.
Most importantly, we try to keep bedrooms tech-free at bedtime, so this setup allows the boys to charge their devices in a single spot overnight. The tray is able to accommodate Chromebooks, Bluetooth accessories (keyboard/headphones/battery cells), tablets, and phones. We found that some of the universal cords also work to charge a variety of other small household electronics/devices out of sight as well, which is just a happy bonus.
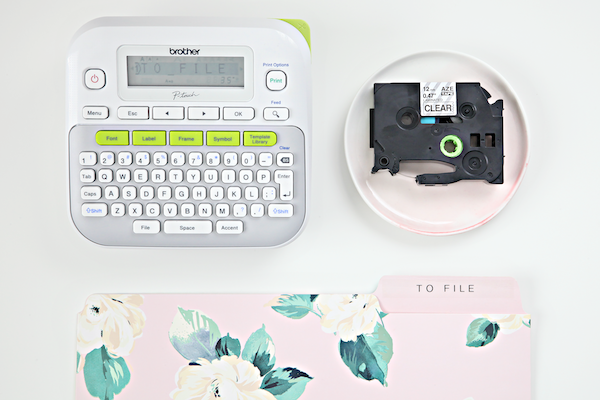
(I used my label maker to label each tier of the organizer, you can find all of those details in this post here.)
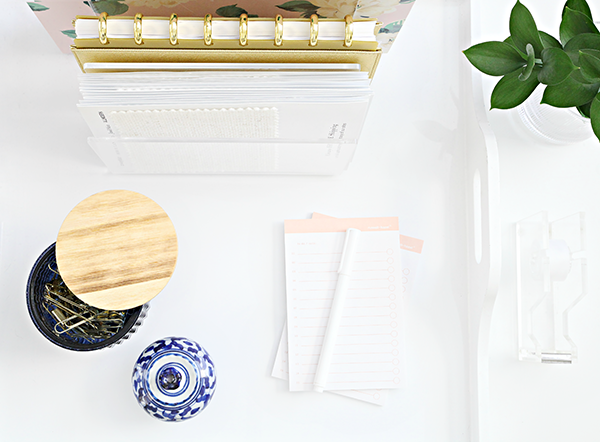
Because we quickly realized that there are times the kids still need a charge during the day or while they are traveling, we store some spare bricks and cords in the cabinet as well.
Quick Tip: I have used a lot of ties and cord wranglers over the years, and have learned that rubber bands and/or hair ties easily and inexpensively do the trick just as well as anything.
Lastly, we have accrued quite a few random colored pencils and markers over the years, so they all get tossed in some lidded bins that can easily be transported to desks or the table as needed.
And that is it, not complicated but really useful. I think the tiered paper organizer works so well due to its overall size and narrow slots, which is something to keep in mind if you are looking for alternative trays/organizers to do a similar task. And if you don't have Chromebooks but are searching for a similar charging option, this docking station appears to be something that can hold quite a few tablets/devices as well. Either way, it's always great when you can "take charge" of the technology situation!
]]>IHeart Organizinghttp://www.blogger.com/profile/05084013302005288836noreply@blogger.com12tag:blogger.com,1999:blog-8864666002840991252.post-21922249356065662762019-07-19T05:00:00.000-05:002019-09-26T11:11:33.342-05:00The Best of the Best: Practical, Everyday Storage Solutions! The four-part series includes:
Gearing Up for Your Next Organizing Project with a FREE Printable Kit!
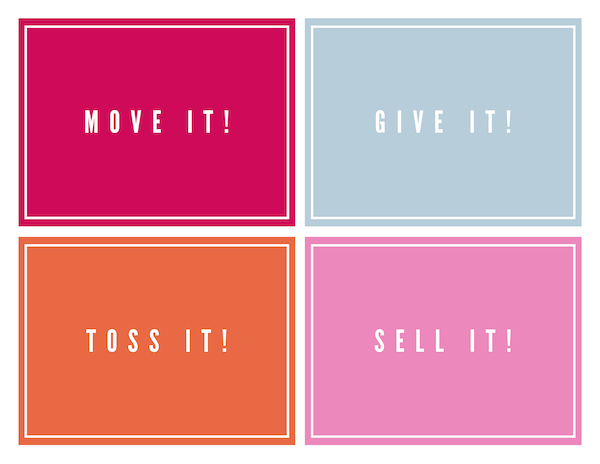
Need helping getting started or prioritizing where to begin? What is the plan of attack? What is currently working well and what isn't? What storage do you need? Trying to get rid of things, but finding it hard to decide what to keep and what to pass on?
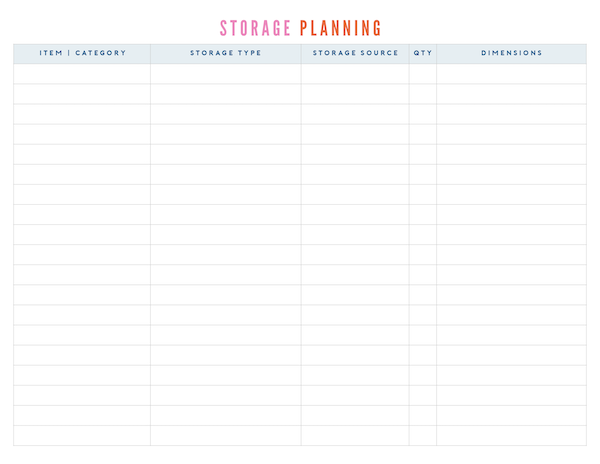
I have put together a great printable kit to help you prioritize, sort, and navigate your way through your next organizing project(s), which includes a total of TEN free printables!
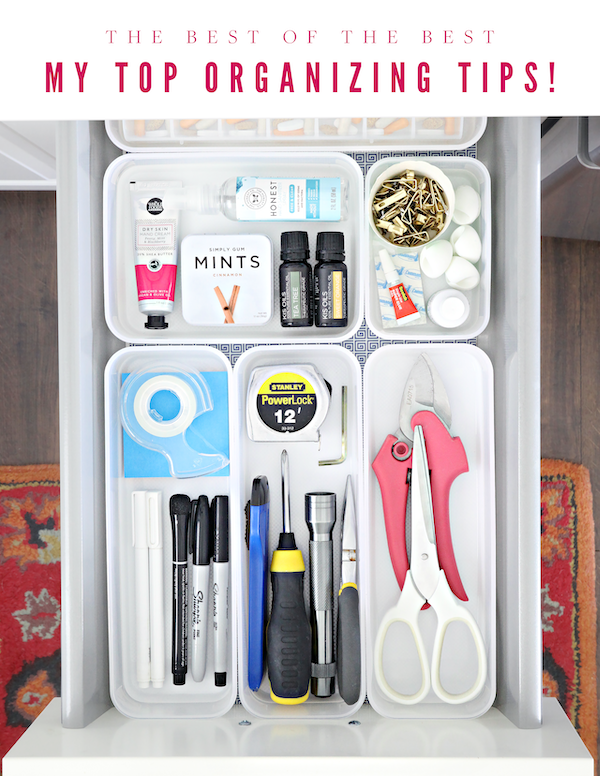
Instead of digging through years of my archives to find individual tips, I am going to compile the best of the best in a single, very informational post! It's going to be a whopper and a really great resource for projects of any size.
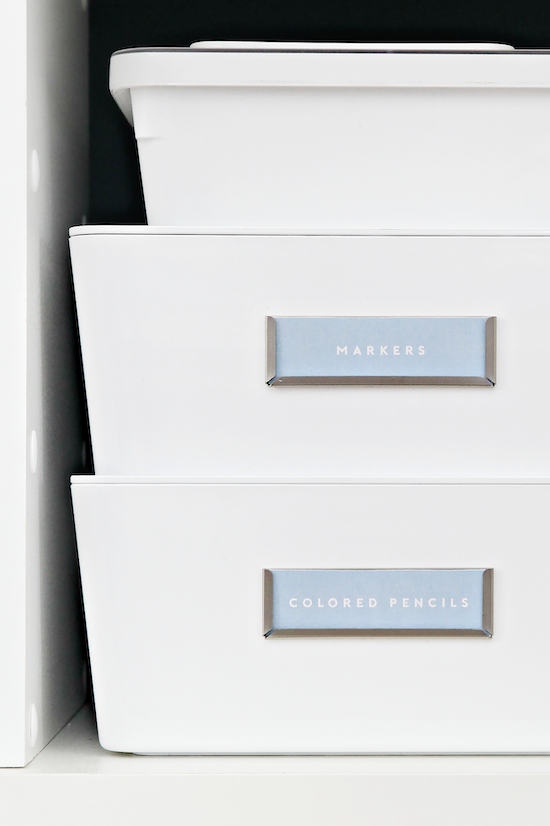
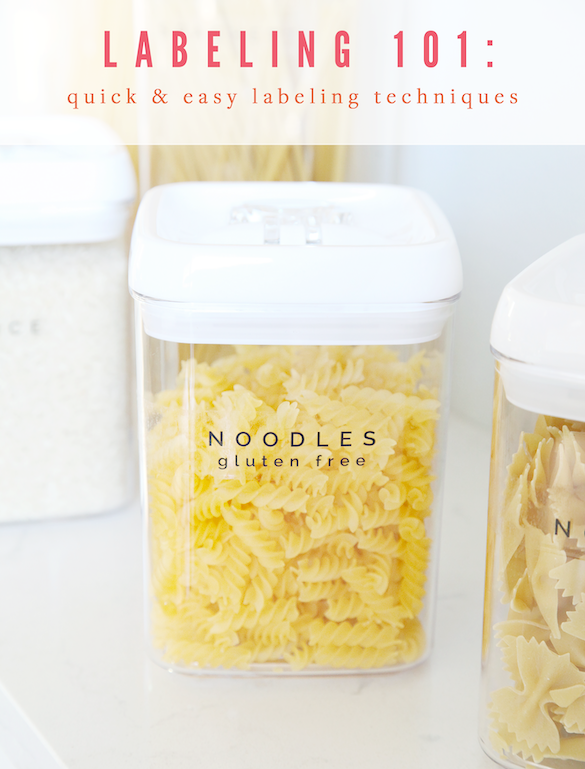
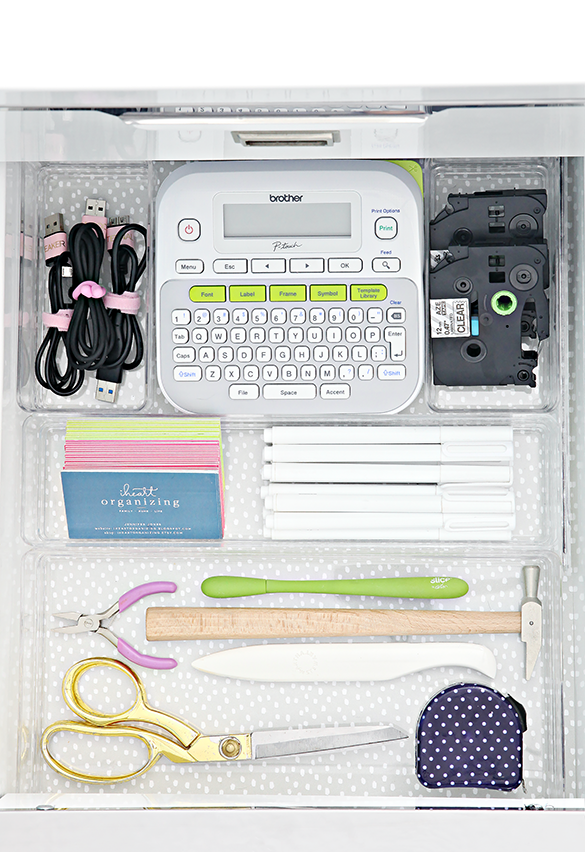
I have tried almost every type of label on the market, from vinyl to label makers to stickers and chalk markers, and they all have their place. But what are my tried and true favorites? What do I reach for with almost any project due to time, cost, practicality, and ease? I will be sharing three labeling techniques that haven't failed me yet, and that you won't need any fancy tools to utilize.
If I have learned anything from raising three boys and organizing along the way, it is that storage can be expensive and that our needs are constantly evolving. Gone are the days where I purchase pretty bins and baskets to decorate with. Although I will always appreciate beautiful storage, it has to be versatile and it has to last! With that in mind, there are a few storage products that I have found that continuously work hard for me in a variety of situations, so they end up being the types of products I gravitate toward when working on any new projects. For the final post in the series, I am putting together the ultimate storage source list with tips and products that I have fallen in love with over the years.
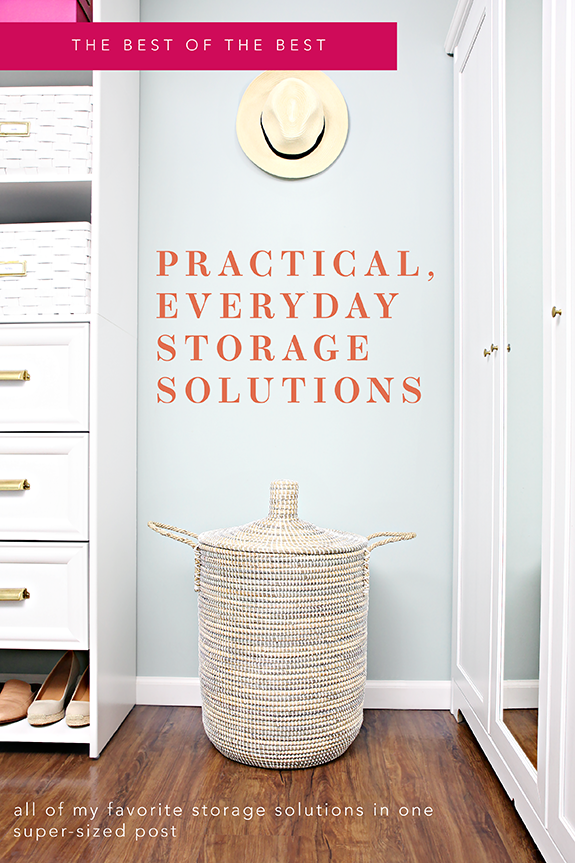
So let's dive in with part four of the four-part series: Practical, Everyday Storage Solutions!
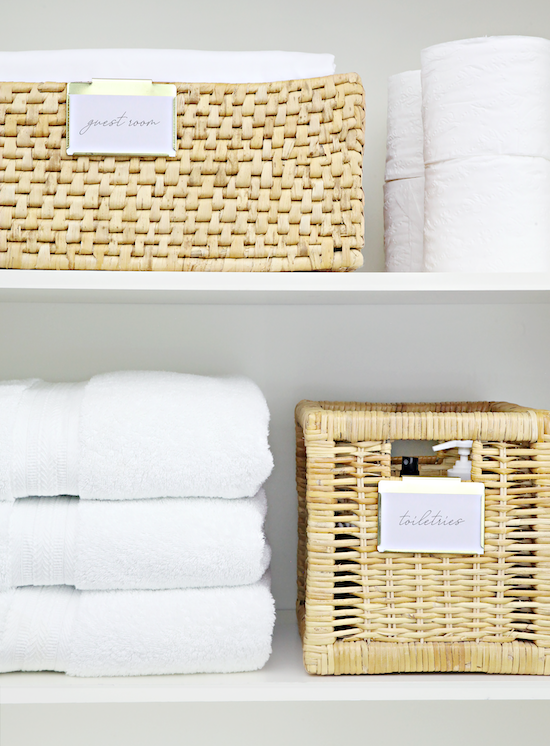
As you go through the motions of organizing areas of your home, storage should be the last piece of the organizing puzzle. Storage baskets and organizers aren't always necessary, but they really can be a key component in keeping a simple and tidy space. Here are just a few of the consistent benefits I have seen by utilizing baskets, bins, containers and drawer dividers over the years:
Containers assign items a proper home to return to.
Containers prevent items from becoming jumbled and messy.
Containers keep items divided into specific categories.
Containers allow for easier portability/accessibility.
Containers offer a place for your eye to rest and ultimately aid in finding items quicker (by eliminating visual clutter).
A few more container-specific tips I have picked up over the years:
Wait until the very end of any organizing project to determine best container types/overall storage needs (after you sort and eliminate you may find you need less storage than you initially thought).
Always keep receipts/tags in and on your storage until you have taken it for a test run. If it isn't making your day-to-day life easier after a week or two, head back to the drawing board.
Storage is meant to aid and simplify, so if it is complicating things, ditch it.
Think long term. Don't select items that are a specific color, are trendy, or only going to be relevant for a specific season of life. Look into products that will stay versatile as your needs evolve. I have learned over the past 15 years the types of storage that have longevity and versatility and what ends up in the donate pile. My general rule is to select products that are neutral in finish/texture; clear, white, linen, and natural/woven materials always win.
Storage can be really expensive, but it doesn't have to be! I will never be above sourcing pretty storage solutions and finding a way to DIY or hack things on a budget. Cardboard boxes can be covered in fabric, dividers can be cut from wood, cereal and shoeboxes can be wrapped in paper, modular pieces can be combined to create dream closets... A little creativity goes a long way and sometimes custom solutions are the best way to maximize and get exactly what you need.
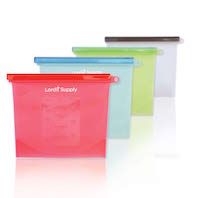
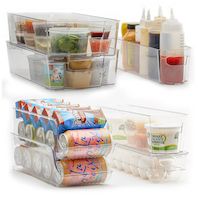
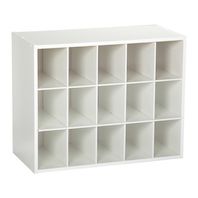
It would only be appropriate to start with my number one favorite storage item of all time:
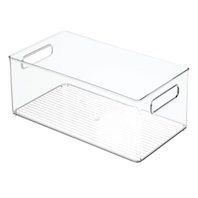
Why I Love These:
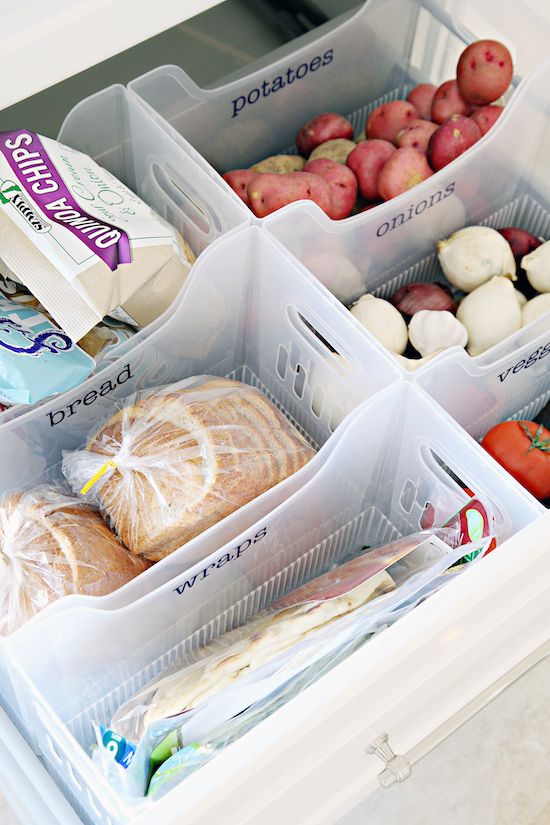
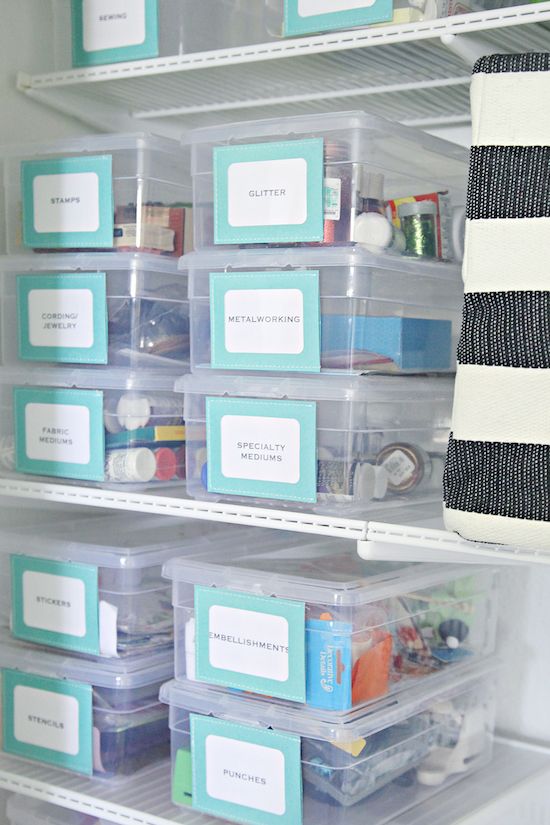
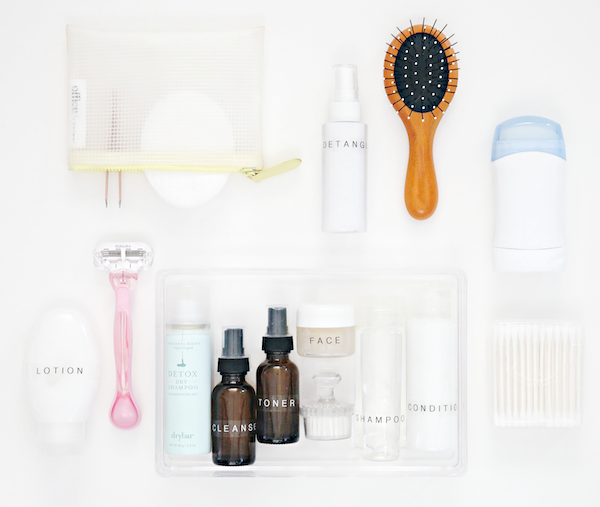
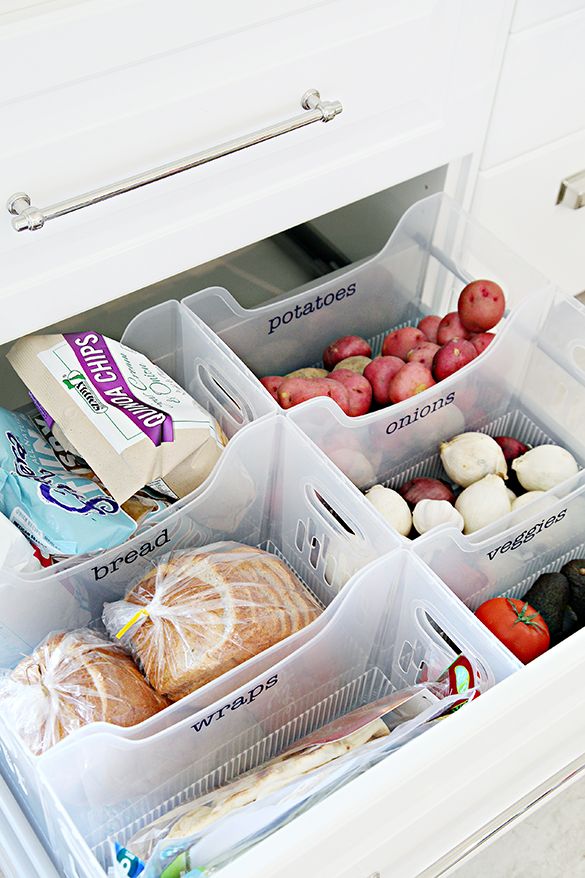
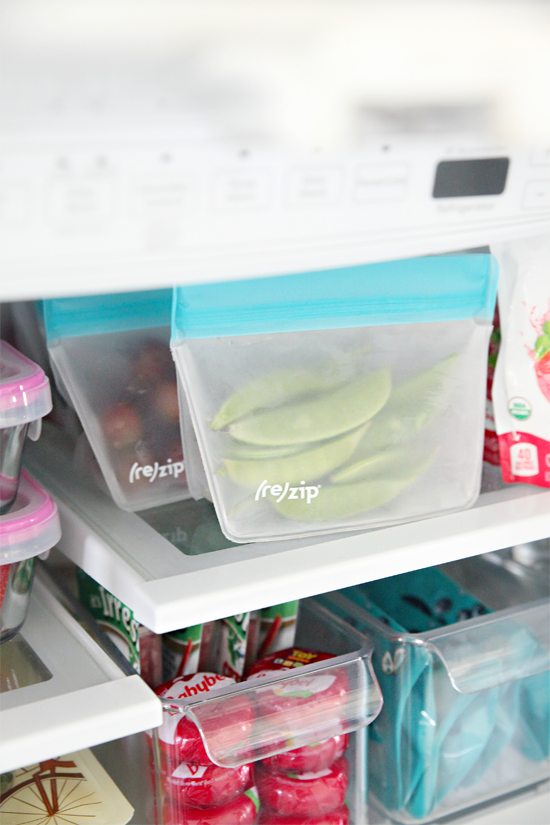
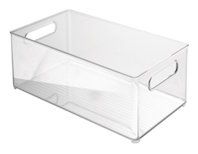
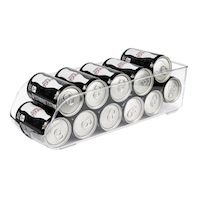
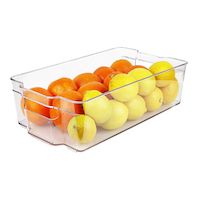
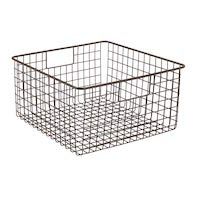
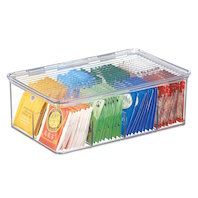
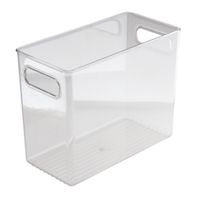
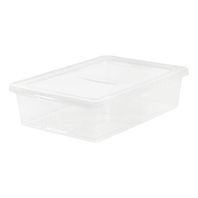
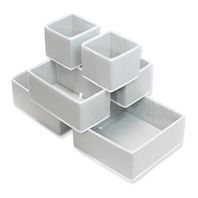
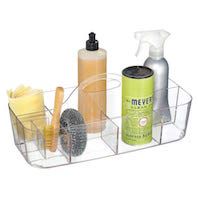
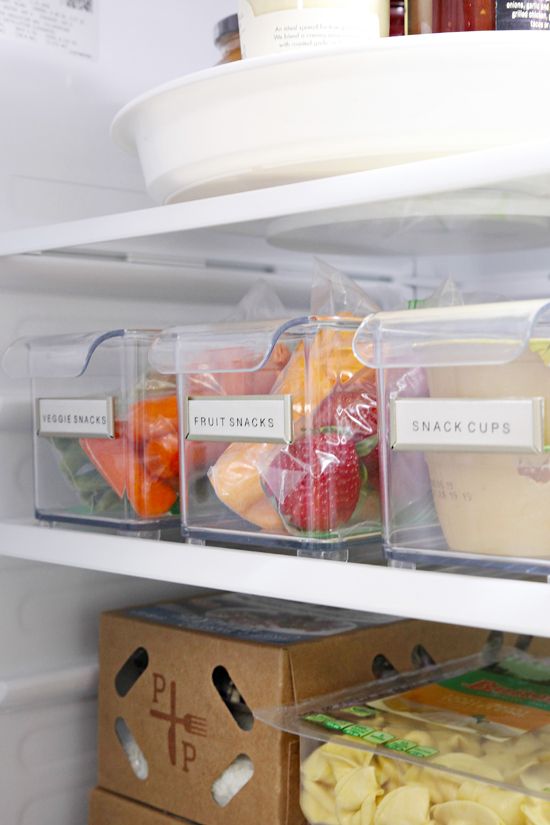
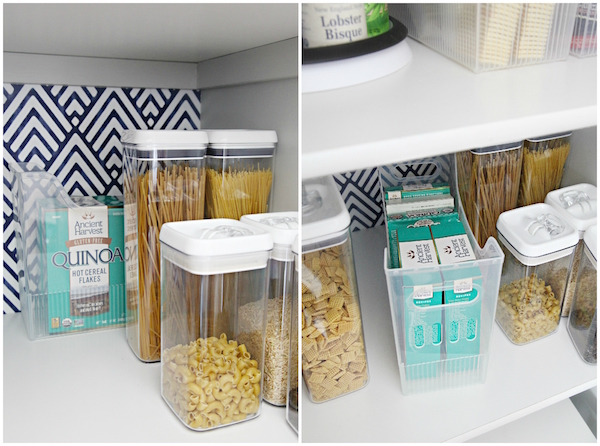
The Multi-Purpose Bins are easily the most versatile bin I have found. They come in a variety of widths for your varying needs, yet are extremely uniform. They are translucent so you can see the contents. They are lightweight. They are easy to clean. They have an open-top so everything is easy to put away. They are inexpensive. They can be used to file anything from papers to foods.
Versatile Ways to Use These Bins:
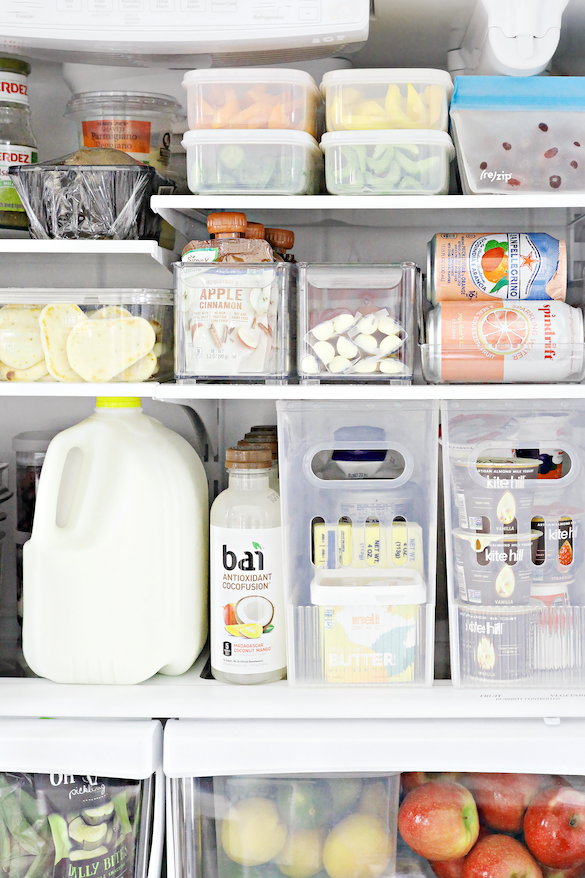
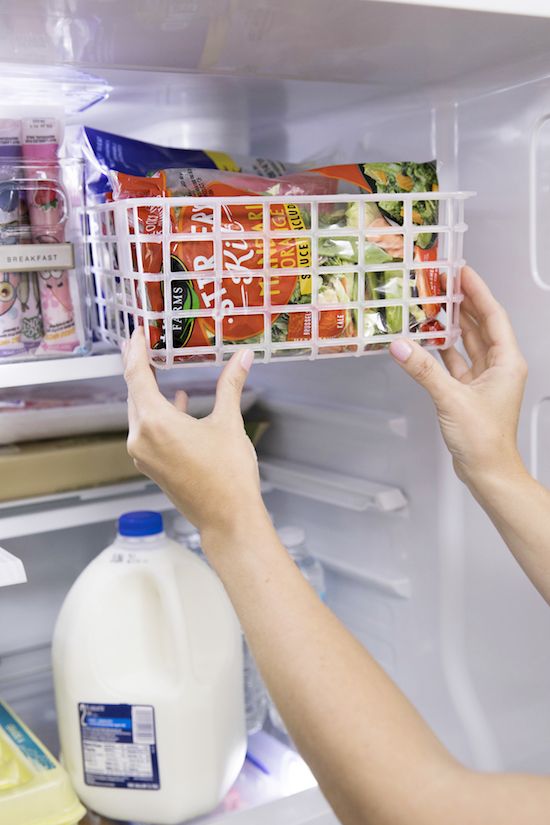
Create categories in the fridge, freezer, and pantry: produce, condiments, snacks, breakfast items, bread/wraps, cereals, etc...
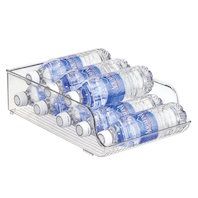
Use in miscellaneous kitchen cabinets for baking sheets, cutting boards, paper products/disposable dishware, water bottles/tumblers, food wraps/bags, drop zone items, and cleaning supplies.
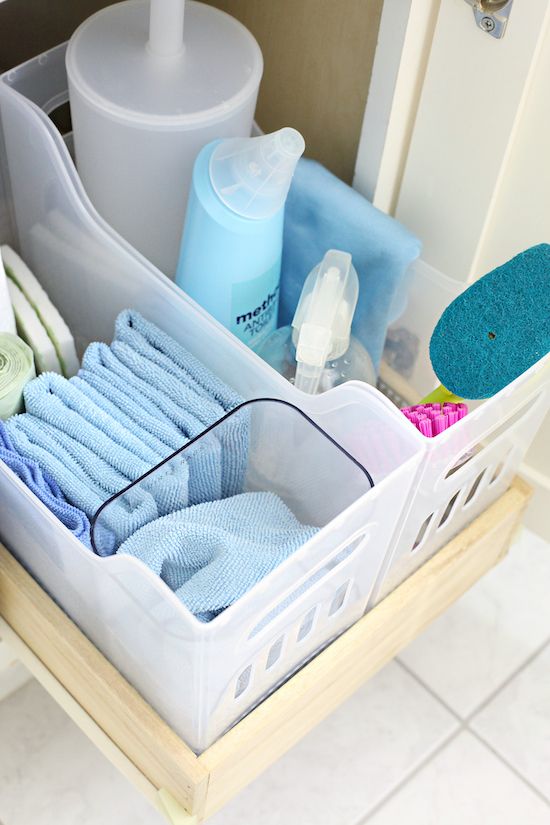
Use under the bathroom sink for toiletries, paper products, and cleaning supplies.
File paperwork and magazines in the home office, or use them to corral miscellaneous gadgets/tech, and vinyl rolls/yarn/craft supplies.
Because these bins are so easy to clean, they can also be used in the garage for small tools, garden supplies, grilling utensils, small toys/activities, pet supplies, and auto maintenance items.
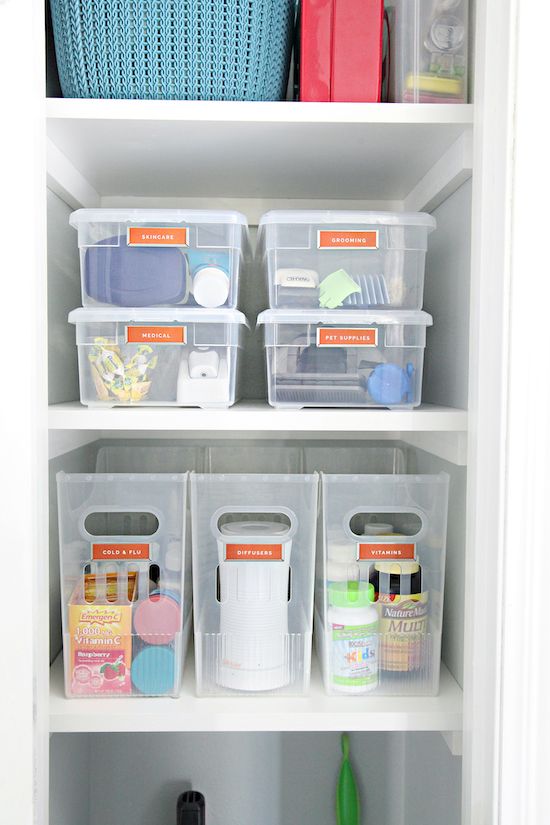
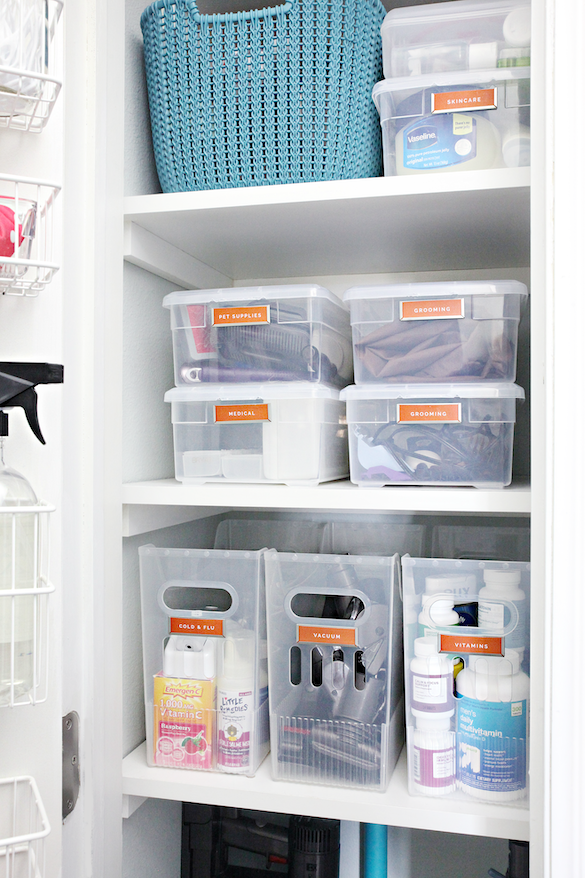
In the linen closet, these bins are great for categorizing first aid supplies, medication, toiletries, sheet sets, vacuum attachments, and cleaning supplies.
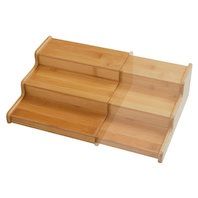
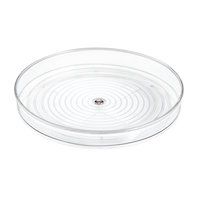
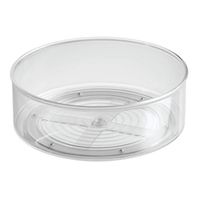
Why I Love These:
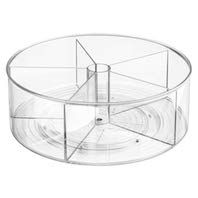
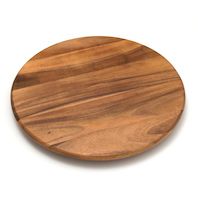
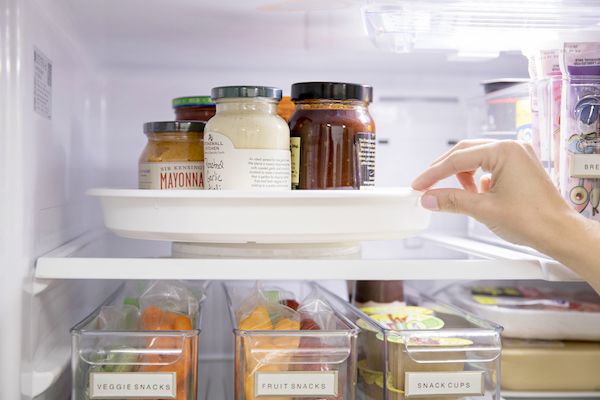
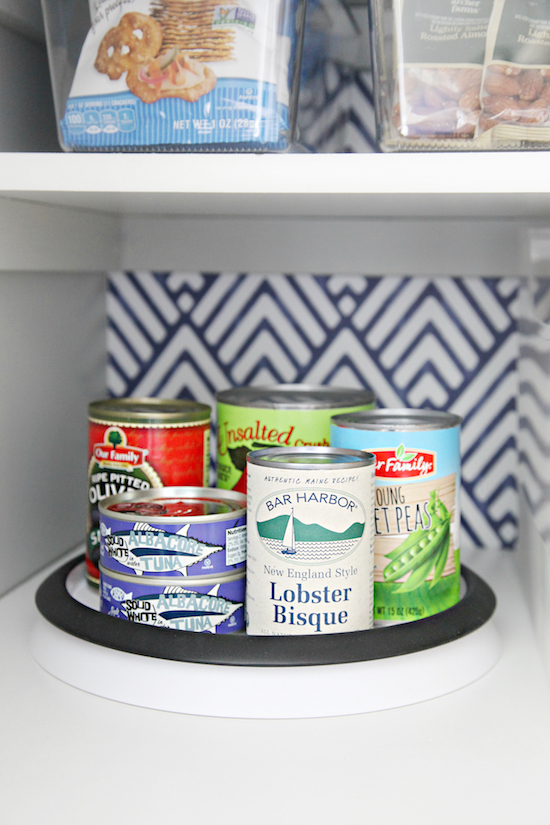
Turntables are known for offering easy access to your items with just a simple spin. They are especially great in narrow and corner areas when it can be trickier to access items near the back of a cabinet or shelf.
Versatile Ways to Use Turntables:
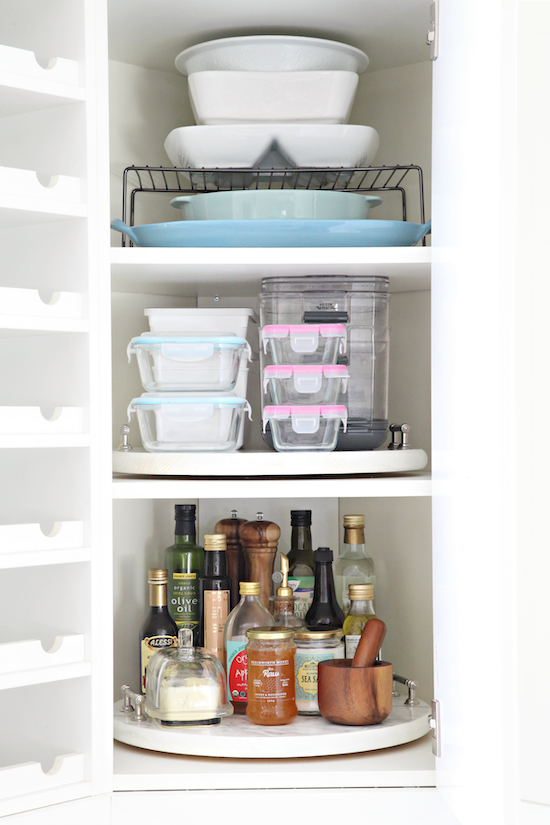
Corner cabinets are always awkward to maximize, but we added oversized turntables to two lower shelves and haven't regretted it for a single second. They are so handy and I feel sincere delight every day when I give them a spin and easily grab just what I need. We use them for oils/sauces/spreads and food storage containers, but they would also work well for coffee canisters/mugs, vases/accessories, dishes, and baking canisters. (see our original DIY tutorial here)
Use these under kitchen sinks for cleaning and household maintenance products.
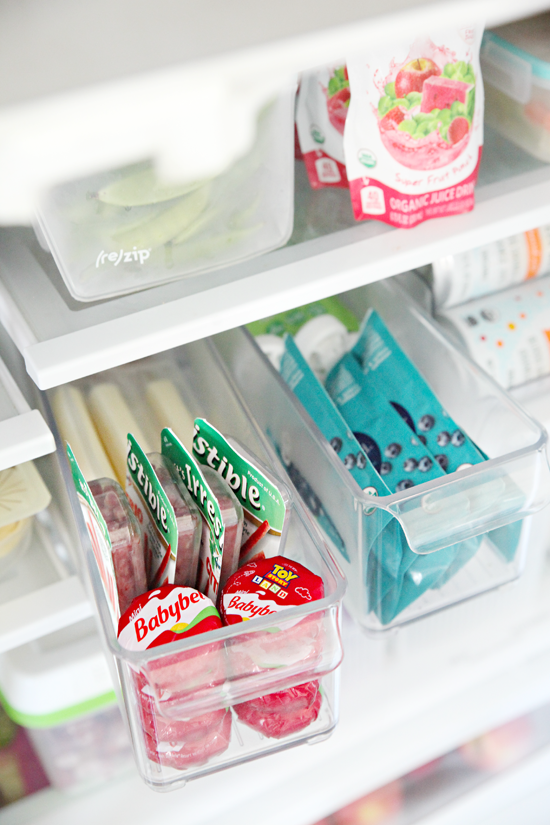
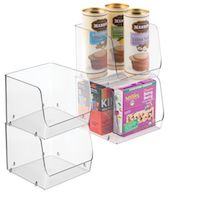
In the fridge so that items don't fall prey to disappearing on the backs of the shelves. I finally swapped ours to a version with a lip and it is infinitely better than one without.
Add these in a variety of shapes/sizes to make the most of awkward and deep pantry/cabinet shelves. Bottles, jars, and cans are most common, but small packages and boxes can also be stored on these handy helpers.
Add them to bathroom/linen closet shelves for toiletries.
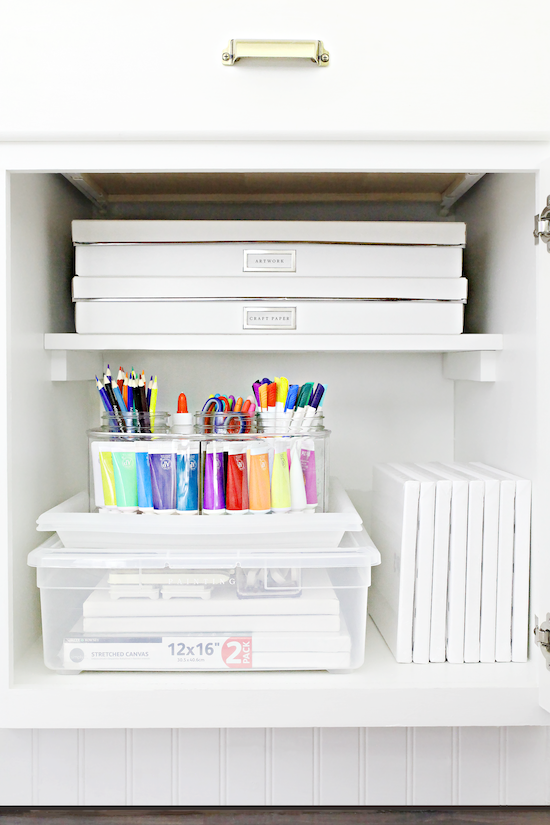
Put them to work in home offices/craft rooms filled with paints, coloring tools, scissors, glue, small notepads, etc...
Pop one on top of the washer to hold stain remover, detergent, dryer sheets, lint roller, and a change jar.
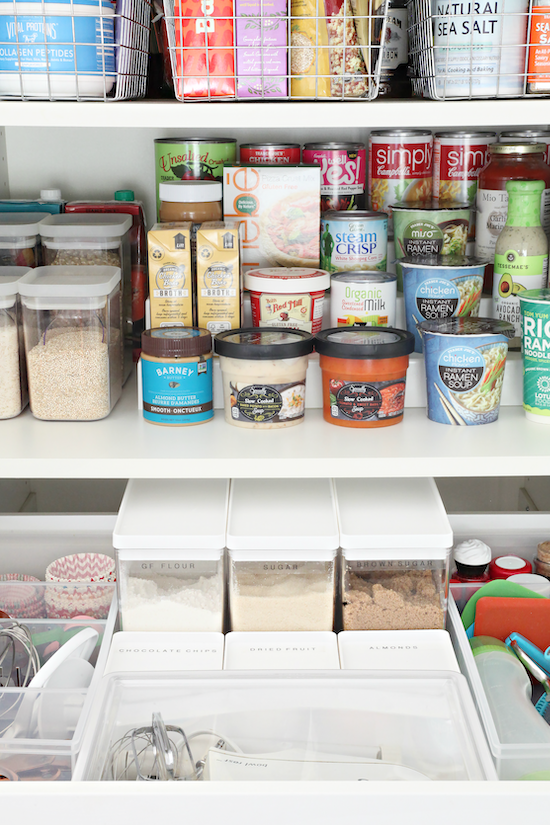
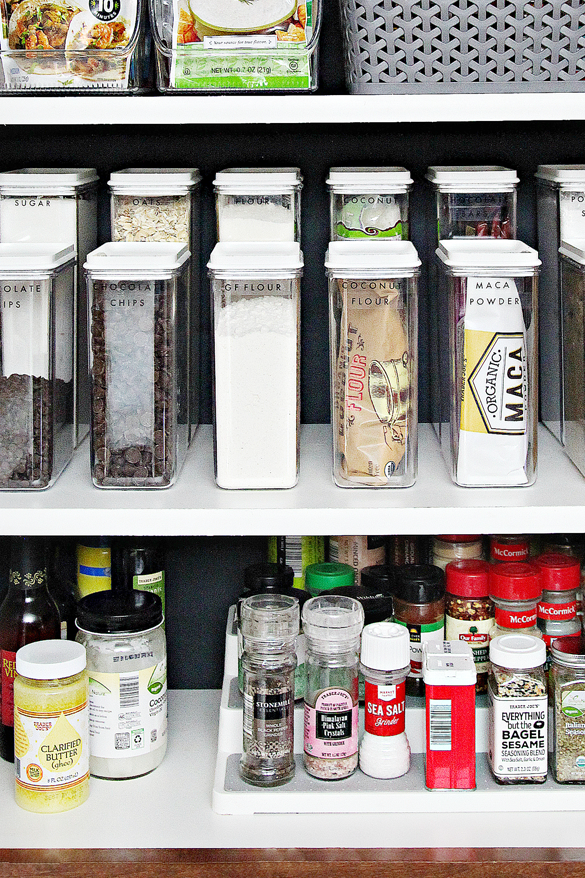
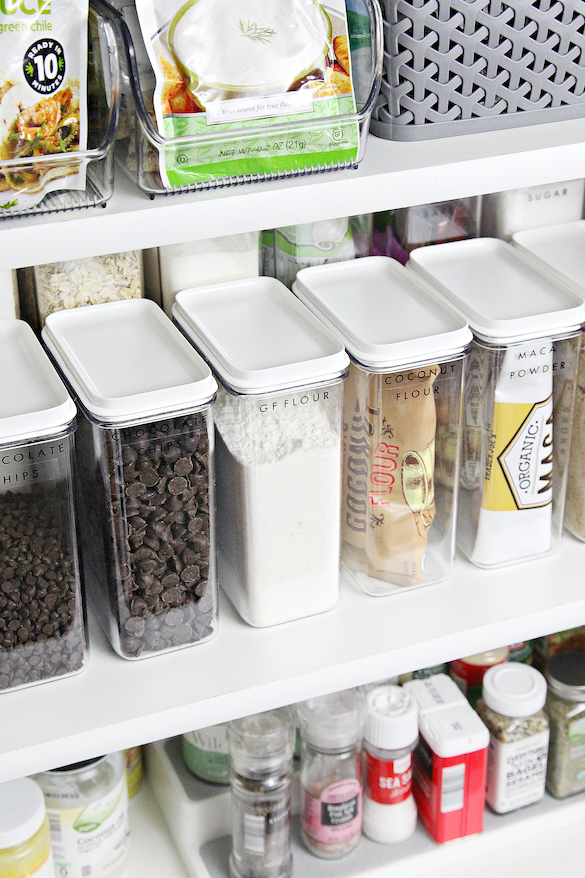
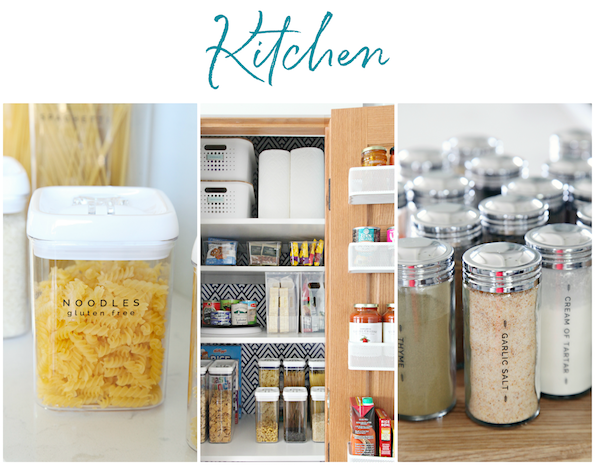
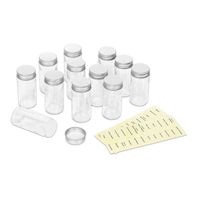
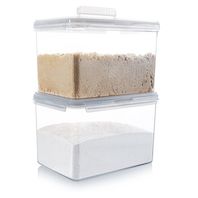
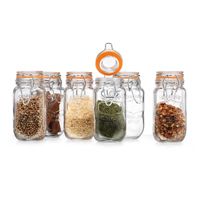
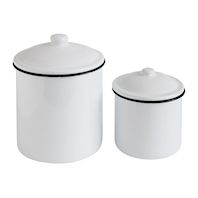
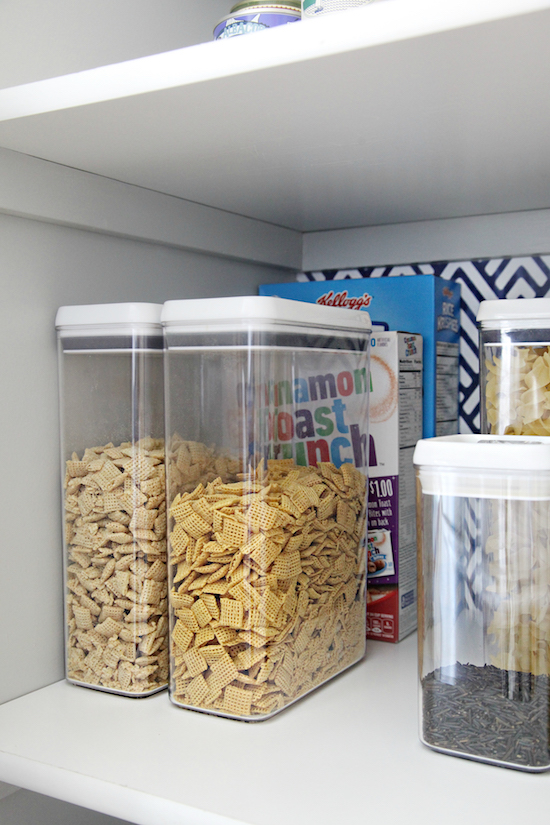
Pantry:
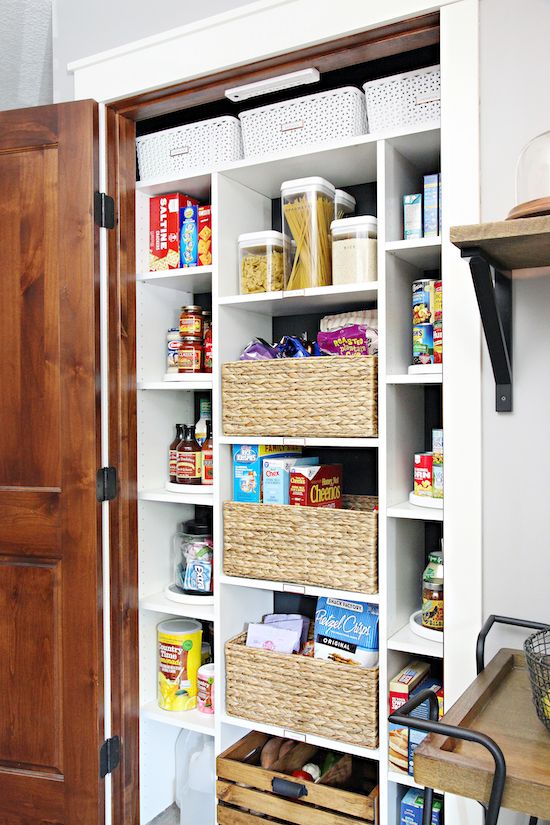
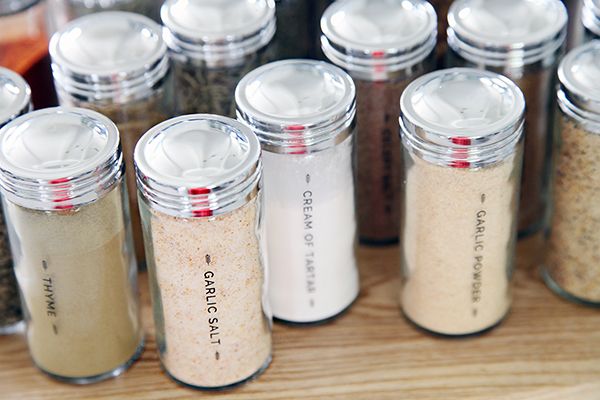
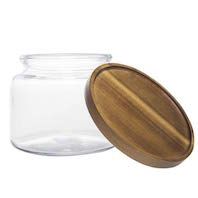
Many years ago I fell in love with these containers for all of our dried goods in our pantry. Since then, I have really reduced the number of items I actually decant on a weekly basis. I have also since discovered some comparable containers from Target that seem to do a much better job of locking in the freshness for longer periods in time. So good that I have made the switch to these for our baking ingredients as well as for beans and snacks in our coffee cabinet.
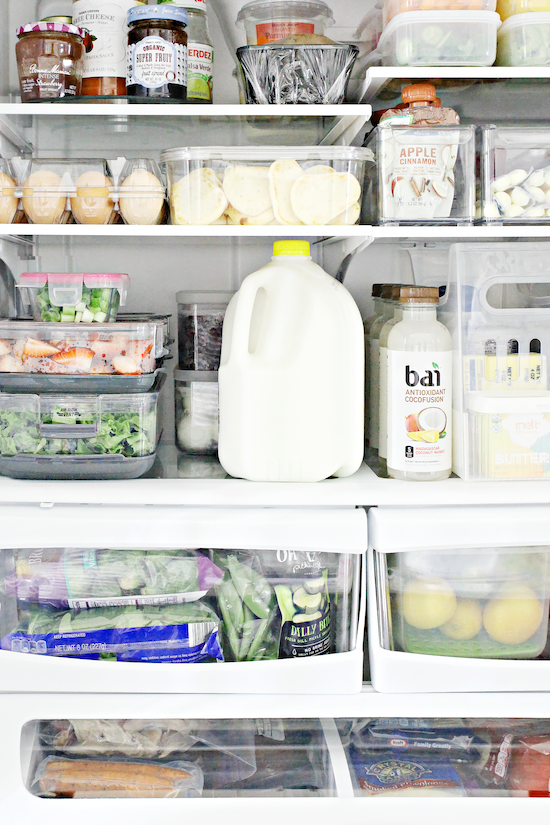
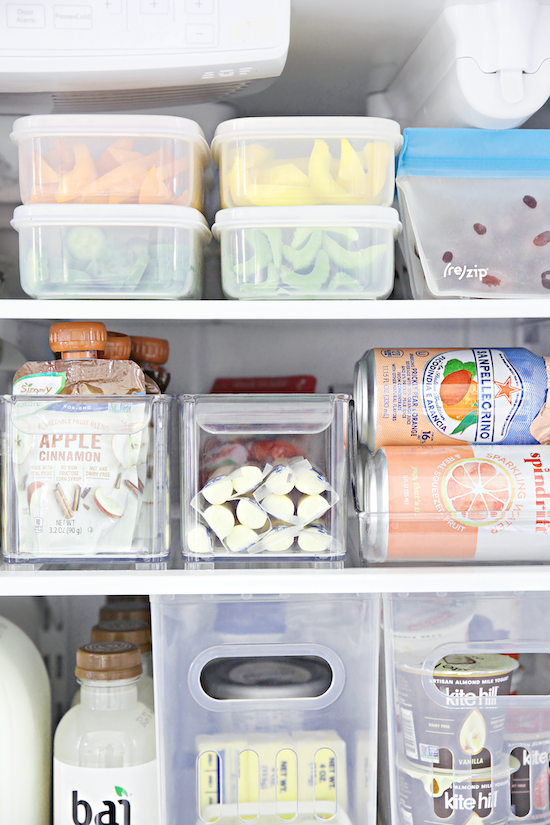
Produce:
Since my last fridge post, I also swapped out our produce containers after many, many years. A few months ago I spotted these Prepworks Produce Prokeepers at our local Costco (no longer available) and I instantly appreciated that they were flexible enough to store a large variety of produce types inside of the fridge. They include detailed instructions right on the lids with the best way to get the longest shelf life for everything from lettuce to berries to mushrooms and grapes. These containers have vents on the ends that can be opened or closed depending on the contents, as well as a drip tray that can be used to add or collect moisture. I also appreciate the more compact sizes and that the containers stack and wash nicely.
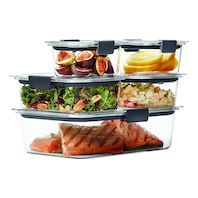
Leftovers:
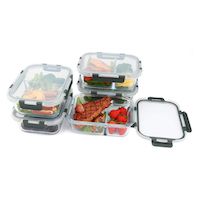
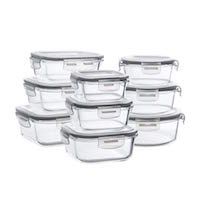
We began using glass food storage containers for produce, meal prep, snacks, and leftovers quite a few years ago, and I continue to heart them just as much today. I look for containers with snapping/locking lids, and they do such a great job maintaining freshness. The biggest perk is that the containers last forever (haven't had one break on us yet). They also wash beautifully each and every time, no more worrying about trapped food smells or red stains. Finally, many glass storage containers can quickly and easily go straight from the fridge to the oven or microwave without dirtying another container for cooking.
Snacking:
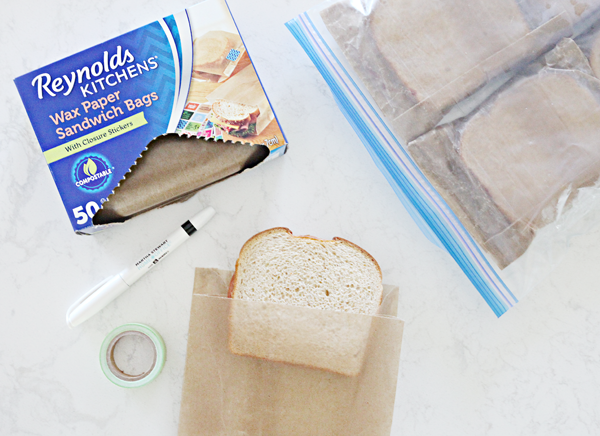
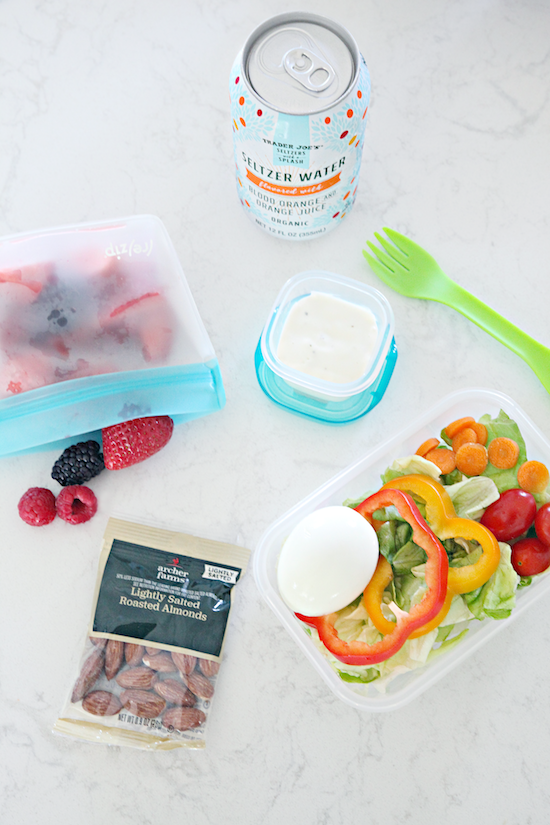
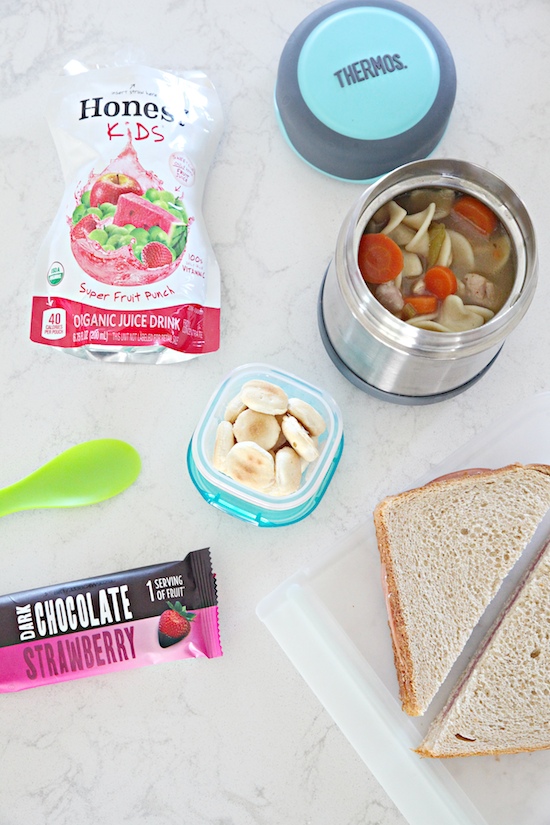
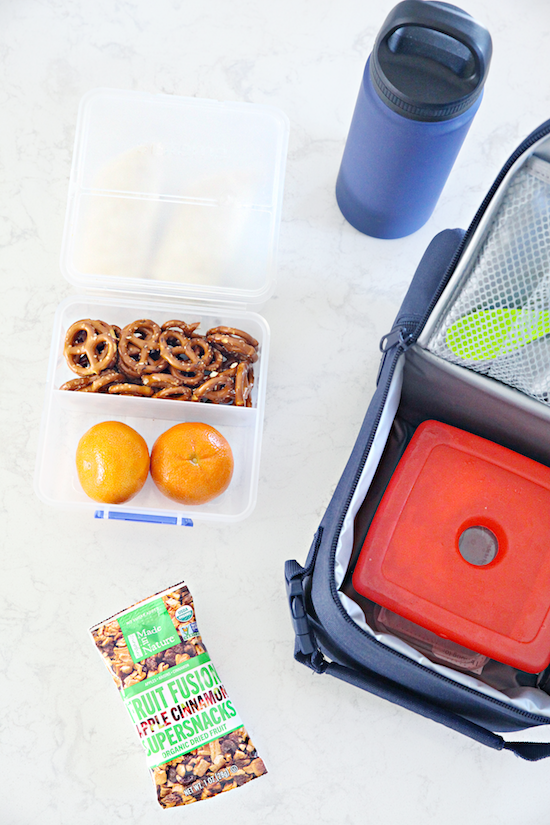
We use two types of containers for snack prep each week. And although both are still plastics, they have cut down on our single-use plastic usage significantly. Each week I do a lot of snack prep for our family which includes peppers, cucumbers, berries, grapes, peas, cherry tomatoes, carrots, etc... These small reusable bags (8 oz) and these stackable containers (20 oz) have both done a great job in getting our snacks through the week while remaining portable for quick grab-and-go moments. A bonus is they are both dishwasher safe, and can also also be used for dry snacks like nuts, granola, pretzels, and crackers.
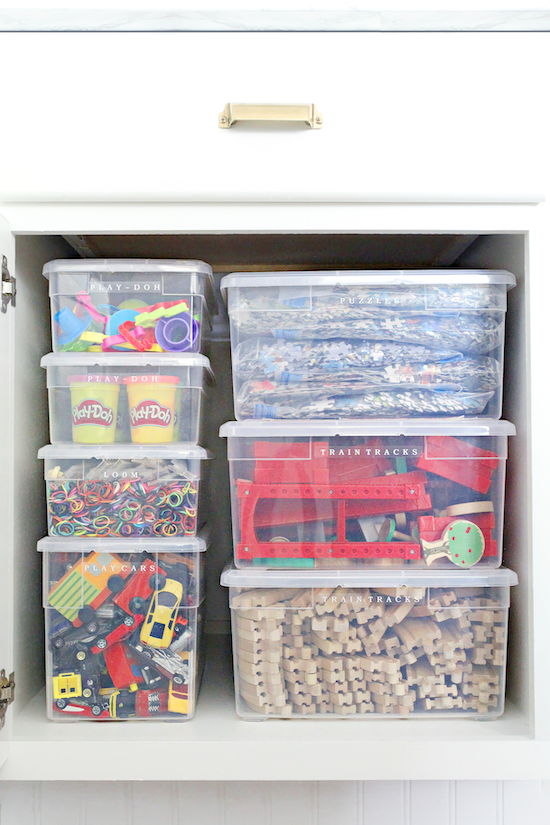
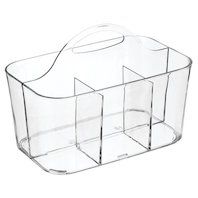
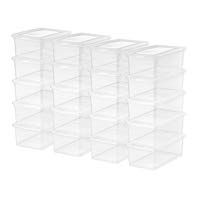
Why I Love These:
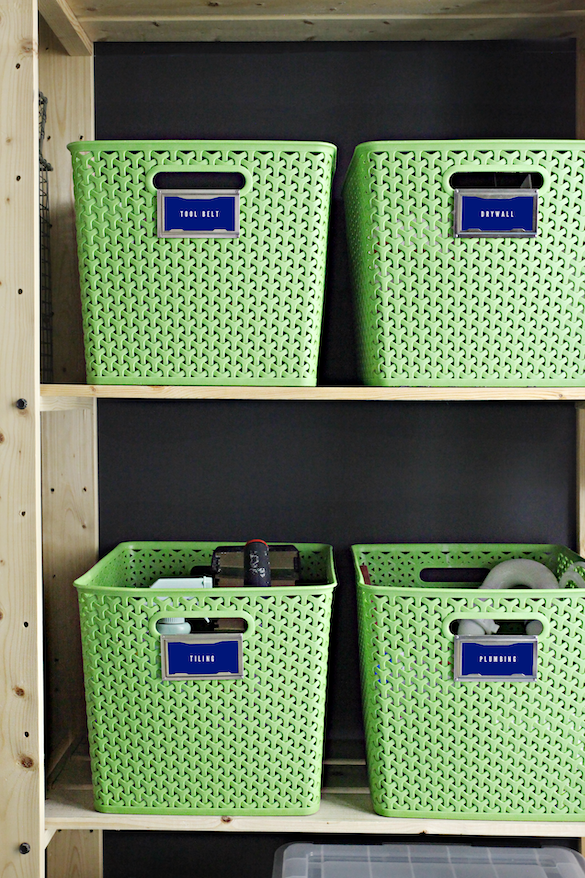
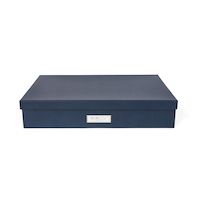
Shoe boxes are another one of those containers that will remain versatile around your home year after year. They are ideal for corralling and categorizing a variety of smaller items in any space. The lids allow them to stack, which is generally a perk for making the most of vertical shelf space. Just be careful, stackable containers are only beneficial when they aren't being used on a daily basis.
Versatile Ways to These Containers:
Shoe boxes work best in cabinets and closets to manage and separate a variety of items. We also like to use them in our garage and storage room on shelves for managing tools and hardware. Here are just a few ways these boxes can work some storage magic:
Shoes
Small Toys
Medications/First Aid
Small Tools
Hardware for window treatments, furniture, hooks, spare parts, etc...
Craft Supplies
Pet Supplies
Candles
Party Supplies/Entertaining Accessories
Travel Toiletries
Nail Polish/Care
Car Kits
Essential Oils
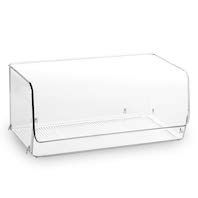
Why I Love These:
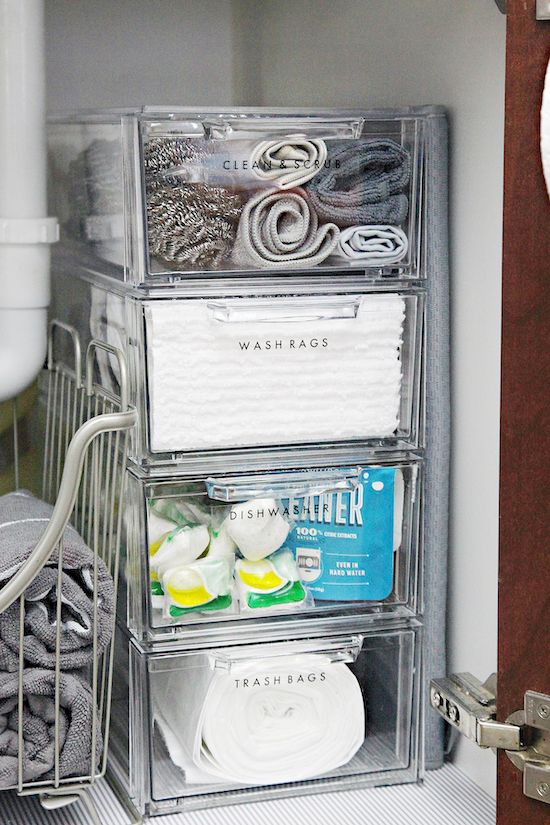
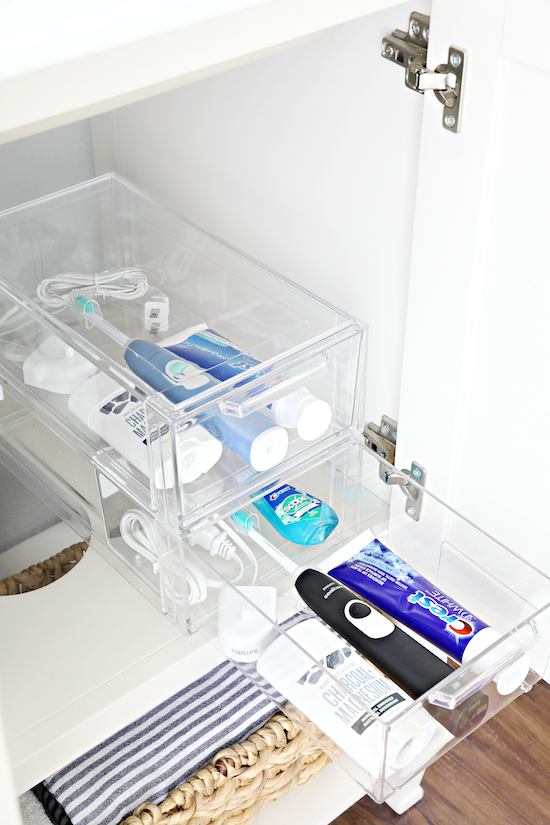
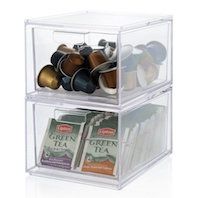
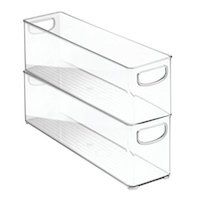
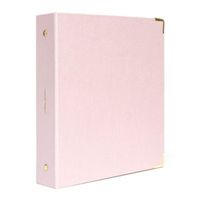
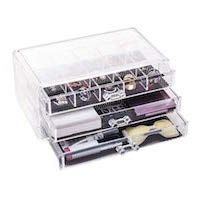
These drawers can store all of the same things as shoe boxes, but they keep things much easier to access. You can stack them, but you don't have to remove anything to access the contents inside. I prefer to spend a little more on storage drawers (vs. shoe boxes) when organizing high traffic areas.
Versatile Ways to These Drawers:
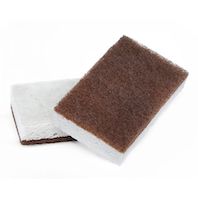
Under the kitchen sink for scrubbers, sponges, dishwasher pods, dishcloths/rags, soaps...
In an office/craft room for small supplies.
In a linen closet for medications, toiletries, and pet supplies.
Under the bathroom sink for toiletries/feminine products (not just for yourself, but to keep items divided by person also).
Why I Love These:
Drawer dividers are to drawers what bins are to closets and cabinets. They are a really great way to categorize and separate items, while ultimately preventing jumbled and tangled messes. Opening a divided drawer should allow you to quickly see and access exactly what you are looking for, and will also cause a pause-and-think-moment when putting things away. I have tried a few types of organizers over the years, but there are a select few that I continue to come back to time and time again due to their versatility, sizing, and cleanliness.
Office | Bathroom | Junk Drawers:
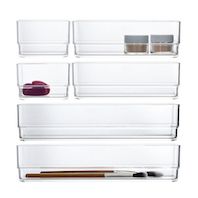
I have two favorites for these types of drawers: acrylic and rubber-coated options. Both can easily be removed and washed, both have a variety of size offerings to mix and match and create endless configurations, and both are priced fair due to the longevity and flexibility they offer. Acrylic gives a bonus of seeing through to a pretty liner, but you really can't go wrong with either.
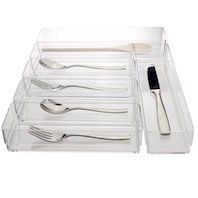
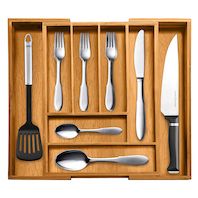
Kitchen:
Cooking utensils come in a wide variety of sizes, so I like to look for organizers that offer at least a 14" long option which should accommodate most turners and spoons. We have been known to create custom DIY dividers for most of our utensil drawers, but another great option I have been recently using on some projects are the expandable dividers.
These drawer organizers are spring-loaded and can quickly divide drawers in half, thirds, fourths... whatever you like! I have become such a superfan, and although I was skeptical if they were worth the investment, I can officially say that they are.
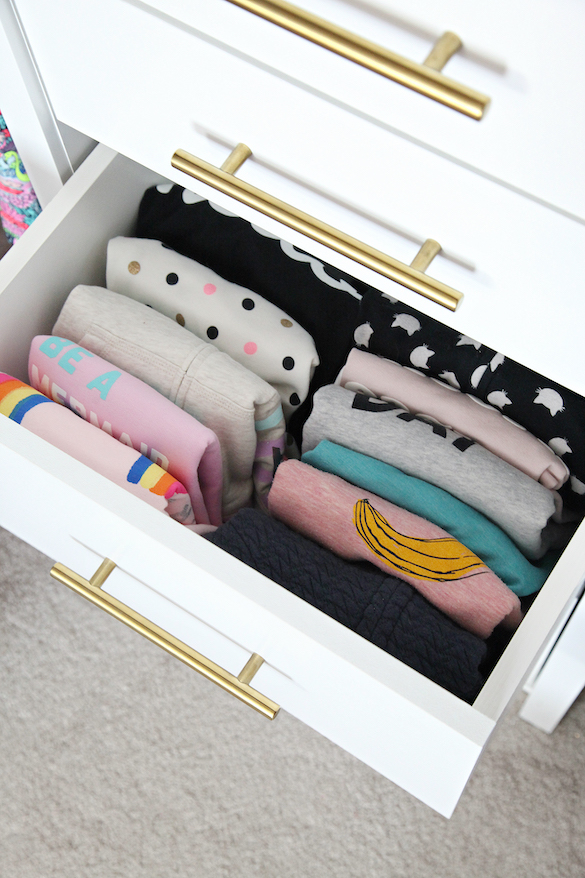
Clothing:
Again, two favorite methods for organizing clothing drawers that both work so dang well I couldn't name a favorite from the two.
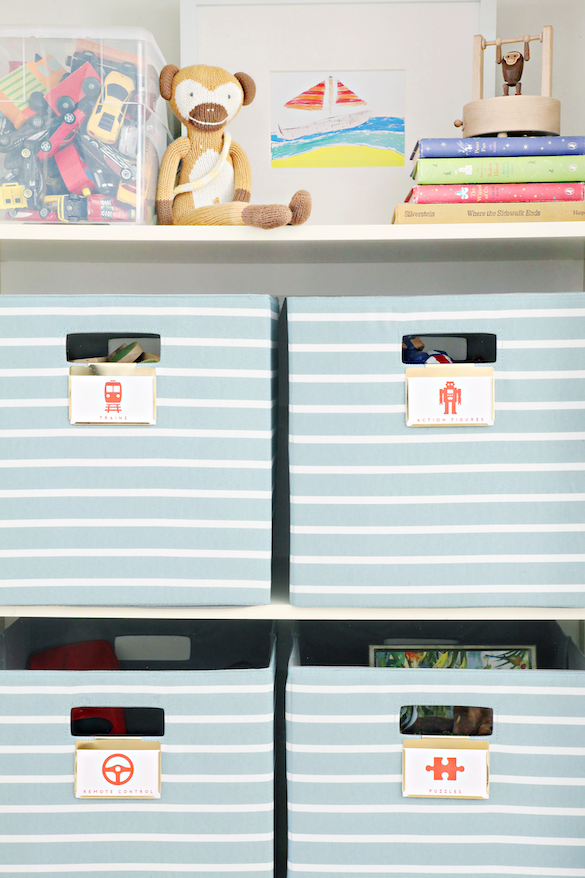
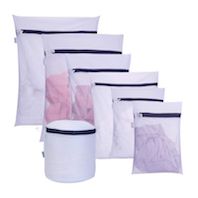
One way I tackle clothing drawers it to look for soft-sided boxes, which are the ideal for the filing method while also creating general categories for pajamas, long-sleeves, short sleeves, socks, undergarments, leggings, tanks, etc...
Another way is to divide from front to back by creating channels to hold folded/filed clothing in place. We have DIY'd this method in the past here, but you can also use the longer spring-loaded options for an immediate solution.
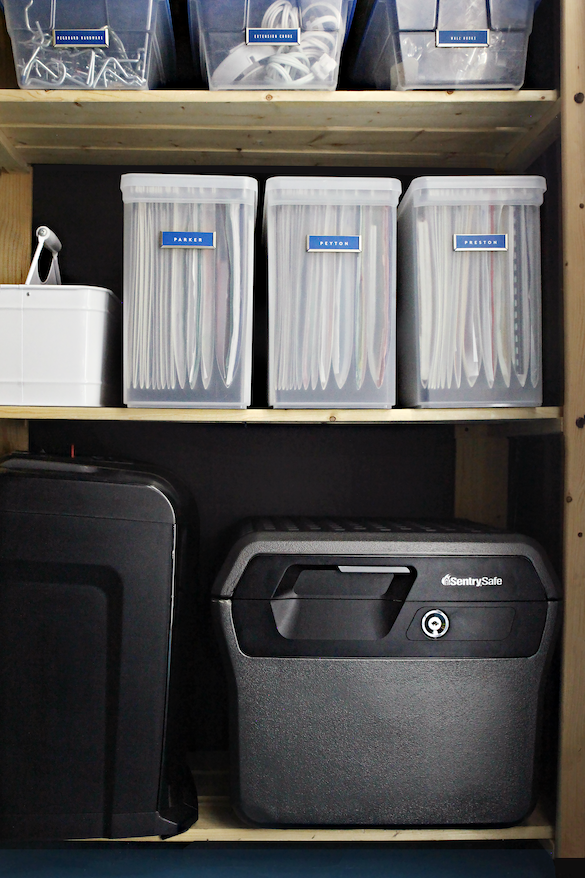
Why I Love These:
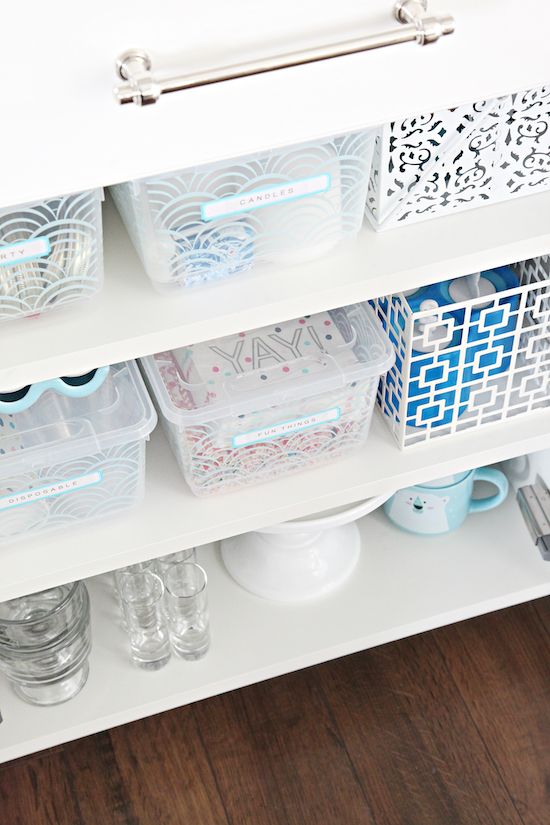
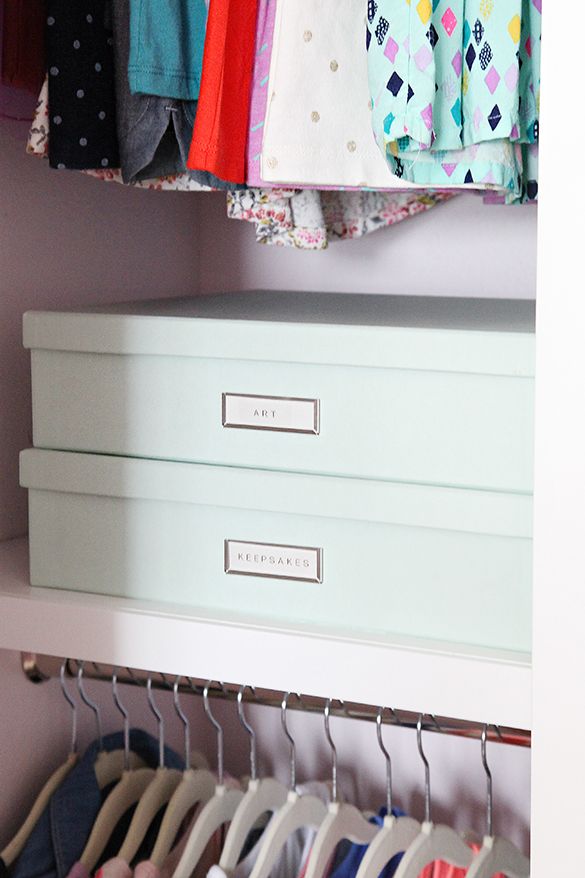
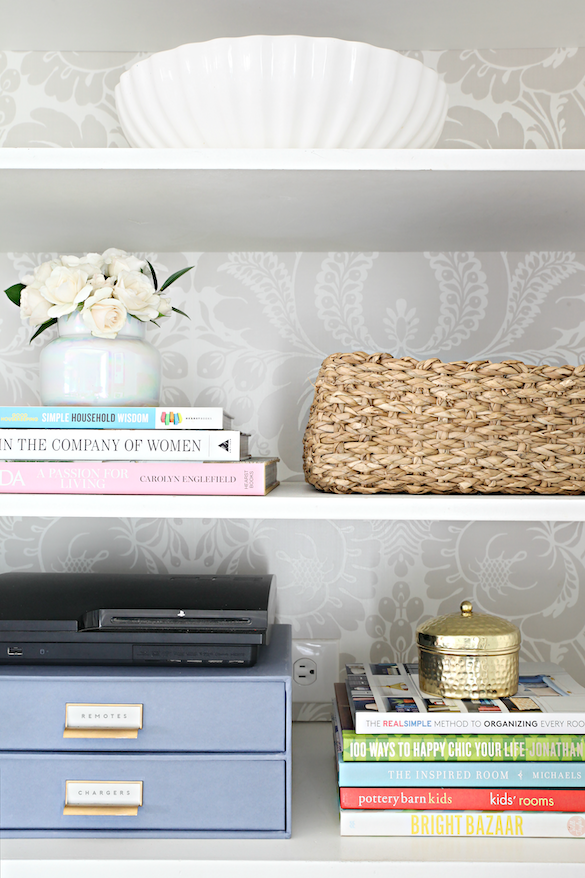
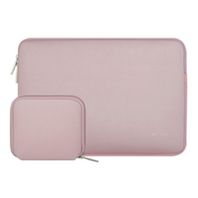
The storage flexibility that these boxes offer is similar to that of a shoebox, but they are pretty enough to double as display/shelving accessories. They completely conceal the clutter while keeping things accessible in a decorative way. These are especially ideal on open shelves/closets but are flexible enough to work just about anywhere.
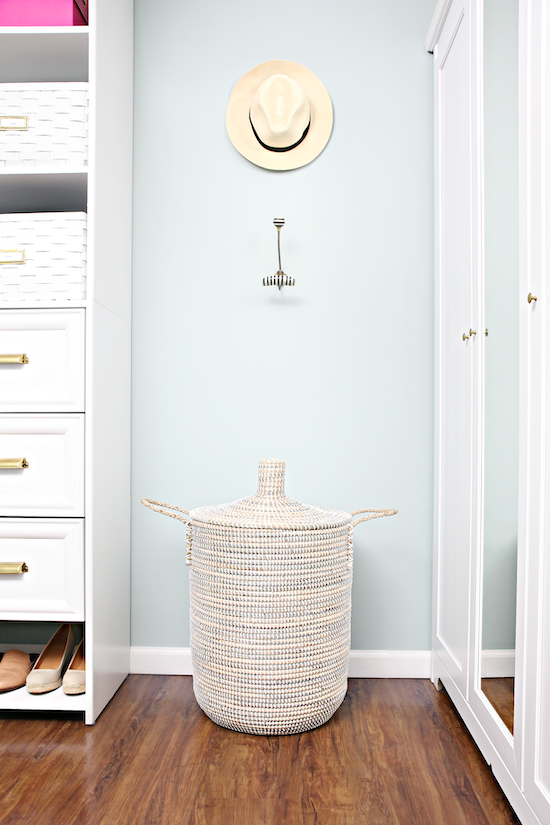
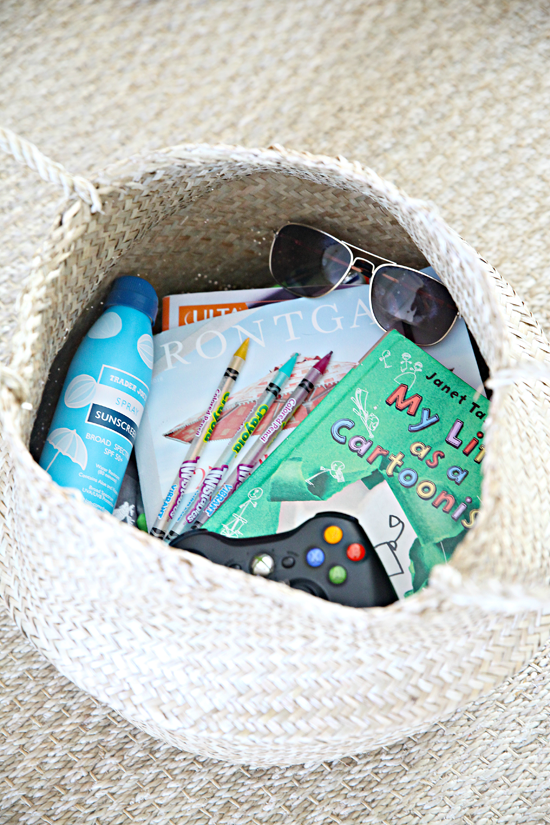
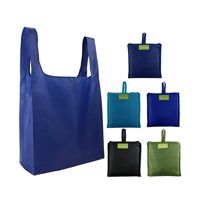
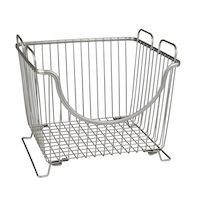
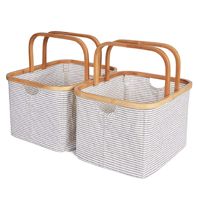
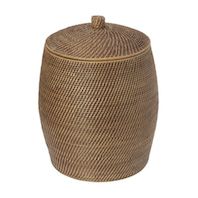
Another beautiful but practical piece of storage is an oversized lidded basket. Storage definitely has to be functional first, but when it is attractive? Such a bonus! Woven baskets are extremely timeless, so you can invest once and expect to keep the basket until the end of time. Especially oversized lidded options which look great in any room while fully concealing bulkier items.
Versatile Ways to Use Oversized Lidded Baskets:
Bedrooms: They make the perfect hamper as they trap any smells while concealing the visual laundry mess.
Living/Family Rooms: They are ideal for concealing bulky toys, blankets, and throw pillows.
Bathrooms: They work well for holding clean or dirty linens.
Entryways: They can conceal shoes, pet supplies, winter gear, or handbags.
Home Office: Decoratively stash away bulky supplies like camera gear/lighting, work totes, crafting tools, gift wrap supplies, and unsightly small electronics.
Why I Love These:
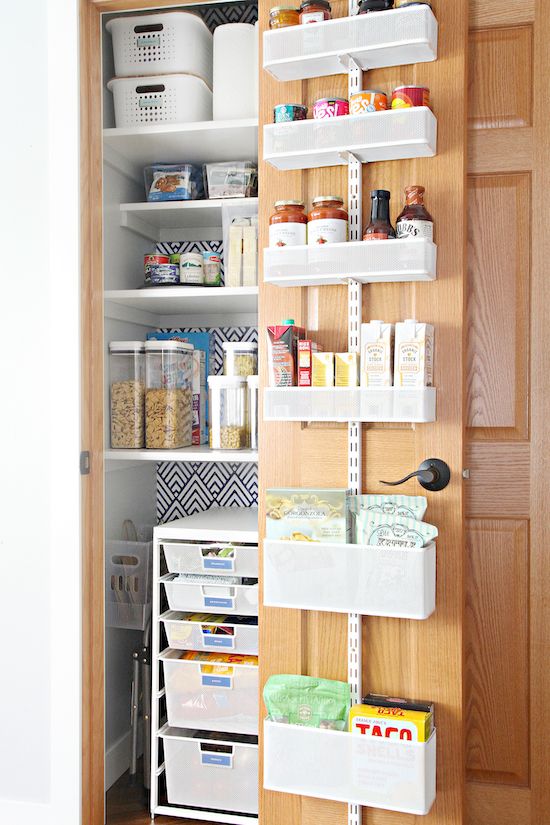
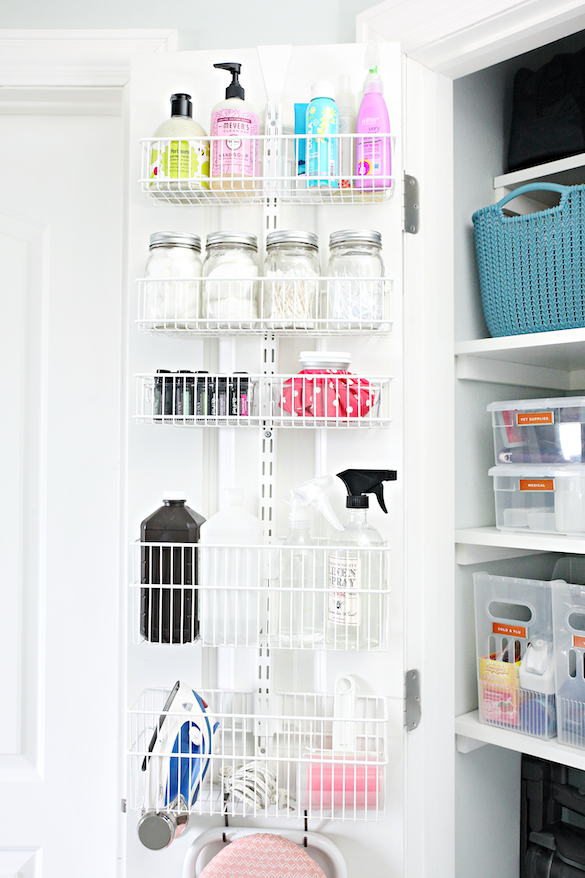
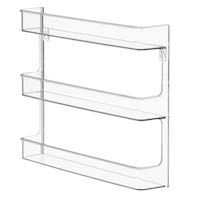
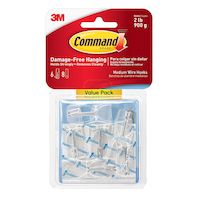
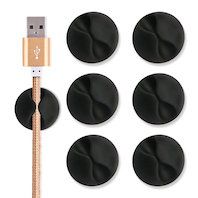
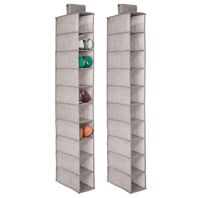
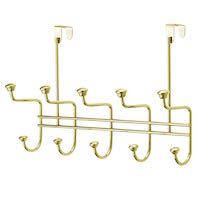
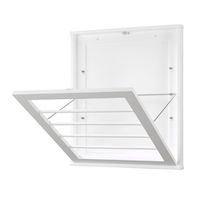
Anytime space can be maximized, I am an instant fan! Walls and doors are commonly underutilized potential, and door organizers (which can generally be installed on walls as well) create a lot of storage something out of nothing.
Versatile Ways to Use Door Organizers:
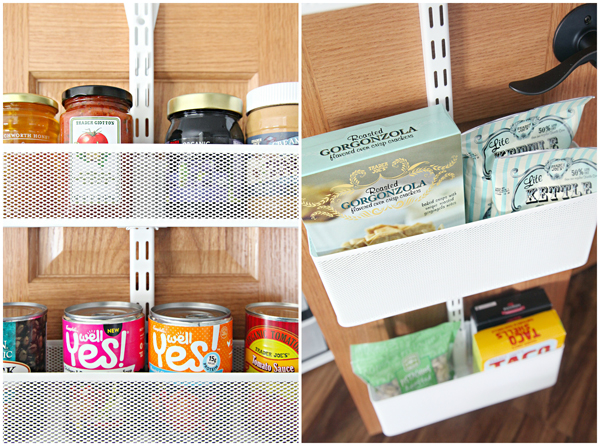
Kitchen: Pantry doors are eager to party with jars, cans, bottles, boxes, snacks, and spices.
Family/Media Room: Add a door organizer to manage technology components, controllers, cords, batteries, photo albums, small games, and media cases.
Entryway: Maximize the back of the door with storage for hats/mittens, shoes, handbags, pet supplies, keys, wallet, sunglasses, and even a mail dropzone.
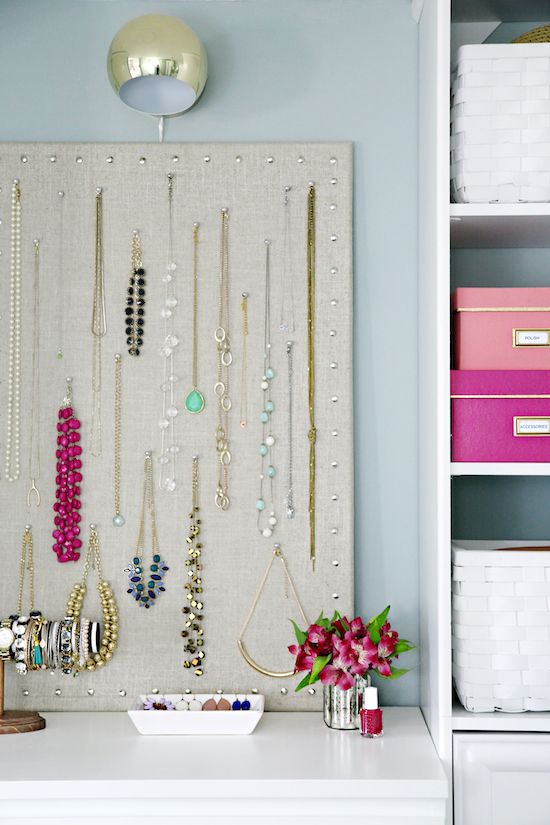
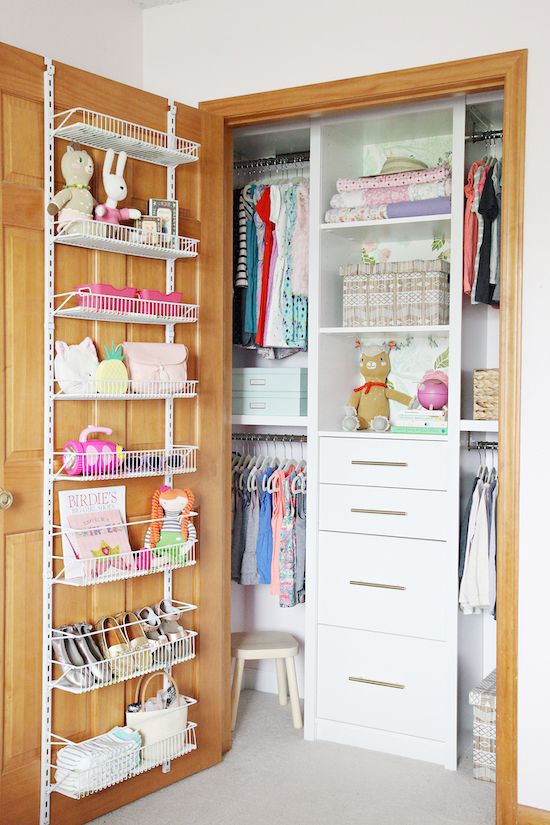
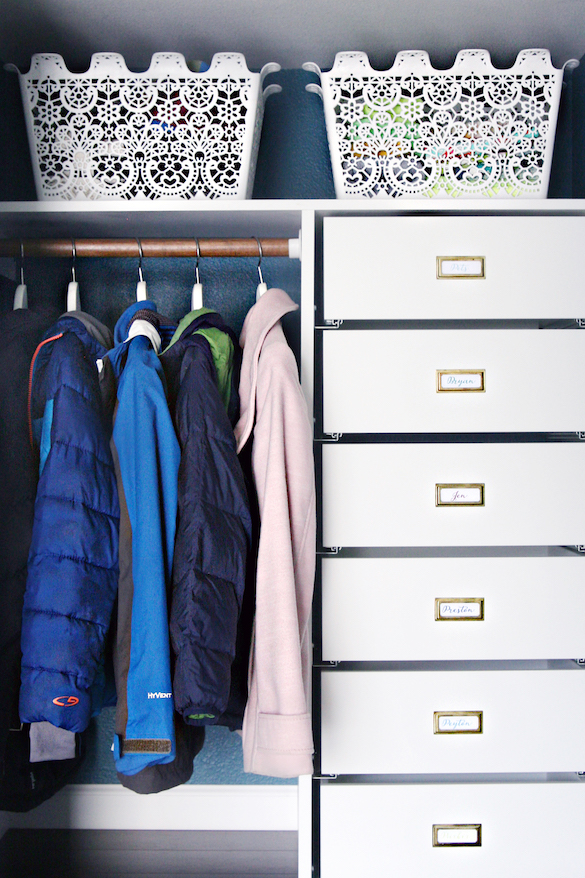
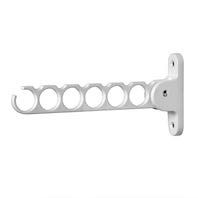
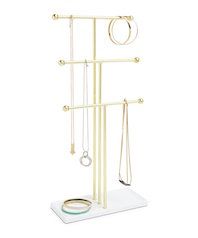
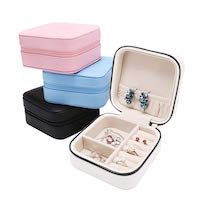
Bedrooms: Install a combination of hooks, baskets, and rails to organize shoes, accessories, jewelry, and hang outfits. Works for folks of all ages!
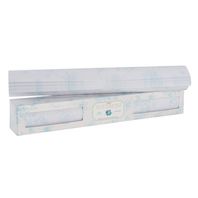
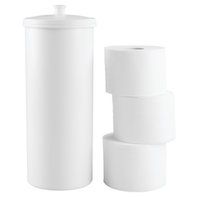
Bathroom: The back of the door is a great place to organize paper products, toiletries, washcloths/handtowels, and tub toys.
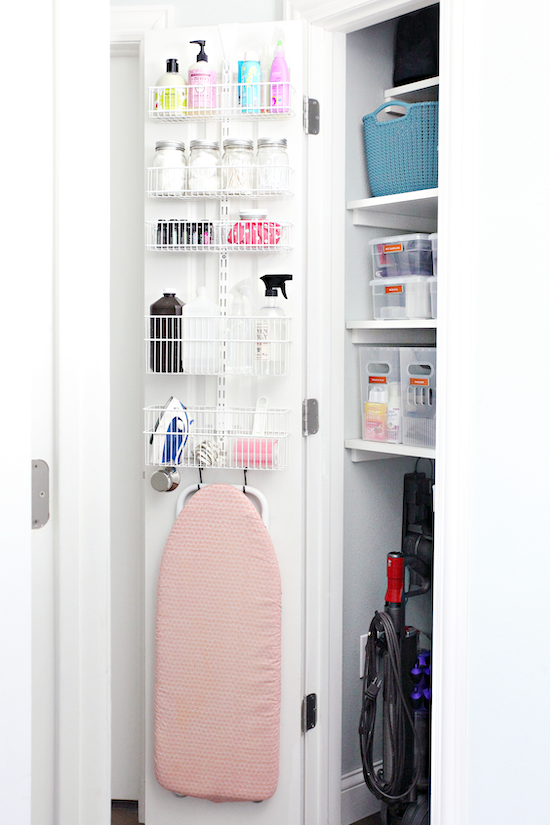
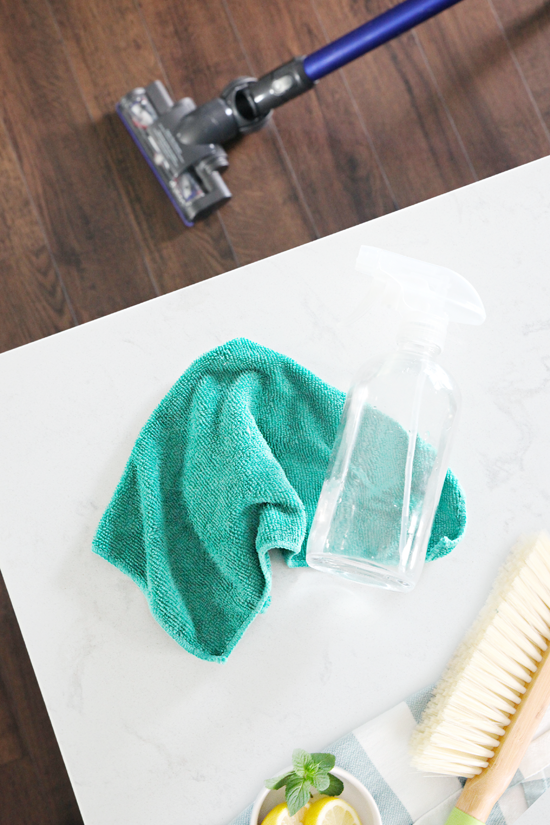
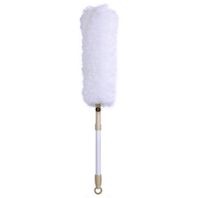
Laundry Room: Door organizers can be loaded with sponges, cleaners, stain removal products, paper products, rags, lint rollers, trash bags, light bulbs, and so much more!
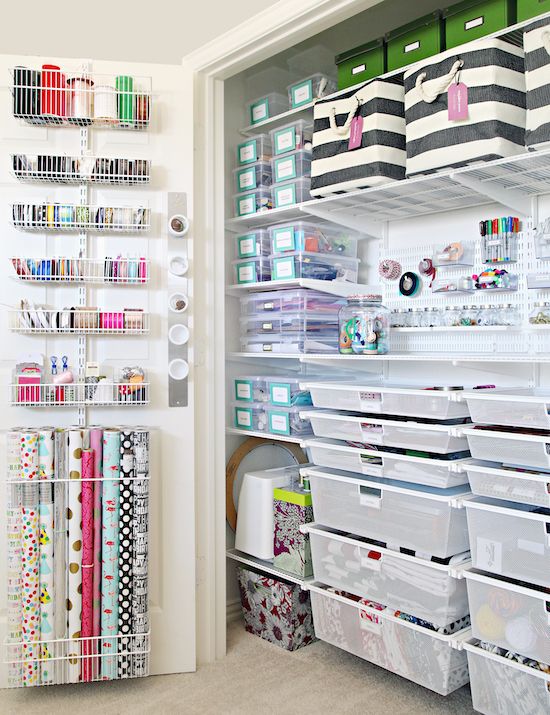
Storage Room: Project and paint supplies fit perfectly inside of door rack baskets. Keep all of your paintbrushes, deglossers/thinners, rollers, sanding blocks, caulk, rags, drop cloths, and spackle in an easy-to-gather-but-doesn't-take-up-a-lot-of-space location.
Home Office/Craft Room: Gift wrap organizers are all of the rage, and rightfully so! We have all scrambled to put together a last-minute gift, and having everything in a single location behind the door takes away a bit of that panic. Or maybe you don't have a full office and need to organize your supplies, ink cartridges, reams of paper, crafts, etc... in a compact way (or you just prefer not to see all of that).
What kind of organizer doesn't talk about good, old fashioned woven baskets? I have grown to prefer natural baskets far more than any other finish for a few reasons, many that have already been discussed above. Traditional and timeless? Check. Versatile? Check. Textural and beautiful? Check. I still have woven baskets from when we built our home almost 18 years ago because I continuously move them around and find new uses for them. They are made to last from natural material. And did I mention they will always look good? OK then.
I find myself consistently heading to the same places to seek out the best deals and the nicest looking baskets. You can rarely go wrong by heading to HomeGoods/Marshalls/TJMaxx in terms of sizing, variety, and prices. Target always has really substantial, beautiful options, but can be a little more expensive. Pottery Barn and Container Store also have really lovely solutions, so when they have good coupons or sales, I pounce. And of course, you can never go wrong with the BRANÄS baskets from IKEA. The smaller size fits on most cabinet and bookcase shelves, while the larger size is a wonderful match to many of the modular units sectioned by squared openings.
________________
I seemed to have taken a note from The Lorax because this post just kept biggering and biggering as I wrote it. I also love that the more images I sifted through, the more I saw many of these same products on repeat inside of drawers, closets, and cabinets. Each and every one of these storage solutions has been tested by me multiple times over the years, and receive my super-sized stamp of approval.
I also hope that this post was able to give you new ideas for reusing storage you may already have on hand. Versatile should always be the name of the storage game!
]]>IHeart Organizinghttp://www.blogger.com/profile/05084013302005288836noreply@blogger.com16tag:blogger.com,1999:blog-8864666002840991252.post-48807992336925270802019-05-06T15:28:00.001-05:002019-07-19T09:51:40.359-05:00Labeling 101: Quick & Easy Labeling Techniques The four-part series will include:
Gearing Up for Your Next Organizing Project with a FREE Printable Kit!
Need helping getting started or prioritizing where to begin? What is the plan of attack? What is currently working well and what isn't? What storage do you need? Trying to get rid of things, but finding it hard to decide what to keep and what to pass on?
I have put together a great printable kit to help you prioritize, sort, and navigate your way through your next organizing project(s), which includes a total of TEN free printables!
Instead of digging through years of my archives to find individual tips, I am going to compile the best of the best in a single, very informational post! It's going to be a whopper and a really great resource for projects of any size.
I have tried almost every type of label on the market, from vinyl to label makers to stickers and chalk markers, and they all have their place. But what are my tried and true favorites? What do I reach for with almost any project due to time, cost, practicality, and ease? I will be sharing three labeling techniques that haven't failed me yet, and that you won't need any fancy tools to utilize.
Practical, Everyday Storage Solutions!
If I have learned anything from raising three boys and organizing along the way, it is that storage can be expensive and that our needs are constantly evolving. Gone are the days where I purchase pretty bins and baskets to decorate with. Although I will always appreciate beautiful storage, it has to be versatile and it has to last! With that in mind, there are a few storage products that I have found that continuously work hard for me in a variety of situations, so they end up being the types of products I gravitate toward when working on any new projects. For the final post in the series, I am putting together the ultimate storage source list with tips and products that I have fallen in love with over the years.
So let's dive in with part three of the four-part series: Labeling 101: Quick & Easy Labeling Techniques.
I have always enjoyed the creative side of organizing, and labeling has really allowed me to play with a variety of craft tools, papers, vinyl, and embellishments. Labels can really add to the overall aesthetic of a project while being extremely useful at the same time!
There are times that I may decide to invest more time and energy into the creative process of an organizing project, but for the majority of my projects I have THREE tried and true labeling techniques.
However, before I dive in and talk about those methods, let's quickly go over the reasons behind WHY we label in the first place.
Labeling is definitely a personal preference that doesn't have a one-size-fits-all rule.
The overall purpose of labeling is to create easy identification. Generally speaking, it is best to label for safety purposes or to keep your household on the same page:
Label food containers to indicate a specific ingredient (or lack of ingredient) due to allergies and sensitivities.
Label food containers/leftovers with dates to prevent serving expired and spoiled consumables.
Label to indicate if an item is fragile or hazardous.
Label to identify the contents of a solid container or bin.
Label to differentiate multiple items that appear similar.
Label to help children identify where to find things/put things away (toys, snacks, clothing, etc...).
Label to identify the possession of items between household members.
Label to create consistency or understanding between household members.
Again, it really comes down to how your household functions and the dynamic of everyone who resides there. Labels can be extremely helpful but are not always necessary.
I use to label clear pantry containers and fridge containers with the contents, only to change the contents each week with my grocery shopping. Changing the labels became too much maintenance and we really weren't gaining much by labeling the obvious clear bin of crackers, as "crackers". So I stopped. Now, I quickly add the purchase date on the bottom of the container with a dry erase marker and call it good (unless it is allergy specific of course). If a label is causing extra work, then is it really adding value?
That said, we have benefitted greatly by labeling over the years. Having a household of five, labels have really made it easy for all of us to collectively pick-up and get things back to their proper homes, and also identify our personal belongings to avoid mix-ups. And by labeling cleaners, drawers, bin contents, etc..., I avoid a lot of questions from my crew.
OK, so now you are ready to start labeling, but what are the best methods? Here are three that haven't failed me yet!
LABEL MAKER
This one is obvious but also the most important. I used this label maker for many, many years, but after a few drops, it broke and I was left scrambling to replace it. It doesn't seem to be available any longer (because the prices on it have since skyrocketed), so I shed some tears and set out to find something similar. I am not too picky, I just wanted something that was inexpensive, had a couple font options, offered clear labeling tape, and also offered inexpensive replacement cartridges. I also appreciate something battery operated/portable so that I can use it quickly and easily without any additional accessories.
I decided on this Brother P-Touch option, I found it for under $20 and the value is definitely there! I have been liking it so far, it checked all of my boxes and I really appreciate that it is an extremely flexible and affordable option. I was also able to find some off-brand tape options on Amazon, and they have also worked out really great! (I purchased these white on clear and these black on clear cartridges). I find this label maker to be really user-friendly, the font options are OK, it prints quick, and the labels stick well yet are also removable. All around a good, go-to option.
Label makers are the clear choice for almost any organizing project because they are quick to use, easy to create, and can adhere to just about anything. I have also found that most label tapes are semi-waterproof, so they can take light cleanings and handle being in kitchen/bathroom settings. Here are a few ways I use my label maker around our home:
Labeling Cords: Wrap around the base of the cord to identify what gadget/person the cord belongs to.
Labeling Cleaning Bottles: Because I make most of our cleaners, I use my label maker to identify the type of cleaner and the general purpose. And because they are semi-waterproof, they can hold up to frequent use and refills.
Labeling Canisters: Perfect for labeling baking powders and coffee beans/add-ins, as well as specialty food items.
Labeling Shelves/Drawers: This has helped my boys tremendously in putting things back where they belong and keeping some general order around our home.
Travel Toiletries: Label tape wraps perfectly around those small, clear travel bottles that constantly need refilling. And because face wash looks like shampoo and lotion looks like conditioner... well, you know how that could result in a bit of a morning disaster.
Spice Jars: If you transfer your spices to jars, label tape is a great way to identify the different varieties.
File Folders: For file folders that I reuse for the same purpose over and over, I love the look of label tape over my handwriting any day.
As you can see, I gravitate towards the clear label tape because I find that it gives a very seamless look. For some reason, the white label tape reminds me of daycares, office spaces, classrooms, and Dr. offices, which is not necessarily a bad thing, it just feels more commercial than personal.
ADHESIVE LABEL HOLDERS
There are quite a few times when I want to add labels, but I am looking for a more polished, long term effect. This is generally in spaces that we see and use often, or for items that are typically left out in the open. In these situations, I use an adhesive label holder, and then just print out the actual label to slip inside. The holder just sticks right to the surface, making it another fairly quick and easy labeling solution.
Just like label tape, these label holders are adhesive and fairly versatile. I typically use them on bins and boxes that either have a rougher surface or in situations that label tape would get lost due to the shape and size of the container (because you can print your own labels, you can design the color/font to be sure they really stand out). These work well on the infamous Target Y-Weave baskets, common rattan baskets, as well as on canvas style bins. If you ever find the stick is fading, a little hot glue can give the holder new life. The narrow options also work really nicely on the face of shelves.
CLIP-ON LABEL HOLDERS
Last but certainly not least, clip-on label holders are becoming a new favorite! They are a really great size which makes them a perfect solution for labeling larger bins and baskets. They couldn't be easier to use, straight from the package they literally just clip right to the container. For bins receiving a lot of use (think toys, linen closet, tool storage, etc...), these are big winners because they are really substantial and won't fall off easily. Yet, they are completely reusable/not at all permanent.
These holders are especially great for large baskets of children's toys, as the surface offers enough space to print an entire image of the product inside for easy identification. Because our kids are older and we don't have many toy bins any longer, I like to use these on woven baskets in cabinets and closets, on canvas bins, and for our tool bins in our storage room.
_______________
Now that I have covered my top three favorite ways to label, I thought I would chat really quickly about vinyl! I still receive a lot of questions on oldie posts about my vinyl labels, which I would create at home and cut with my Silhouette craft machine. I will always love the look that making these labels offer, but I find myself reaching for the machine less and less due to the mess it makes and time constraints. There will always be a place in my heart for vinyl lettering, I especially appreciate that it is extremely durable, waterproof, and can look really, really sharp. Below are a few examples of how I have used vinyl labels around our home:
I wanted to share one last time-saving labeling technique in the kitchen. Dry erase/chalk markers! I can use them to write on our clear plastic and glass containers, and then erase the writing if the contents change. I usually use markers to add dates to leftovers or dry goods to show when the product was purchased, and also call out items that may have specific food sensitivity information. It gets the job done and just wipes away each time we change out the foods inside.
Only one more post remains in this super-sized series! Last up we are talking all things storage!
]]>IHeart Organizinghttp://www.blogger.com/profile/05084013302005288836noreply@blogger.com28tag:blogger.com,1999:blog-8864666002840991252.post-36953022805714361982019-04-18T12:52:00.002-05:002019-09-30T15:30:04.803-05:00The Best of the Best: My Top Organizing Tips! The four-part series will include:
Gearing Up for Your Next Organizing Project with a FREE Printable Kit!
Need helping getting started or prioritizing where to begin? What is the plan of attack? What is currently working well and what isn't? What storage do you need? Trying to get rid of things, but finding it hard to decide what to keep and what to pass on?
I have put together a great printable kit to help you prioritize, sort, and navigate your way through your next organizing project(s), which includes a total of TEN free printables!
Instead of digging through years of my archives to find individual tips, I am going to compile the best of the best in a single, very informational post! It's going to be a whopper and a really great resource for projects of any size.
Labeling 101: Quick & Easy Labeling Techniques
I have tried almost every type of label on the market, from vinyl to label makers to stickers and chalk markers, and they all have their place. But what are my tried and true favorites? What do I reach for with almost any project due to time, cost, practicality, and ease? I will be sharing three labeling techniques that haven't failed me yet, and that you won't need any fancy tools to utilize.
Practical, Everyday Storage Solutions!
If I have learned anything from raising three boys and organizing along the way, it is that storage can be expensive and that our needs are constantly evolving. Gone are the days where I purchase pretty bins and baskets to decorate with. Although I will always appreciate beautiful storage, it has to be versatile and it has to last! With that in mind, there are a few storage products that I have found that continuously work hard for me in a variety of situations, so they end up being the types of products I gravitate toward when working on any new projects. For the final post in the series, I am putting together the ultimate storage source list with tips and products that I have fallen in love with over the years.
So let's dive in with part two of the four-part series: My Top Organizing Tips!
Below you will find 20 Tips and Tricks that I have learned over the year and have been crucial in setting up our home, creating more family time (what it's really all about), saving money and sanity, and even encouraging better habits by all of us.
(I touched on a few of these tips in the printable post, however, they are important enough that they are worthy of the repetition).
UNDERSTAND YOUR "WHY"
Before you start an organizing project, it is a really good idea to reiterate why the project is so important to you. Everyone has their own "why", but I encourage you to do it because it will make your life easier, it will save you time, it will bring you joy, it will reduce your stress, save you money, and because you truly understand the positivity that results from organizing. Avoid striving for perfection, comparison traps, or thinking that organizing will ultimately solve all of life's messy problems. Stay intentional and do what is best for you to get the biggest reward for the time that you invest.
In the image above you can see that we have invested in organizing our fridge, and do our best to maintain it on a weekly basis. Our "why" is that we are able to promote healthier and easier snacking, eat more meals at home, waste less food (and money), etc....
GET MOTIVATED
Sometimes I think getting yourself motivated can be the hardest part! Just getting started can be really overwhelming. And knowing where to begin can be even more daunting. You may feel like you have plenty of areas you want to streamline, but my first tip is just to take it one small project at a time. My recent printable post offers tools to help prioritize where to begin, and to summarize I typically recommend ranking your projects in terms of what is costing you the most time, money, and sanity. But also start small just to get the momentum going. Once you finish one project, you should feel some natural endorphins and also reap some immediate benefits.
It is also important to know what motivates YOU! There are definitely times that I look at a mess and feel overwhelmed, so I personally find a way to put a creative twist on it. Getting to the creative side of the project feels like a fun reward to me (making labels, lining drawers, wallpapering, painting, etc...). The excitement I feel for the fun part of the project is what keeps me going during the messier moments.
Are you wanting to get into a good book? Allow yourself to listen to a recording while you are sorting. Behind on your favorite television season? Sorting and organizing is a great time to binge watch something. Try researching some inspiration and #goals to get yourself visually stimulated. We know why organizing is so important, but sometimes that isn't enough, so look for your own ways to get jazzed up and excited about it!
Most importantly, sometimes you just have to force yourself to start. When I am feeling sluggish or really dreading a project, I try to just push myself to take the first step to get it started. I am often surprised how quickly I can get invested, and that it is never as bad as it seems. You just need to get the blood flowing and adrenaline running. Do a little cardio, turn on some good music, and move your body... it is all SO helpful and really important.
CREATE A SMALL ORGANIZING TOOL KIT
I find myself reaching for a few common items on a frequent basis, so I toss a few of these things into a small, portable bin to keep handy while working on an organizing project:
Phone: I use my phone for time management and listening to music/podcasts.
Headphones: I prefer to utilize headphones while sorting to keep me focussed and drown out distractions.
Sorting Signs: These are great for identifying specific sorting piles (download free here). I also like to keep a couple of empty cardboard boxes to pair with the signs and keep the sorting piles corralled and portable.
Cleaner: Spray cleaner/wipes are key to giving yourself a clean slate. I always like to wipe down all of the surfaces of the area I am clearing out, as well as items that haven't seen the light of day for some time.
Rubber Bands: Rubber bands work well for bundling/corralling small items like cords, pens/pencils, papers, etc...
Zip Bags: Just like rubber bands, zip-locking baggies also inexpensively corral and categorize smaller items. I find them especially useful when organizing craft supplies and small tools/hardware.
Scissors: Scissors are helpful for snipping loose strings on linens and garments, opening packages and boxes, and cutting ties/bands.
Notepad, Flags, Pen, and Sharpie: The notepad and flags are really great for jotting down ideas that arise during sorting, or for making a quick list of labels that need to be created (the sticky tags can also act as temporary labels mid-project). The pen is for note taking, while the Sharpie is nice for labeling boxes and baggies.
Label Maker: I am going to dive deeper into my favorite label making tools in my next post, but having a basic label maker on hand is a household essential in my book.
BLANK SLATE
As you begin, I recommend removing everything from the area you are focussing on (cabinet, drawer, closet, fridge, etc...) to give yourself a clean and blank slate. There are a few benefits in doing this key exercise:
It allows you to give the area a good cleaning.
It requires you to touch everything before putting it back.
It encourages you to re-think how you are setting up/using the space.
ORGANIZE BY CATEGORY
This tip comes in two sizes; small and large!
Starting with the bigger picture, try organizing and sorting your belongings based on categories. This can be a little challenging to wrap your mind around, but if you are sorting items in a bathroom, then bring all of the items from ALL of your bathrooms together and sort/pare it all down accordingly. This gives you a bigger picture of what you already have, what should live where, what can be condensed, what you need to add, etc... This concept applies to linens, clothing and outerwear, kitchen items, office supplies, medications/first aid, tools, etc...
The same idea should be used while you are loading up your cupboards, drawers, and closets. You will want to create categories of similar item types and group them together in the space. This will help you (and others) to recognize and locate the items quickly and easily.
ZONING LAWS
Whenever possible, it is always better to keep specific item types in as few places as possible around your home, which will ultimately cut down on the time it takes to hunt something down. For example, you may keep charging cables in your living room, entryway, automobiles, bedrooms, etc... When the time comes for needing a charger, suddenly you are looking in multiple places. In that situation, I would recommend creating a zone in your home where all of your tech lives, which would not only include charging cords, but may also include batteries, tech cleaners, keyboards/mice, media, remotes, etc... With everything within that category stored in one specific place, everyone should naturally fall into the habit of checking that one place when they need something tech related. We are generally groomed to practice this concept in the kitchen (dry items go in a pantry, silverware goes in a utensil drawer, etc...), but the same idea should be implemented all throughout the entire house.
Zones can be created in bookcases, cabinets, drawers, closets, nooks, etc... It is just used as a general term for an area in your home where everything with a similar responsibility is stored.
GIVE EVERYTHING A PROPER HOME
Bottom line, clutter happens when things don't have a home, or when we aren't disciplined enough to put things away. While organizing, everything you sort/touch needs to be assigned a proper home. When you run out of space, that is when it is time to purge. And when something new comes in, it is a really good rule of thumb to let something go right away. It is a good idea to know how and where you are going to store your belongings prior to adding them to your shopping cart.
If you notice piles/items consistently out of place, first assign it to one of your home zones. Go from there to find a way to make it fit. Paper piles? Give yourself an inbox to corral mail until bill paying day. Returns need to be done? Put a basket in your coat closet or car to hold those returns until you are out running errands. At the end of the day, if an item doesn't have a proper home, it will cause a trickle effect of frustrations.
MORE ITEMS, MORE PROBLEMS
I have never been a minimalist, but I have seen first hand the problems that come from owning too many things. Not only do you run the risk of creating piles and clutter (which can ultimately lead to emotional distress), you also carry the responsibility of having to maintain every last item you own. That means keeping it clean and fixing it if it becomes worn out. When it comes to linens and clothing, if you have multiple options, you may be less likely to keep up on washing duties. You may also spend more time contemplating what to wear each day. More items require more space to store those items, and space usually equates to dollars. Dollars in home size, containers, closet systems, etc...
SHOULD IT STAY OR SHOULD IT GO?
The sorting process can really be daunting and be the one act that slows us down while organizing. We become emotionally and financially invested in our belongings. Eliminating our items can overwhelm us and even deter us from finishing our projects.
Last week I shared a list of sorting questions that can be really helpful in aiding you through the process of letting things go (download free here). I like to keep it laminated and use it as a tool to help myself and others stay on track during the paring down process.
The biggest roadblock is typically those sentimental items; belongings we received from a special someone or tied to specific memories. A few tips for handling those situations:
I am typically pretty good about understanding the benefits of paring down and letting things go. But I am also a sentimentalist. I frequently tell myself that items do not equal memories, that memories live in my mind and heart. However, items can draw emotion and connection to moments in our lives. These days we are really lucky that we have the technology to help us retain those items without having to necessarily hold on to every last birthday card. Sometimes I think tech is taking over the world, and I miss the days of paper book pages and magazines, face to face conversations, and tangible items that are real and nostalgic. But tech can also be a blessing. We now have the ability to photograph our belongings, so when they are passed on we still have some sort of visual record of them. We can also scan our children's artwork, letters from our pen pals, and old photographs of our grandparents. Take advantage of technology and use it to store your memories digitally vs. in boxes around your home.
Assign each member of the household a special box for memorabilia. These boxes could be considered a bit of a time capsule or treasure chest of sorts. It allows us to hold on to the most special of items but also encourages us to keep things pared down to a single container.
Collections are best displayed in a grouping vs. spread out around the home. If you (or someone you love) collects specific items, group the best of the best on shelves or in a display cabinet. This creates more of a statement and also pays tribute to the passion while reducing the amount of clutter spread throughout.
Which brings me to my next point, what good are your memories and belongings doing living in boxes in your basement or attic? Why not get them out and enjoy them, or pass them along to someone that will. Put old photos into an album or frame them on the walls. Display grandma's china or grandpa's camera collection on your shelves. Create shadow boxes of children's clothing, artwork, or clay creations. Make a blanket out of old textiles. Pay tribute to your family history in tasteful and creative ways.
Finally, if you just can't decide, I recommend using a bin or box as a holding cell. Pack up the items you just aren't sure about, put the box away on a shelf or in storage, and set a reminder on your phone or calendar for three months down the road. In that time, if you have not reached for or thought about those items, then you will probably be OK letting them go for good. Don't use this as a crutch for everything, but it is a useful way to really decide before doing something you might regret. This works especially well when sorting down your child's toys that they are insistent they can't live without.
A TEAM EFFORT
If you are organizing for more than just yourself, then make the process about everyone involved. It might be as simple as brainstorming and asking for suggestions, but I also recommend getting the individual(s) active with the sorting, moving, cleaning, and organizing. This will get them invested in the process and increase the success rate of maintaining things going forward.
Also, be sure to consider everyone's existing habits when setting up your systems. If your spouse has a habit of dropping their change, keys, and wallet in the same place each day, then maybe consider adding a decorative tray in that exact spot to corral it and make it look more intentional. Sometimes it is easier to create a solution based on the habit than it is to change the habit itself.
In the image above I worked with my son to organize his work area in a way that caters to his study style. He needs a larger, empty surface to spread out on, so giving him wall organization allows him to keep his desk clear. He does best when there are fewer distractions so we kept things fairly basic.
KEEP IT SIMPLE
The easier it is to put things away, the more likely we are to do it! One of my most basic tips is to use open-top bins and baskets as often as possible. If you have to remove a lid or move an item to put something back, then you may be less inclined to keep up on it. Only stack lidded bins that are not utilized frequently. If stacking is ultimately the best solution to make the most of a space, consider using pull-out drawers instead of lidded containers, which will allow you to quickly access (and put away) the contents inside.
You can see more of how I encouraged this concept throughout this entire client kitchen here.
FILING ISN'T JUST FOR PAPERS
I file anything and everything I can. When I open a drawer or closet door, I don't want to have to move a pile of items to see or access something at the bottom. Filing items will allow you to better see everything at a glance, and quickly grab from the front, middle or back. Not only can you file clothing such as sweaters, jeans, t-shirts, etc... But you can also file linens, movies, baking sheets, cleaning supplies, foods... The sky is the limit!
DIVIDE AND CONQUER
It may seem like an organizing cliche, but add dividers to your drawers whenever possible. There are a few different benefits for doing this, but the two primary reasons are:
Dividers hold your items in place and prevent tipping or shifting when the drawers are opened and closed, and that means less rummaging and searching.
Dividers encourage you to stop and think before stuffing random things away. If the contents are organized and divided, then it is harder to stash and dash. The dividers should naturally aid you in keeping your drawers tidier.
Space is typically maximized when you can make the most from floor to ceiling. Do this by adding storage to walls via pegboard or wall organizers, utilizing tall and narrow bookshelves, and taking advantage of the backs of cabinets and doors.
Your organizing solution does not have to be traditional, or what everyone else typically does. There is so much creativity in the world, who is to say what is normal and what isn't? Organize based on your routine, your lifestyle, your home, your schedule, and your style. What works for me might not work for you, and that is OK! Some of the best ideas and trends are formed when people go down their own path.
An example of this is the family closet concept. Typically speaking, folks have a dresser/closet in their own bedroom. However, I have seen families create a community closet used to store the clothing for the entire family in a single place. This cuts down on the time needed to do and put the laundry away, streamlines the process of getting multiple kids ready for school in the morning, and offers quick packing and planning for vacations. It may not be the way most families do it, but it doesn't make it wrong. In fact, if it makes your life easier, then it is absolutely RIGHT!
In the image above you can see how we set up a small document retention area in our storage room. Not typical at all, but it offered us a place to store our unsightly and bulky items like our paper shredder and waterproof/fireproof document safe.
MAXIMIZE YOUR CLOSETS
Whenever possible, it is best to look beyond the stock shelf and hanging rod that is originally installed in most closets. Although I always appreciate a solid floor to ceiling closet system, I know they aren't always in the budget. Great closets can still be maximized by adding in a dresser or shoe rack below the hanging items, multiplying shelving with the help of a bookcase, adding a second rod halfway down the closet to double hanging space, etc... There are a lot of wonderful mix-and-match closet organizers for great prices at most department and home stores, and they can easily be paired with existing storage pieces to really maximize your overall closet functionality.
Labeling is another personal preference that doesn't have a one size fits all rule.
The overall purpose of labeling is to create identification. Generally speaking, it is best to label for safety purposes or to keep your household on the same page.
Label food containers to indicate a specific ingredient (or lack of ingredient) due to allergies and sensitivities.
Label food containers/leftovers with dates to prevent serving expired and spoiled eats.
Label to indicate if an item is fragile or hazardous.
Label to identify the contents of a solid container or bin.
Label to differentiate multiple items that appear similar.
Label to help children identify where to find things/put things away (toys, snacks, clothing, etc...).
Label to identify the possession of items between household members.
Label to create consistency or understanding between household members.
Again, it really comes down to how your household functions and the dynamic of everyone who resides there. Labels can be extremely helpful but are not always necessary.
The next post in this series is all about my favorite labeling tools, but this label maker can take on just about any labeling task. If you are looking to label something temporarily, consider dry-erase options.
CONTAIN YOUR EXCITEMENT!
The act of organizing is FREE my friends, because organization happens naturally when you pare down and categorize.
But we would all be silly to think that storage containers are not a beneficial part of the organizing process! There are endless benefits to utilizing dividers, bins, and baskets to separate and store our belongings, and they ultimately encourage us to maintain our systems while also providing accessibility and space maximizing advantages.
There are quite a few ways to save money on storage, but the biggest is to just wait. Once you have gone through the sorting, purging, and categorizing process, I encourage you to live with it for a bit before investing in containers. This ensures you like what you have done so far, and reduces the chances that it will be changed out in the upcoming weeks/months.
Also, you may realize that you don't need as many containers as you initially thought, and you might even find some extra storage around your home as you continue to check projects off of your list.
Bonus Tip: Once you do purchase your organizers, don't remove the tag/label right away. Tuck the receipt inside and take the storage for a spin before fully committing. This makes it easier to return if you find it isn't working out as originally planned. Deep pantry organizing tips can be found here.
MAKE ADJUSTMENTS
I have met quite a few organizers in my day, and I still don't know a single person who gets it right the first time, every time. So if you find something isn't working out, I encourage you to be forgiving, stay positive, and try again. Also, remember that your needs are constantly evolving and changing. That means that your systems and home need to change with you. Organizing is a process and a journey and never a one-and-done. And if you feel like you have exhausted all options, don't be scared to ask for help and advice from friends, family members, and experts. Where there is a will, there is a way!
"A person who never made a mistake never tried anything new!" - Albert Einstein
In the image above you can see how our awkward coat closet went through multiple phases to finally get us to a place of easy maintenance and organization.
Now that you have put in all of the energy organizing that closet or setting up a new system, you are halfway there! Only halfway you say!? What's left!?
The key to any successful organizing project is to get into the habit of using it and maintaining it. An inbox is not going to keep your documents organized if you still toss them on the counter, or if you don't get in the habit of clearing it out on a frequent basis.
No matter what, keeping a neat home takes a certain level of discipline. This is why some of the tips above are so important; especially a less-is-more attitude and keeping your storage solutions as simple as possible. Dishes, clothes, and papers are not going to put themselves away, but once you get your systems set up and give everything a proper home, tidying up will become easier and easier.
It truly takes time to create new, healthy habits. And it can be especially challenging to encourage positive changes out of others. We have found this Habit Tracker to be extremely helpful in maintaining our systems and encouraging better habits in our household. A few ways we have used it is for the boys to put their belongings away after school, for my husband to get his clothes into his hamper each day, and for me to keep our bathroom counter clear of beauty products. The goal is to begin doing these things naturally as part of our routines, and the tracker is a really wonderful way for us to stay motivated and accountable.
_______________
WOW! Talk about A LOT of information! Obviously, this is a subject that I am passionate about. This post started out as 8 top tips, then went to 15, and ended at 20! And I probably could keep going!
And I have even more to come! 'Stick' around because next up I am chatting all about labeling and my no-fail labeling products!
]]>IHeart Organizinghttp://www.blogger.com/profile/05084013302005288836noreply@blogger.com20tag:blogger.com,1999:blog-8864666002840991252.post-60610876865865077512019-04-02T05:00:00.000-05:002019-05-06T20:59:06.461-05:00Gearing Up for Your Next Organizing Project with a FREE Printable Kit! The four-part series will include:
Gearing Up for Your Next Organizing Project with a FREE Printable Kit!
Need helping getting started or prioritizing where to begin? What is the plan of attack? What is currently working well and what isn't? What storage do you need? Trying to get rid of things, but finding it hard to decide what to keep and what to pass on?
I have put together a great printable kit to help you prioritize, sort, and navigate your way through your next organizing project(s), which includes a total of TEN free printables!
My Top Organizing Tips!
Instead of digging through years of my archives to find individual tips, I am going to compile the best of the best in a single, very informational post! It's going to be a whopper and a really great resource for projects of any size.
Labeling 101: Quick & Easy Labeling Techniques
I have tried almost every type of label on the market, from vinyl to label makers to stickers and chalk markers, and they all have their place. But what are my tried and true favorites? What do I reach for with almost any project due to time, cost, practicality, and ease? I will be sharing three labeling techniques that haven't failed me yet, and that you won't need any fancy tools to utilize.
Practical, Everyday Storage Solutions!
If I have learned anything from raising three boys and organizing along the way, it is that storage can be expensive and that our needs are constantly evolving. Gone are the days where I purchase pretty bins and baskets to decorate with. Although I will always appreciate beautiful storage, it has to be versatile and it has to last! With that in mind, there are a few storage products that I have found that continuously work hard for me in a variety of situations, so they end up being the types of products I gravitate toward when working on any new projects. For the final post in the series, I am putting together the ultimate storage source list with tips and products that I have fallen in love with over the years.
So let's dive in with the first of the four-part series: Gearing Up for Your Next Organizing Project with a Free Printable Kit!
Today I have for you all TEN free printables!
Now, you don't have to use all of these printables for a single organizing project. They all serve different purposes and can be helpful to guide and encourage in a variety of ways. They really emulate my thought process when working on projects of any scale, and serve as really wonderful tools to keep organizing projects organized!
Below you will find a link to each printable as well as a brief explanation on how to utilize each one.
The Daily Schedule printable is typically my key to prioritization when I am feeling overwhelmed and not quite sure where to begin. It also really helps me when I need to reconsider how I am using the hours throughout my day.
It can be really eye-opening to spend a single day and track how your time is being utilized. It may shed light as to how much time is being wasted on social media, or simply bring attention to parts of the day that are just too chaotic.
H O W T O U S E T H I S P R I N T A B L E :
From sun up to sun down, track the tasks you are doing throughout the day, as well as the specific details about what is working and what is not. Tasks could include exercising, making kid's lunches, getting ready in the morning, homework hour, dinner, clean-up, bill paying, etc... Are you noticing that certain times of the day cause you frustration? Do some tasks take longer than they should? Are there ways to streamline specific tasks so they are more manageable? This is a really great way to get a visual of a typical day and provide some insight on what tasks could use some organizational attention.
My biggest tip when trying to figure out where to begin and prioritizing your projects is to focus on your day-to-day routine FIRST. The storage room can wait, it is important to get your days running smoothly before you can invest time on the outlying projects.
H O W T O U S E T H I S P R I N T A B L E :
Looking at your day and tasks listed in the first printable, select the top five areas of your day that could use improvement. It is extremely important to factor in what those specific tasks are costing you in terms of time, money, and sanity. For example, if you are finding that you are unhappy with the process of lunch making for yourself or your kids each day, you can probably equate it to costing you money in wasted food or eating lunches out, and costing you time in the act of preparing the lunches each day. The solution may be creating a list of favorite lunch items, setting up a lunch making station in the pantry and fridge, and spending time making lunches in bulk on a Sunday afternoon. Prioritize your projects by the highest cost to the least (cost equating to time, money, and sanity). List out the problem as well as possible solutions. This printable is a great way to encourage brainstorming and to give yourself a starting point.
Homes work best when they are set up into functioning "zones". That means categorizing specific closets, drawers, nooks, etc... into a specific zone and then detailing out what items make the most sense to be stored there.
H O W T O U S E T H I S P R I N T A B L E :
In the first field, list a specific location or zone in your home. For example, an entryway closet. Then, give that location a general category in terms of how it should function. An entryway closet would generally function as a place to store outerwear and shoes, but may also act as a hub for cleaning and pet supplies. In the belongings field, list out the specific items that should be stored in that zone so that they match up with the working category. This is a very eye-opening exercise and really ensures that items are only being stored where they make the most sense vs. being scattered in multiple locations throughout the house.
Now that you have a specific project in mind, it's time to plan it out! This may not apply to smaller organizing tasks, such as a single drawer or your handbag, but it really comes in handy for those larger scale projects.
H O W T O U S E T H I S P R I N T A B L E :
Utilize the top portion of the form to recognize and detail the specifics of what was already working, as well as what needs to be addressed by the end of the project. The bottom portion of the form is helpful for keeping track of specific steps or tasks to get from start to finish, as well as any products or supplies that need to be purchased along the way.
Sometimes it can be helpful to draw your drawer or closet to scale. I have been known to sketch out closets, pantries, and drawers ahead of time to be sure all of my storage needs fit and make sense. This exercise allows me to maximize the area that I am organizing and helps me to visualize the end goal.
H O W T O U S E T H I S P R I N T A B L E :
Assign a specific measurement to each square and sketch up a general plan for your project. Grid out drawer organizers or design a full closet installation. The graphing area is useful for creating the outlines of bins and baskets to ensure that you get a nice fit and make the most of the available space.
Do you have a really large project that requires a lot of new storage? You can keep track of it all with this helpful storage printable!
H O W T O U S E T H I S P R I N T A B L E :
Larger closets and whole room makeovers require a variety of storage options for various belongings and item types. This printable allows you to keep track of the different categories, assign the ideal container, source the storage from a variety of locations, and most importantly, keep track of all of the dimensions. For example, you are organizing a walk-in closet. Item categories might be handbags, jewelry, dress shoes, sweaters, etc... Storage types would then be shelf dividers for the handbags, drawer organizers for the jewelry, shoe boxes for the dress shoes, and canvas boxes for the sweaters. In the form fields, keep track of the sources, quantities for each, and total available space/dimensions for each container type. In the end, you will have yourself a very thought-out shopping list to work from.
After you have done all of the planning, it is time to empty the space and start your sorting!
H O W T O U S E T H I S P R I N T A B L E :
Download, print, and cut the sorting signs, then score some bonus points for running them through a laminator to get multiple uses out of them. Clip or tape the signs to cardboard boxes, bins, laundry baskets, or garbage bags to keep your piles separate and clearly labeled. Four sorting signs are included: Move It! Items that need to be moved to another area of the house. Give It! Items that are heading to a donation facility, friend, or family member. Toss It! Items that no longer serve you (or anyone else) due to quality/function. Sell It! Items that need to be listed on Craigslist, Facebook, eBay, etc... or added to a yard sale pile.
Now that you are in the sorting mode, keep track of the items being donated for your tax records.
H O W T O U S E T H I S P R I N T A B L E :
Make note of the donated item description and condition, as well as the organization that the item is being donated to. There are a variety of resources online to help you determine the appropriate value of the item, like this one and this one. Clip the receipts that you receive from the charity at the time of the donation to the printable, and file it away with your tax documents.
Right now the trend when sorting your belongings is to ask each item if it truly "Sparks Joy". While I agree that when you are sorting and touching each item, you probably get a gut sense of whether you should keep or discard the item, there are times when you need some extra nudging and guidance to make a decision that you are comfortable with.
H O W T O U S E T H I S P R I N T A B L E :
I recommend printing (and laminating) this document and attaching it to a clipboard to keep nearby while sorting your belongings. If you find yourself holding something that is leaving you conflicted, use this printable to ask yourself a series of questions. A lot of times we continue to hold on to items out of guilt, maybe because we spent too much money on it or because we received the item as a gift. Many belongings hold sentimental value, but could possibly live on by taking a photo of it or scanning it in digitally. Other times it may come down to the amount of space you have vs. the number of items you would like to keep. Belongings can cost you in space, special storage requirements, ongoing maintenance, etc, and these questions will help you reassess that reality.
Organization and habits go hand-in-hand. The act of organizing and adding storage will get you halfway, your habits are what complete the process. In fact, good habits are the most important part of living a more organized life. Whether it be encouraging your child to take his/her backpack to their room each day or reminding yourself to go to bed with an empty kitchen sink each night, creating a habit makes it easier and easier to get things accomplished each day and guides you in slowly changing things for the better over time.
H O W T O U S E T H I S P R I N T A B L E :
Use the fields down the left-hand side to add the good habits you are trying to create. There are enough fields to do this as a family or to track multiple personal habits throughout your own day. To the right, there are 30 boxes to check. You can either start at the beginning of the month or start halfway through and set a goal to check as many boxes possible. I have heard that it takes 21 consecutive days for a habit to be formed, so by day 30 you should really be on your way to making a small difference in your life.
____________________
All of the free printables shared in this post are designed to be downloaded via the links provided. Simply click the Download button at the top of the linked document screen, you may be asked to log-in to Box.com, but that is not required to download and save the document. Once the document is downloaded, it should be opened via Adobe Reader (find it for free here) and can be printed and used as many times as you wish.
I hope this post offers a few general tips to get you going with your next organizing project! The next post in this series will really elaborate on some of these ideas even more, and of course, there will be a few new gems in there as well!
]]>IHeart Organizinghttp://www.blogger.com/profile/05084013302005288836noreply@blogger.com25tag:blogger.com,1999:blog-8864666002840991252.post-46246835091086087272019-01-25T19:33:00.002-06:002019-05-06T20:59:19.983-05:00Save Your Scents: How to Make the Most of Your Candles (and use them as storage!)
Over the years I have learned to look for candles that are not only delightful in scent, but also come in a pretty jar. The jars they come in can always be upcycled and used as vases or storage around the home. More on that in a minute...
And candles are not always cheap. I try to purchase the majority of my candles inexpensively (Marshalls/HomeGoods/TJ Maxx, Michaels, Tuesday Morning, and Target), but some of my favorite scents are typically found at Anthropologie and local boutiques. I don't mind paying a little more for a really great quality candle, but it is ridiculously frustrating when the wick burns down before all of the wax is used. I might be doing something wrong, but so often the wick will be out and 1/3 of the candle wax is still in the jar!
All of the wax has to come out from the jar before it can be reused. I have tried a few methods to remove the wax over the years and recently heard that freezing the candle was a really quick and easy way to do this. So I gave it a try...
It actually worked pretty well! I left a candle in the freezer overnight and just chipped the wax out with a spoon. But look at all that wax! That seems like a lot of waste!
So I went back to the method that I have typically used in the past, which is to heat the candle up on the stove in a pot of water. The water doesn't have to be boiling hot, just warm enough to melt all of the wax within the holder to a liquid (I remove the wick prior to warming up the wax on the stove, but it can be done after as well).
Now to save that wax! I recently had four candles leftover from Christmas and quickly realized that there was a lot of wax remaining in each of the containers once the wick burned down completely. I use to just pour the hot wax into the trash and reuse the container... but I decided to come up with a way to stretch that wax out going forward.
Years ago I had a plug-in warmer that would heat wax as an alternative to lighting candles. They were all the rage back then, and I remember having packs of wax molds in different scents stocked in our junk drawer. So off to the craft store I went in search of some sort of mold. In the baking aisle I came across a plethora of silicone options which are typically used for candies and small treats. PERFECT! (Don't forget that most craft stores offer great coupons/discounts on a single item purchase!)
Now, when I melt the candle wax, I just pour it into my special mold! Below you can see how many wax melts I was able to create from four burned down candles. I can't get over how much wax I was able to save! (Similar mold can also be found on Amazon here.)
It only takes a few minutes for the wax to naturally harden back up, and then they just pop right out of the silicone.
Quick Tip: Pouring the wax out of the different candle holders can be a little messy, I recommend placing wax or parchment paper under the mold to catch any drips. Also, the candle holders can be really hot from the melting process, so use caution!! I found wearing a winter glove gave me control to pour without burning my fingers.
Right after the wax is poured, I grab a paper towel to clean out the rest of the contents of the jar and quickly wash with hot water and dish soap.
The different candles were a variety of scents so I store the wax molds seperately in canning jars, back into their original vessel, or in these wax sandwich pouches until I am ready to melt them in the warmer.
I noticed that they still sell plug-in candle/wax warmers at many home and craft stores, although, I prefer something a bit more discreet and mobile, so I just use a basic butter warmer for now. It was less expensive and I can move it around my home without plugging it in. It may seem like a bit of an odd choice, but I sort of love it. And YAY for extending the life of my favorite candles scents, I can't believe I was going to dump all of that wax away!
Now that the wax is out of the holders, here are a variety of ways to reuse all of those pretty vessels around the house.
Above I placed two on our bookshelves! One is working as a vase while the other tucks away a dice game that our family enjoys playing.
Quick Tip:This gold hammered candle is a true bargain, especially considering the container itself is so fantastic (especially if you line the bottom with a piece of felt).
I find candle holders are most useful in the bathroom. Above you can see one being used for holding cotton swabs, but they also work as toothbrush holders, floss pick holders, hairbrush and comb holders, etc...
Another bathroom scenario, hair ties and bobby pins are hidden away while keeping the nearby counter clutter free!
One of the first candle holders that I ever upcycled was used for makeup brushes, and they were the perfect match!
Let's talk office supply storage for a second! Candle vessels are perfect for corralling paperclips, rubber bands, washi tape, small craft supplies, pushpins, charger cords... The possibilities are pretty endless.
It is always a bonus when the holder has a nice lid to really hide the contents and to act as a true container.
In the bedroom on a nightstand or dresser, candle jars are wonderful as a change jar or jewelry holder. Or toss your lip balm, medication, hand lotion, earplugs, etc... inside and keep your bedside table nice and tidy.
How about in the laundry room? They work well to keep track of pocket treasures, clothespins, safety pins, and buttons.
__________
That's how I use these charming candle vessels around our home, but I bet you all could come up with even more creative examples. I know that this isn't a new fad, but it's always a great reminder to upcycle and reuse when we can.
One last quick thing! I recently found these candle warmers, but can't personally speak to how well they work. I imagine that they actually melt the wax of a candle more evenly and allow you to use the entire candle without lighting the wick at all (or needing to make molds). That would definitely be another great way to get the most of the candle before reusing the jar. Just wanted to try and offer up all of the options I can find.
And it goes without saying but I will anyway, it is always important to be careful with candles in general. Both plug-in options and the use of any flame should always remain monitored. ♥
]]>IHeart Organizinghttp://www.blogger.com/profile/05084013302005288836noreply@blogger.com48tag:blogger.com,1999:blog-8864666002840991252.post-58623796224435293952019-01-15T16:27:00.002-06:002019-05-06T21:06:29.852-05:00An Organized Gifting Caddymy last post, as well as the abundance of emails and messages I received. This community really amazes me, and I adore that we all bond over a passion for our homes and organization! It sounds like many of you are on a quest to simplify and reduce home clutter with me this year, which keeps me awake at night with excitement! Let's do this 2019!
I have always been a bit of a sentimentalist, and I really love giving gifts to friends and family throughout the year. Just as much as I find joy in the process of looking for something thoughtful to give, I also really enjoy the process of wrapping it all up! I have absolutely nothing against a gift box or bag, but sometimes it just feels a little more special to add a ribbon, embellishment, a handwritten note, an ornament, monogrammed tag, etc... And those extra touches don't have to take much time, but they really go along way.
Five years ago I put together the ultimate gift wrapping station. It had extra of everything from twine, bows, bags, boxes, tissue and quite a few rolls of gift wrap. It was epic and went viral and I don't regret the project for a second. It served me quite well over the years, and it has taken me a long time to work my way through a lot of the supplies and cards. But it was a bit much. And over the years as the nearby counter became cluttered with toys and Lego builds, I would gather my supplies and take them to my office or the kitchen table to do my wrapping. In my quest to reduce and simplify this year, I decided that it was time to downsize this part of my life in a way that takes up less space and offers some portability.
I actually put all of this together last month before Christmas, and it couldn't have worked out better. And because I can still use it year-round for anniversaries, birthdays, and just-because days, I decided I would share the tote-tastic idea with you!
I began with the large KUGGIS bin found at IKEA. I have used smaller versions of these bins and I absolutely LOVE them. They really have become one of my "go-to" storage items as of late. However, this is my first time using this particular size, and I was ridiculously eager to try out the addition of the divided organizing tray that tucks away nicely inside.
The top tray is really great for smaller embellishments and cards. It can also fit a smaller address book (if you are old-school like me and still use one of those during the holidays).
If I am at a stationery store and spot a nice greeting card, I pick them up so I can be prepared ahead of time for special dates or for those celebrations that come up last minute. The larger areas of the tray are a really wonderful size to fit all of those greeting cards, thank you notes and envelopes.
I also like to add tags, ornaments, bows, etc... and the smaller divided areas are a nice way to divide out the tapes, twine, and gift toppers. I also keep a few gift cards on hand to hand out randomly when the mood strikes (I just put a small amount on each and will give them to strangers or kind employees as a random act of kindness).
There is more magic happening below the tray, which is completely removable.
The nice thing about this bin is the amount of space/storage to keep everything all together. The base of the bin is a nice size for gift bags, boxes and larger sheets of tissue. I found some food storage containers at the dollar store to add a little extra division for the bows, tissue and smaller ribbon spools. They are light-weight and inexpensive and couldn't have worked out better.
I used a small tension rod for my larger spools of ribbon, placed at the outer edge of the bin. It is easy to be removed if I need to swap out a roll but stays in place for grabbing a quick bit to add to a package.
I use a small piece of masking/painters tape on each spool to keep the ribbon from loosening inside of the bin in-between uses.
Above you can see the entire bin in action and how everything stacks in a compact and portable tote.
I have also really condensed my gift wrap rolls down; I find it best to actually only purchase solid craft, black or a simple stripe/dot gift wrap that can be versatile year round. That allows the ribbon and toppers to shine and also keeps the number of rolls that I have to store to a minimum. I currently just keep them in a corner of my office closet until I can finish up with a little refresh of that space in the near future.
I also looked into an under-bed bin that would allow me to store the rolls and cards/embellishments together, however, our bed frame doesn't allow for most of those bin sizes. But they are another great option for doing something similar. Here are a couple of those options:
I was able to condense my large bookcase of packaging and gift wrap items down into a mobile gift wrap station and it couldn't have worked better this past Christmas.
Also, I am totally sold on the amount of storage and functionality this KUGGIS bin offers! I have also seen the tray insert used inside of a drawer as a divider for tech and office gear and it was brilliant. So tell me, have you tried these bins and if so, how do you put them to use around your home?
]]>IHeart Organizinghttp://www.blogger.com/profile/05084013302005288836noreply@blogger.com22tag:blogger.com,1999:blog-8864666002840991252.post-79536355984815313712019-01-09T19:20:00.000-06:002019-05-06T21:07:00.070-05:00Catching Up and a Hello to 2019! Oh, how I have missed you all so very much!
It always feels a little awkward coming back from an extended break, especially when they are unplanned and much longer than ever anticipated.
Truth be told I have always had huge goals and amazing intentions for this small slice of the internet, but 2018 just wasn't meant to be my year (again, womp womp). For someone who is generally an energetic go-getter, learning to navigate the past few years has been a true personal challenge and journey. And having to do it online has been flat out tough, especially when I am trying to walk the line of personal and professional in front of an audience. If I have learned anything, it's that no matter how much you plan, life can change those plans in an instant. And as a self-proclaimed planning obsessed girl, that has been a hard pill to swallow.
I am not 100% ready to dive into my absence, although I hope to someday down the road. Just know that your support is deeply cherished and I appreciate those of you who continue to check-in. The outpouring of love, comments, emails, DM's, etc, has been so overwhelming over the past couple of months, and for that, I am eternally grateful. They continue to uplift and encourage and I truly hope that THIS IS THE YEAR that I can give that back to you.
____________________
I have a few things to cover since I have been away, so let's begin with Christmas decor storage.
I have never been a minimalist by any means and I truly enjoy layering our home with our character and personality. At the same time, I am making 2019 the year to reduce and streamline. This last Christmas I only put up a fraction of our decor, and I noticed that our time entertaining and enjoying the holidays wasn't at all negatively impacted. I also appreciated that it took much less time to pack everything up this past weekend! Keeping it understated was refreshing and allowed me to focus on what really mattered most to me, and it was also the most relaxed I have been during the holiday season in years. I definitely need to continue to remember this and apply that understanding to more areas of my life this coming year!
I know some of you probably had your decor packed up December 26th, but for those of you who extend the season and enjoy the layers a little longer, I thought I would share my top Christmas decor storage tips (a refresh of this post here). And if you already have everything packed away, tuck these tips in your pocket for next year (or give your bins a quick remix when the mood strikes).
CLEAR STORAGE BINS
For so many years I selected solid bins because I didn't like the visual clutter that generally comes with the clear versions. A few years ago I decided to give clear bins a whirl (I love these) and it really has been so helpful! I appreciate that I can get a quick idea of the contents without having to do any rummaging or digging.
LABEL
Even though the bins are clear, and some of the contents are simple and obvious, other bins still have a mixture of items such as ornaments, embellishments for different trees, stockings, garland varieties, books, wreaths, ribbon, tree skirts, lights, etc... Therefore, labels can help to differentiate categories and assign items/bins to specific areas of the house. This year I updated my labels to an editable version, that way I can just type the contents, print them out and slide them into the label sleeve attached to the front of the bins. I saved my labels to my computer to easily edit and reprint down the road if needed. You can download the editable label printable for free here.
CATEGORIZE
Make the most of your bins and divide them out in a way that makes the most sense for how you decorate. Zippered storage bags work really well to corral and categorize smaller items like ornament hooks, ribbon, beads, special ornaments, replacement bulbs, light clips, stocking and wreath hooks, etc...
THINK OUTSIDE OF THE BOX
Are there other items that you only use during the holidays? Specific items for entertaining or baking or cooking? Maybe you use certain pillows, candles, appliances and serving platters for a month or two out of the entire year. If your storage is limited around the house, don't give those seasonal items prime real estate with your day-to-day belongings. Instead, pack those pieces away with the remainder of your Christmas decor.
TIS' THE SEASON TO CLEANSE
This is the best time of the year to streamline your Christmas inventory. While packing everything up, take the time to recategorize your bins and eliminate the items that didn't make the cut this past year. Handle each object and ask yourself if it is worth your time, space and energy moving forward. Also discard any items that are broken, torn or worn.
Donation Ideas:
Drop off your gently used holiday decor at your local donation center (Salvation Army, Locally Owned Thrift Stores, Goodwill, etc...)
Check with your local Habitat Restore, some do holiday-specific sales throughout the year.
Inquire with local shelters to see if and when they typically accept holiday decor, and what specific items are most beneficial.
Does your city decorate for the holidays? Think of areas around town that put up Christmas trees or string lights that may benefit from the items you no longer have a use for. Libraries, hospitals, community centers, etc...
Have you heard of Give Back Box? I recently read about this donation program and I love it! It really emphasizes the one-in-one-out rule, but can be used beyond that method! When you receive merchandise in the mail from select retailers, you can reuse that box along with a free shipping label to donate your household goods and clothing items. Give Back Box selects a charity based on your location, however, there are ways to select your own if you wish. Christmas decor is accepted, so pack up a box and ship it on out!
____________________
Remember last year I flocked our artificial tree? I promised to give you an update on how it held up through storage and I am happy to share it did really well. I have noticed that flocked trees will shed no matter if you DIY or purchase them that way, and ours did drop some flocking during setup and decorating. However, not enough to notice on the tree itself, and minimally throughout the time that it was up. I am excited to try the flocking process again down the road on some garland and outdoor topiaries, and I love that I can always easily add more to the tree over the years as necessary with the remaining flocking powder.
____________________
If you are looking for a couple of idea-inducing reads for the New Year, I contributed to two publications on newsstands now:
Inside this month's issue of Parent's Magazine, we focussed on Little Ways to Love Your Home.
While inside the Family Circle issue you will find a great section dedicated to making the most of your home's hot spot: The Kitchen! So many great suggestions in this one!
____________________
In other iHeart news, 2019 planners were released in my shop last month and I get so much joy filling in the colorful pages for the new year. I am thrilled to see that you do too!
The FAQ page is loaded with details on the sizes, layouts, coversheets, printing suggestions, and images. The pages are fresh and beautiful and seeing them being used by you all throughout the year is a true treat, so thank you for Instagramming and sharing those images with me.
____________________
This time of the year is generally known for starting fresh and setting goals and organizing every nook and cranny of your home. I have had a few conversations with friends and they have mentioned that the new year gets so built up that they feel like once the clock hits midnight, they should have this automatic boost of energy, and that when they wake up they should feel some sort of magical feeling and clear vision for what is to come to finally get their lives together. So. Much. Pressure.
While I personally do love that the new year is a great benchmark for setting goals and reflecting and evoking change, I want to remind you all (and myself), that lifestyle changes are gradual and don't happen overnight, and all big things come from a culmination of smaller steps. It's great to set goals and be fired up, but also be realistic and break those goals up throughout the year. Think of little changes that you can make each day that will help you reach a larger goal by next month, next quarter, or even by the end of 2019. That is how I am personally approaching this year; day by day, bit by bit. It doesn't all have to be done by the end of January.
I am still wearing a lot of hats, and aside from trying to be an involved and loving wife and mom, I have a lot of business-centric goals that include updating and organizing my website (and a new home tour!), moving my online shop and adding fresh new items, working with clients (best feeling), and writing a book (big goal). Pair that with the administrative responsibilities of running a business, freelance writing, creating content and sharing it actively on social media, I get a little overwhelmed managing it all and managing it well. When I work on a project, I get so hyperfocused on that one specific thing, that it can take away from all the rest. Sometimes the blog takes a hit, sometimes my personal goals take a hit, sometimes my family takes a hit, sometimes my shop takes a hit. I can organize a closet no problem, but maybe I need to find someone to organize my life (ha!). Time management, prioritization, and balance are all my personal top priorities for 2019. Some things will have to move to the bottom of the list so I can actually do the more important things. And this is that moment where it all rounds right back to my small steps towards the big goal mantra.
I don't want to drag this post out any longer, but a few final notes about our year to come:
Last year we didn't focus a lot of attention on our own home or projects. I am approaching my 10th year of blogging and that is a LOT of organizing, crafting and remodeling. We simply needed a break, even if we still have a lot of wish list updates to make, going at it around the clock is exhausting, expensive and disruptive. It was time to let things rest, and we did. Buuuut, our oldest is graduating high school this year!!!!!! He is receiving college acceptance letters and about to spread his wings and I am holding back tears of joy (and let's be real, tears of selfish sadness) on the daily. With graduation comes a graduation party and a big party is a great motivator to check lingering home tasks off of the list, as well as a lot of deep cleaning. Time to relight that fire!
How do you all feel about doing a home cleanse with me this year? I really wanted to do this last year, so the past few months I began researching and building a really great resource of ways to clear clutter from your homes. It always pains me a bit to see how piles of trash bags can so quickly be associated with organizing, so I am diving deep into options for feeling less guilty about getting rid of our belongings. And I would really love for it to become a library that can be referenced and built-upon over time. You in?
I don't have a lot of closets or drawers left to organize around here, this year my biggest pain points are PAPER (I have a plan!) and photographs (I don't have a plan!). What are your biggest organizational pain points? Knowing your problem areas could really help me come up with new content, so if you could take a quick second to leave a comment on this post with your organizing goals and struggles, I would appreciate it to the moon and back!
Let's raise a glass of wine, a coffee filled mug, or a bottle of water, and cheers to 2019!
P.S. I just went back a re-read my intro to 2018 post. Wow. Sounds like I am rewriting history and even mimicking a few of the same sentences word for word, nodding and still feeling a lot of the things that I felt last year. Believe me when I say that as frustrating as that is for me, I know it is also frustrating for you. Please know that I never take you all for granted and I really hope to break the cycle. There are definitely some things I need to change, and I appreciate your continuous grace as I work on bettering things around here. ♥
]]>IHeart Organizinghttp://www.blogger.com/profile/05084013302005288836noreply@blogger.com142tag:blogger.com,1999:blog-8864666002840991252.post-63334109218588295902018-09-20T04:00:00.000-05:002019-01-16T14:37:47.206-06:00Let's Chat! School Lunches and a Free Printable! This year I have a senior in high school (!), a freshman, and a 6th grader. By now, we have done the back-to-school organizing and routine changes quite a few times, and most things continue to get easier and easier. LOVE that! And over the years, I have shared quite a few of the things we do to prep, but this year I realized I haven't really posted about school lunches. So today is the day because they are a huge part of our daily life!
A few things I want to mention right off of the bat; lunch and food is a personal parenting decision that I never judge and hope that we can definitely keep this conversation helpful and encouraging. There have been times that I have felt bad that I wasn't making bear shaped sandwiches for my boys, and I definitely have my kids eat school-prepared lunches as well. That shouldn't make me feel bad and I know that now. We all do the best we can for our kids, period. I know that some people truly enjoy making art out of food, that some kids are vegetarian, have food allergies, only eat organic, or don't do sugar. This post isn't about that, it's just a few really quick and simple tips for how I handle the lunch prep/making process around here. So let's dive in.
TIP #1
The first thing I did this year is sit down with my boys and figure out what each of them enjoys most. My biggest problems leading into this year have been over-purchasing foods, trying to over-cater to their specific taste buds, then ending up in a hamster wheel of packing the same things on repeat with very little variety.
So, I sat with the boys and asked them what their favorite foods are, and wrote down all of the items that they could all agree on. We took some time to look for quick ideas online together to come up with 15-20 different lunch options as well as a variety of quick and tasty sides.
You know me, I couldn't miss an opportunity to whip up a free printable for you all, and I am SO glad I did. I made it editable so that we could type in all of our lunch ideas (which are broken down into categories: main course, fruits/veggies, sides/desserts), and then print it off and keep it inside of our pantry with our shopping/meal planning items. You can also just save it filled in digitally and access it from your phone or computer.
Now when I am grocery shopping/meal planning for the week, I can glance at their list and be sure to stock up accordingly. This list has items they will all eat, so I can now quickly put together lunch ideas without over purchasing food while offering some variety from week to week.
TIP #2
Keep it simple! One of the primary goals is to be speedy about lunch making. Whether in the morning or the night before, I don't want to have to invest much time in putting everything together. And really, the best case scenario is that I give the boys the tools they need to be able to do everything themselves.
So, that might mean giving into some pre-packaged items or creating my own quick snack packs that we can all just grab-n-go. Typically I portion off crackers, popcorn, fruits, veggies, protein bites, etc... Whenever I can, I select fruits and veggies that I know I will get the longest life from (I have found that grapes, carrots, celery, cucumbers, pea pods, oranges, peppers, melon, and apples will typically stay fresh throughout the course of the week without concern of spoiling, and are easy to portion out). This is HUGELY important and probably my biggest tip.
I will also purchase individual meat snacks, cheeses, nuts, yogurts, granola, etc... if the price is right for the time I am willing to invest. If I have more time on a given week, I might opt to purchase in bulk and create those portions myself.
TIP #3
OK, so basically the first step was to select the simple sides that can easily be tossed into a lunch, and next, I like to do a little prep. Again, I am putting groceries away anyway, why not just put them away in individual grab-n-go packages to make the entire week go smoother?
Aside from the fast fruits and veggies mentioned above, we all really love berries as well. So, while putting groceries away and doing my weekly meal prep I will soak/rinse them in a bowl of water and vinegar for a couple of minutes. They seem to last longest if I do a quick soak and then let them air dry before refrigerating. This is one more step, but if I multitask during other meal prep, then it isn't too bad and I know I will prolong the freshness for a few extra days. I do this with all berries, not just strawberries.
Also fresh from the grocery store, I will cook up chicken to create grilled chicken strips that I will put in wraps, tacos, on salad, etc... And every couple of weeks I will freeze sandwiches in a few varieties in bulk.
I recently switched to these wax paper bags because they are compostable and keep the sandwiches fresh in the freezer. I will make a few loaves of bread worth of sandwiches at a time (I will also use rolls/croissants with meats/cheeses, etc...) and I find they work best if I don't use spreads other than peanut butter and jelly directly on the bread. I will put together a few sandwich varieties to select from, and just label the sandwich type on the wax paper bag.
The bulk sandwiches go into freezer zipper bags (which I just keep reusing) and into the freezer until a school morning when they are transferred directly to the lunchbox and they are ready to eat by lunch.
All of the pre-prepped snacks and sides are put together in a section of the fridge that the boy's love to grab from.
TIP #4
If you have the space for it, I recommend storing all lunch related containers together. That way everything is quick and easy to pick from during the lunch making sessions.
We have a nice deep drawer in our pantry and it holds all of the lunch boxes/bags, containers, water bottles, thermos, reusable bags, etc.... It has become a pretty popular drawer!
TIP #5
Tip five isn't as much of a tip as it is just some of our favorite lunch products.
We have done bento-type containers and boxes in the past, but now that the boys are bigger, they have outgrown many of those. We prefer containers that will hold a full-size sandwich or wrap without having to turn it into bite-sized finger food.
These sandwich boxes are our new favorite and I appreciate that they are dishwasher safe! They can hold the main course as well as two adequately sized side items. They are also really handy for sending snacks to school to get the boys by between classes and their extracurricular activities.
With all of the fruits/veggies/sides, and my quest to eliminate our use of plastic sandwich bags, I invested in some reusable options and so far I have been really happy with them.
I went with both the snack and sandwich sizes and they are great for keeping a variety of snacks ready to go and fresh in the fridge, and the rest stay on hand for the dry goods. They can be washed in the dishwasher, but I usually just wash them out with this dish brush in an attempt to prolong their number of uses even more.
Above you can also see the containers I am smitten with for dressings and condiments. They are typically used for baby food storage, but they are completely leak proof and durable and reusable so we give them major thumbs up for lunch boxes.
An insulated food jar is also high on our list because it allows us to really expand on what we send to school. We can quickly heat up items in the morning, pop them in the insulated Thermos and everything stays nice and warm until lunchtime (think leftovers, rice, pasta, soup, etc...).
An insulated Thermos can also keep items cold, but we don't find ourselves using it for that purpose as often (but love that we can if we would like to). We do have these ice packs on constant rotation to help with keeping items fresh and cool for the few hours they are packed up.
As you can see in the lunch drawer above, we also have a few airtight snap containers that work well for bulkier items and salads (similar). In general, I looked for containers and products that can be reused, are durable, and are dishwasher safe, all of which keep our day-to-day process running quickly and smoothly.
Finally, these fridge bins (similar) rank so high on our list, they are wonderful for corralling all of the individual servings of our lunch and snack sides and act like a deep drawer in the fridge.
If you are looking for a couple of easy peasy ideas, here are the lunches we currently have on our list that all of our boys are willing to eat and are pretty simple to assemble or prep at the beginning of the week:
M A I N C O U R S E S
Grilled Chicken, Ham & Cheese Croissant, Hard Boiled Eggs, Turkey Apple Sausage, Pepperoni/Cheese/Tomatoes, Soup & Crackers, Lunch Meat Wrap, Pasta Salad, Quesadilla, Peanut Butter & Jelly, Chicken Taco, Spaghetti/Pasta, Sub Sandwich, Salad, BLT Pita Pocket, Bagel Sandwich, Rice Cake w/Peanut Butter
F R U I T S / V E G G I E S
Pickles, Clementines, Grapes, Peppers, Applesauce, Melon, Peaches, Pears, Apple Slices, Strawberries, Raspberries/Blackberries, Carrots, Pea Pods, Celery, Cucumbers, Bananas, Side Salad
And because you all educate me just as much as I try to share what is working for us, I would love to hear more lunch ideas that are a hit in your households. It could be a quick meal, a quick tip, a favorite product, a helpful website/app, anything! Please take a moment to chime in below!
]]>IHeart Organizinghttp://www.blogger.com/profile/05084013302005288836noreply@blogger.com54tag:blogger.com,1999:blog-8864666002840991252.post-65184613603687542932018-08-14T04:00:00.000-05:002018-08-16T13:42:40.572-05:00Homekeeping 101: The Basics
Having the kids home from school all summer is always a quick reality check of how messy the house can get oh-so-quickly, and how important our "all hands on deck" mentality is. From beach towels to athletic gear to multiple meals a day and sleepovers galore, things can spiral out of control in the blink of an eye. The following "basics" have definitely been our glue, and although some of these tips might seem ridiculously obvious, they are absolutely worth mentioning.
I have talked about this before but here it is again because it is my top tip for quickly maintaining your home: Set yourself up for success.
I recommend storing your household cleaners in the primary areas of your home so they are easy to grab and use. Also, simplify your cleaners down to just what you need to reduce confusion for the entire family. Many all-purpose cleaners are just that and can tackle counters, windows, stovetops and even quick floor cleanups. Keep bathroom cleaners under a bathroom sink and kitchen cleaners under the kitchen sink.
The basic cleaning supplies that I have found I can get away with using for 99% of our household chores are:
All-Purpose Cleaner (I just use a mixture of distilled water, 2-3 drops of dish soap, vinegar, and tea tree oil, and apply it to counters, appliances, glass, and floors)
A couple cleaning cloths (one for glass, one for surface)
I have loved and used cleaning caddies for years now, and they are great when I am doing a bigger room-to-room deep cleaning session, but for daily battles, I like that my go-to cleaners are right within an arm's reach of the mess. I also recommend keeping a vacuum and broom on each floor of the home and storing less-used specialty cleaners together and out of the way (I keep mine in our laundry room).
By removing a lot of the extras and keeping it simple, my family asks me fewer questions and are quicker to just grab what they need to get the job done.
Color code the cleaning rags.
We use microfiber cloths for just about everything, and to prevent cross-contaminating the bathroom germs with the kitchen germs, I assigned the two spaces their own cloth colors. Green is used in the kitchen and blue is used in the bathroom (or for other dirtier jobs). I also added a stack of pink for our pets near their feeding station. Easy enough for all of us to remember and the rags just get stored in their designated areas.
At the end of each week, the bathroom rags are washed with my mop heads and bath mats, the pet rags are washed with dog bed covers and their bath towels, and the kitchen rags and dishtowels are washed together. I always wash these items on a sanitary cycle during my Sunday linen wash day.
Baking soda and dish soap can clean just about anything.
Clear dish soap makes a really great stain remover and I use it all of the time on furniture, clothing, rugs, and spills. Because it is clear, I don't have to worry about it damaging colors or materials (I always start with a small drop or two and paired with some water it typically does the trick). Baking soda is a good deodorizing agent and also helps to absorb the spill/stain/wetness.
For those tougher messes (think pots, pans, baking sheets, ovens, etc...), soaking items with baking soda, dish soap and water is a major sanity saver. After cooking I always soak our pots and pans with baking soda and dish soap and by the time I am ready to wash them, they come clean with little to no scrubbing.
Baking soda and dish soap seem to be a powerhouse cleaner when combined, and I wouldn't hesitate to reach for the combo when tackling any major cleaning job around the house, inside or out!
Clean from top to bottom.
This general rule applies to just about any cleaning task; it is always easiest and quickest to work from the top down. Washing glass? Start at the top and make "S" motions down to the bottom. Cleaning the kitchen, wash counters and the table first, then vacuum/mop the floor. Bathroom? Clean the mirror and work down to the sink and counter and finish at the base of the toilet. Spraying down the siding outside, start at the top and... you got it! Work your way down.
Clean with the grain.
There are times when I actually encourage folks to go against the grain, but that is not the case when it comes to basic homekeeping. Washing items against the grain will bring out imperfections and may cause the surface to appear less clean than it is. It is always best to clean floors, stainless steel, wood furniture, etc... with the natural grain of the item. When the cleaner dries, it should blend right in and enhance the beauty, not fight it.
Dishwashers are not just for dishes!
Did you know that so many other things can be cleaned in a dishwasher? A few examples of things we have washed in our dishwasher are light fixture shades, toothbrushes, sponges, scrub brushes, toys, soap dishes, shower caddies, combs, vases, canisters, baseball caps, drawer organizers, basic tools, vent covers, etc...
Of course, I say this with my use with caution warning, the top rack is usually best for anything you worry about. Avoid putting anything too precious in the dishwasher, also avoid washing anything made of wood or with a delicate metal finish. Always rinse items first to prevent clogging up your dishwasher and when in doubt, leave it out.
Fold/hang clothes straight out of the dryer.
In the past I would get in a habit of taking clothes out of the dryer, tossing them in a basket, and taking them to another room of the house to deal with. Then I would do my best to fold things during a nightly T.V. show, but too many times the contents wouldn't end up put away. And just as I did when I was a kid, my boys would mix dirty with clean or would leave piles on their beds which would then tumble to the floor...
A while back we decided to try something new, so straight out of the dryer the clothes are either immediately folded or put directly on their respective hangers (I just grab the empty hangers out of the closet on my way to the laundry room), and stacked in a portable basket. Same for linens. It only takes a couple of minutes and makes it much easier to put everything away right away. I also have the boys doing this with their personal loads and it has completely cut down on the piles of questionables around the house and in each bedroom. The wire baskets we use are lightweight and portable making it easy to tote around the house and return back to the laundry room (as shown here).
Laundry can quickly become a monster if not managed regularly but really isn't all that hard if you just get into a good groove with it. I am not sure why it works so much better for us to just deal with everything right out of the dryer (vs. taking it to the couch or our bedroom to fold), but it has been a huge sanity saver so I call it a very basic win. And while we are on the subject, giving each member of the house their own designated day to do their laundry has also been amazing.
Multi-task whenever possible.
I have gotten into the habit of building some of the basic household cleaning tasks into my routine each day, which makes it much easier to maintain the home in general. For example, I wash the bathroom sink/counter each time I brush my teeth. I scrub down the walls of the shower while actually taking a shower. I quickly wipe up the kitchen counters while making my coffee. I wipe down the inside of the fridge each week when I put away groceries. These very quick add-ins really add up each week.
Make your bed every day.
Maybe I should move this one to the top because it might just be the most impactful. I will admit that I haven't always been a believer in making my bed every day, and never really encouraged the kids to do it either. But after it became such a positive habit, I can't imagine not doing it. It makes a huge difference in quickly pulling our bedroom together, but it also has been really uplifting to my mood. And I love leaving our bedroom door open and catching a glimpse of the tidy bed, which can be exactly what I need when I am having a messy day.
Not buying it? I encourage you to try it for two weeks and check out this article (or listen to this awesome speech). It is a great basic housekeeping and life-changing task!
Homekeeping takes some effort.
Dang, if I could teach my kids anything about basic housekeeping, it would be that life is so much easier if you just pick up after yourself right away. And if that just isn't possible, to set aside a few minutes at the end of each day to do so. Too many times we have spent an entire afternoon on a weekend dealing with a week's worth of random piles and messes. I can think of 1,001 other ways I would rather spend a weekend day, and my family agrees.
I know that some people are naturally more tidy than others. That some people can look right past a pile or mess and be completely unphased by it, while others can't focus or relax until that pile is gone. We have both personality types living under our roof and it has always been a give and take and compromise.
There are definitely days when I say, "the chores can wait", and the clean freak in me has done a lot of letting go over the years. There is something to be said about soaking up the little moments in life and I know first hand that our time with our kids goes much too quickly. So cheers to playing a card game after dinner instead of stressing out about those puppy nose prints on the patio door.
But the matter of the fact is that the mess will continue to be there until we deal with it, and it only snowballs if we don't.
So we try to find that right balance and do our best to take care of a lot of the basics each day and to pick up after ourselves when we take things out.
We also work together to do a quick pick-up at the end of each day. I leave a flexible basket hung on a hook near the stairs to corral random items that need to be brought down, and it also works great for running through the house and collecting things like electronics, mail, crafts, toiletries, socks, etc... that have been left out throughout the day and need to be put away. We always tidy up the kitchen (run the dishwasher after dinner, quickly sweep or vacuum, wipe down the table/counters) and fluff the sofa pillows before bed. It makes all of the difference just taking 10-15 minutes each evening to start the following day off right.
I wish there was a red "easy" button or magic cleaning fairy that would come in and get things done while we sleep, but general homekeeping just takes some work and discipline. We aren't always perfect or on top of every mess, and we still have times when we have to play catch-up and binge clean parts of the home, yard or garage. But we continuously instill in the boys that we are all responsible for our home, and always have them help with the basic homekeeping responsibilities.
I think this is one of those discussions that could really benefit from your added ideas and advice in the comments below. I hear so often that people are generally overwhelmed with household chores and keeping up with daily duties. People want quick tips, shortcuts, and basic ideas to make homekeeping more manageable and less discouraging. Do you have additional ideas to share? How about small things you have added to your routine that have had a big payoff? Any ah-ha moments that we all could benefit from? Let's chat!
]]>IHeart Organizinghttp://www.blogger.com/profile/05084013302005288836noreply@blogger.com68tag:blogger.com,1999:blog-8864666002840991252.post-54920992227351498452018-07-17T05:30:00.000-05:002018-07-17T07:18:34.869-05:00Items IHeart: Favorite Amazon Finds!PRIME DAY! I am guessing many of you marked it on your calendar as a celebratory holiday too! *wink wink
I originally considered sharing my favorite Prime Day deals like I did last year, but then when the sale is over, the post is only partially relevant. Instead, it inspired me to finally get a post out that I have had on my list for a very long time.
I want to start out by saying that I prefer to shop on Etsy and with small businesses as often as I can, especially when looking for unique and special gifts, home goods, textiles and even clothing. But did you know that a lot of small businesses are also turning to Amazon to launch and sell their product? Love that! And because we are a busy crew, my Amazon app is always running so that we can use the benefits of our Prime membership to the fullest. Free shipping on everyday items saves me so much time on running errands, which I truly appreciate. Not only that, the product selection on Amazon is generally pretty extensive, and their prices are also generally pretty competitive.
I dislike that this sounds salesy and like an #ad, even though it is not, but the matter of the fact is that I source 60-70% of my cleaning and organizing products from Amazon for both myself and the clients that I work with. And I have always thought that I should create a space on my blog specifically for my favorite Amazon products because of how universally accessible Amazon is compared to many alternative retailers. So hopefully this list is not only a great resource for myself and my clients, but for you all as well!
I also added all of these items to a specific Amazon page on my blog that will continuously be updated with my favorite finds and even additional categories down the road. Please let me know if there are specific items that you would like to see included in the future.
Are you shopped out yet? This week is buzzing with even more sales around the web. Of course, Nordstrom is going strong with their mega Anniversary Sale, Target announced a super-sale for today only, Lowes is rocking 10% off for MyLowes members, and a few other retailers decided to join the mix too.
Now that I got a little shopping and sharing out of the way, I am diving back into a few more organizing and DIY projects. And then I am literally diving into the pool. #summer
* This post is not sponsored by Amazon, however, it does contain affiliate links. *
]]>IHeart Organizinghttp://www.blogger.com/profile/05084013302005288836noreply@blogger.com17tag:blogger.com,1999:blog-8864666002840991252.post-29472686229743305972018-06-21T06:00:00.000-05:002018-06-22T21:51:48.376-05:00Quick & Easy Tips to Organize Your Refrigerator!
GE Appliances recently invited me to Louisville, KY, to help a family of five organize their new high-capacity fridge. Just like us, this family has three growing boys in a variety of activities, and needed a larger fridge and some organizational tips to simplify their food storage just in time for the hectic summer months.
Now, we have all seen those organized fridges that go viral because they are perfectly styled with rows of bins filled with flowers, colorful fruits and pretty cans of fizzy water. I could look at pictures of fridges like that all day long, and I always appreciate a good bin, but I do have to wonder, where is all of the food? The meals for a large family, the leftovers, the snacks, the breakfasts and lunches that last for the entire week? I really wanted to offer up some of my favorite usable and practical tips to help this family, and you, take control of the fridge.
When I arrived at the family's home, I was welcomed with a new, large capacity fridge and a week's worth of groceries straight from the grocery store.
I showed up with a few of my tried and true organizers and got right to work assessing what a typical week's worth of groceries looks like for this family, and how I can best set up their fridge to accommodate both the food and their lifestyle. My number one goal was to put a fridge together that is easy to maintain, offers future versatility, and remains functional week after week.
The fantastic team at GE Appliances was there to see how it all went down, and they put together a quick video of my ten go-to, no fail refrigerator organizing tips. Check it out below!
Here is a quick recap of the video's talking points:
Although I generally encourage folks to empty a space first, when it comes to the fridge, I actually recommend the opposite. Fill your fridge just as you would on a typical week, or maybe even shop and plan for those times when you have more food than usual (think extra kids visiting or a party or eating home every night of the week, etc...). This is really helpful in setting up your fridge to work for you week after week and to consistently accommodate your routine and lifestyle. This is also the best way to plan for any organizational bins and storage you may wish to add.
Whether you are organizing an entire room, a cabinet, or the fridge, I always recommend keeping like items with like, and sorting things into general categories. By placing items back in specific locations, you create a bit of muscle memory and can quickly find things time after time. Keeping the fridge categorized is also quite helpful before heading to the grocery store. Just open the fridge and do a quick visual scan to see what foods and condiments need replenishing.
In this specific fridge, I did condiments in the door (even divided out spreads, juices/beverages, toppings & dressings, and garnishes), salsas and sauces on the top shelf, kits on the next couple of shelves, main dishes and leftovers alongside milk & eggs in the large middle area, followed by veggies, fruits and deli items in the drawers below.
These days refrigerators help you easily store the majority of your items in specific temperature controlled areas. That said, it is good to know the ideals temps and locations for storing your food, to be sure to get the most out of that food. Take advantage of the specific drawers for keeping your veggies crispier, your fruits fresher and your deli meats and cheeses ready for lunch making.
Beyond that, I have read a few different articles that also recommend keeping your milk, dairy, and meats at the center of the fridge where it is coldest. The door is not recommended for eggs or milk because that is generally the warmest location and can cause early spoiling, but this location works great for juices and dressings. Also, there are a lot of fruits and veggies that actually do better stored outside of the fridge, and knowing which ones with help to free up even more space for the items intended to stay nice and cold inside.
I have been a long time kit maker and kit cheerleader! And for this fridge, I spent no more than ten minutes putting together five fuss-free kits.
Kit number one was a breakfast bin to hold yogurts and rolls. It can also be a place to store some berries, spreads, toppings, etc... whatever you relate to breakfast specific meals. Kits 2 - 4 were snack kits; one filled with finger veggies portioned into snack bags (snap peas, carrots, sliced peppers, celery, etc...), one filled with finger fruits portioned into snack bags (berries, melon, orange slices, etc...), and the last with some grab-no-go snack cups. Finally, a tray to hold deli meats and cheeses that can quickly transfer to the counter for sandwich making (I also like to add some other sandwich toppings to the tray such as sliced tomato, onion, and avocado).
Investing a few minutes after grocery shopping to put together these really quick solutions saves so much time for the entire crew over the course of a week.
You may have noticed, but the majority of the bins used throughout the fridge are clear! That's because clear storage gives you that quick visual and reduces time spent looking through and for things. Before heading to the grocery store, just open the fridge and you can see which bins are running low without pulling everything out.
Another bonus for using bins for corralling the majority of the fridge contents is that they can be individually removed and cleaned at the sink, which is much quicker and easier than trying to scrub down the entire interior of your fridge when things spill and leak.
Not only do bins help to categorize your fridge contents, they also act as additional drawers!
To make the most of a fridge, it is best to adjust the shelves throughout, but that may limit your ease of accessing the items near the back. Extra long bins help to bring those foods to the front in one quick motion. I also recommend selecting bins that have handles or are lightweight for portability.
Why label? Because it keeps everyone on the same page and allows the entire family to quickly identify and locate where things are. Even if you put a variety of breakfast items into a clear bin, your little one may not know what everything in that particular bin has in common without the help of a simple label. Labeling also helps everyone put things back in the right "zones" and to keep general order.
As much as I love a good label, try not to over-label. The goal is to keep the fridge flexible yet simple from week to week, so general categories are best.
Just like deep bins, turntables are another really wonderful solution for preventing items from getting lost near the back. They are especially great for heavier jars or bulkier containers.
We have used a turntable in our fridge for quite some time now, and I absolutely love it. But this larger version with a lip really stole my heart and I will be upgrading immediately. It makes better use of an entire shelf and also reduces the risk of items falling off and breaking or spilling. So many wins.
I divide my utensil drawers, my junk drawer, my dresser drawer, so why wouldn't I divide the drawers inside of the fridge?
Smaller open-top bins and baskets are a great way to prevent fruits and veggies from rolling around. They also work well for separating out the contents of the deli drawer.
Did you know that you can write on most glass and plastic storage containers with a chalk or dry erase marker, and then just erase it away when it is time for a change? I love this so much, it is so easy to label our food storage containers with the meal contents, prep instructions and the dates that they were prepared or purchased. (Be sure to test your marker/bin combo in an inconspicuous spot a few times just to be sure they are compatible.)
No more questioning if the food in the container is yesterday's dinner leftovers or last week's science project. #beenthere
So there you have it! I was so thrilled that GE Appliances asked me to help this family setup and organize their new fridge. As you may have noticed, this specific fridge had more space than I was even able to fill, which was a first for me with the many different refrigerators I have organized over the years (this particular model has almost an entire cubic foot more space than most refrigerators in this class). I am obsessed with how many main dishes, leftovers, and sides were stored throughout, and the flexibility there is for adding additional items for cookouts, birthday parties, entertaining, etc... But what tickled me most about this whole experience was watching the homeowner open her fridge and point out all of the details, and getting excited about the solutions I whipped up for their clan. There was a bit of relief, and she also expressed how easy it was to find things and transfer items to the nearby counters. That is the best feeling ever.
There are a few products that continue to be superstar workhorses for me each and every time I organize a fridge, and I have sourced them for you below.
** This post was created in collaboration with GE Appliances to share my favorite fridge organizing tips. All of the ideas and opinions shared are my own. I sincerely appreciate brands supporting my content and work! **
]]>IHeart Organizinghttp://www.blogger.com/profile/05084013302005288836noreply@blogger.com34tag:blogger.com,1999:blog-8864666002840991252.post-965615525168318962018-06-05T10:00:00.001-05:002020-10-01T14:01:03.862-05:00An Organized Teen Boy Closet
Our almost 14-year-old son currently has the smallest room in the house. But we don't want it to feel that way so we have been making a lot of changes to open it up and add smart storage.
I think two different actions accomplished that feeling of openness we were after; painting the walls a solid light blue-gray (almost white color - Sherwin William's Nebulous White) and widening the closet opening to create more storage that will ultimately live behind a closed door (see that post here).
And a quick reminder of the closet the day before we cleared it out for a makeover:
And here it is today!
Although the last make-shift closet system served us well for quite some time, the biggest problem we all had is that our son had outgrown the bins and they were literally bursting at the seams. He needed some actual drawers and to keep his bedroom floor area nice and open, we wanted to add those drawers inside of the closet. I also wanted to be sure he had a place for his shoes off of the floor and that we made the most of the 8 feet of vertical space, so after looking at a variety of options, I decided on the IKEA PAX wardrobe frame (measuring in at 29 1/2" wide x 22 7/8" deep x 79 1/4" tall). This unit offers more than enough space and I appreciate that there is plenty of room for him as he continues to grow.
This kiddo is the beneficiary of a lot of hand-me-down items. Not only does he have an older brother that has always taken pretty good care of his belongings, but we have a few friends with older boys that like to pass on their clothes as well. We try to limit the number of clothing items we keep in general, but it is also nice to have some options. The updated closet not only provides adequate storage for his current wardrobe, but also for the plethora of hand-me-downs waiting for when he goes through another growth spurt.
So let's talk about the hand-me-downs for a minute. We have three boys so we do our best to preserve and reuse clothes as much as possible. They grow at different rates and are always different sizes, so there are times we need to store those extra clothes that they just haven't grown into yet. Twice a year we do a quick closet purge and inventory and rotate out their closets (spring and fall). I prefer to keep their hand-me-downs stored on the top shelf of their closets, and in this room, these medium Elfa drawers were the perfect solution. Did you know that although they are meant to be used with the Elfa drawer system, they can also be used as stackable bins? Mind. Blown. I love that they are frosted and sturdy and come with slim lids that clip in. They are a really great size and by using two, we were able to easily fit them on top of the IKEA tower in our son's closet.
These two bins hold 10+ pairs of jeans in a variety of sizes, as well as dress shirts/pants, shorts, sweats, t-shirts, etc... I found that I had plenty of room to roll and stack the items inside.
To keep track of the contents, I created and printed out a quick inventory tracker that I filled out and tucked under the lid. I am able to see through the lid just enough that this worked out perfectly, but the sheet could also slide into a clear plastic sleeve on top of a solid bin as well.
You can also download the trackers for free if you would like!
I divided the top drawer into three slots; one for pajamas, one for socks, and another for underwear.
Quick Tip: I typically purchase a different type of sock for each boy, one to two packages of white and one package of black. This makes it easy to identify which socks belong to which boy, and also allows them to just toss their socks into their drawer with no matching necessary. In the past, I have also used colored Sharpies to mark the bottoms which helped in identifying and quickly sorting all of their socks after washes (or when they are laying all over the house).
The next drawer down divides his bulky hooded sweatshirts and shorts.
Then his short sleeved t-shirts, sweatpants and sweatshirts, and long sleeve t-shirts are divided into three narrower sections.
The following drawer is all of his athletic wear, swim and extra space for future sports uniforms.
The bottom drawer has plenty of room for sheets and seasonal bedding.
And the smaller pull-out at the bottom holds his shoes.
You may have also noticed that I added some labels to the top of each drawer, which can be seen when the drawer is both closed and open. I used this label maker with clear tape.
Our son prefers to fold his clothes vs. hanging them, and this folding method was so quick and easy for him to learn. He basically files his clothes so that everything is visible and compact.
Four easy steps, the shirts can be folded in just a few seconds each.
1. Shirt face down 2. Fold in both sleeves 3. Fold bottom up to the top (in half) 4. Repeat and fold the bottom up again (in half)
Everything else is just rolled or folded to best fit in each divided section.
For the clothes that he does hang (essentially anything a little dressier with a collar or buttons), we installed a solid oak closet rod which I stained a warm wood tone. And as always, I recommend doubling up on the rods whenever possible.
We also added two solid white shelves above each rod to offer a little extra storage if needed. We recessed them back a bit so that we could place the hand-me-down bins up top without any issue.
Both the drawers and the shelves in the tower are quite deep, almost two feet in fact. This is great for the drawers, he has plenty of spare space to continue to grow. The shelves, of course, prove to be a little more difficult to utilize. But, the top shelf holds some heavier throw blankets that we use for sleepovers/guests, the next shelf holds a couple of light-weight woven baskets to conceal his everyday clutter (nerf guns, tech gadgets, etc...), and the lower shelf has a few document boxes for memorabilia and arts & crafts.
I also added a small "valet" type tray to hold his daily items and act as a drop zone.
It's funny that this was one of his favorite details, I guess it made him feel a bit more "adult" to have a place for his wallet, change, watch, sunglasses, and deodorant.
And that completes the closet tour!
With our boy entering high-school this coming fall, this closet project came at the perfect time! The previous closet functioned so well for so long when the boys were much smaller, but this is definitely an upgrade fit for a teenager.
I added this hardware to the drawers, which I sprayed in a flat black finish.
All of the drawers are soft close! So nice!
This is the paper I used to line the back of the tower (I just adhered it to the back panel with double-sided carpet tape before tacking it to the back of the frame).
Although we designed this closet for a teen boy, it is versatile enough to work for anyone of any age! Always a bonus.
We plan to add a sliding door next to conceal everything, which almost makes me sad because I love how it turned out so much! But also, teenage boy.
I considered adding a small step stool under his pants, but the boy is officially as tall as me and has no problem reaching his everyday items. Sigh....
This install has also sold us on updating our own closet with the PAX system down the road. It was so easy and versatile and the quality is really great. Not to mention, I love that there are so many ways to customize it to make it look unique, even though it is off-the-shelf at IKEA (they are not sponsoring me by the way, just my honest thoughts).
Let's end the post with a fun before and after to see how much was gained by removing the wing wall and installing a fully functional closet system.
For reference, I rounded up all of the closet sources below.
]]>IHeart Organizinghttp://www.blogger.com/profile/05084013302005288836noreply@blogger.com41tag:blogger.com,1999:blog-8864666002840991252.post-57836754638808483642018-05-17T10:30:00.000-05:002018-05-17T11:53:55.008-05:00Quick Tip! Get a Grip on your Drawer Dividers However, finding dividers that fit inside of drawers just right is a rarity. No matter how much you search and create grids and measure and plan, there will always be that last sliver of space. Or what about those times when you only want to divide a portion of the drawer? And because those drawer dividers are not always perfectly fit, they end up sliding from side to side and front to back. #thehorror
I have worked with a few folks lately that have had that very problem and asked how to prevent the obnoxious shifting of everything each time a drawer is opened and closed. Dividers are supposed to make things better, but something so small can quickly become a daily annoyance.
There are three really easy (and non-permanent) ways that I like to prevent shifting, wiggling, and sliding inside of drawers.
1 | C O M M A N D S T R I P S
Because I usually spring for clear/acrylic drawer dividers, I also prefer the clear Command Strips. You can purchase replacement strips solo (no need to purchase with the hooks), and they are great to use for a variety of discreet projects around the house. Of course, any type of Command Strip could pair well with any drawer divider of your choosing. I place one or two of the strips on the bottom and stick it directly to the drawer/liner.
With this method and the next, I am selective about what divider I adhere the strip to as I don't want to incur the expense of doing this to the bottom of every divider in the drawer. I typically select the divider that is able to support/hold all of the other dividers in place as well.
No one would be the wiser, and there is absolutely zero shifting of the dividers when the drawer is opened and closed.
These can be found at just about any home or hardware store, and are very grippy! They are generally used to protect your cabinets and drawers, but have also been known to protect glass surfaces, the walls behind frames, added to the bottom of home decor and accessories and electronics. And now they can also be found in some of the drawers in our home!
In the drawer above you can see I left a large amount of space for longer items to be stored and wanted to prevent the entire row of dividers from sliding forward. Adding a few bumpers to the front of the dividers in the front rows did just that!
This is a really great option when you only want to add a couple of dividers to a large drawer and have a lot of additional space to fill with other items.
3 | G R I P P Y S H E L F L I N E R
For heavier duty projects, my "go to" is a grippy liner. And sometimes grippy dividers too!
A few years ago I gifted my husband two Elfa towers (these frames and these bins) to store all of our project materials and tools, and I am just now beginning to tackle the huge project of organizing them!
I have been on the hunt for both a good liner and also good dividers to use inside of the drawers; nothing cute or fancy but 100% durable. I landed on some black grip liner that can be cut to size, along with these interlocking organizers that also have some inside grip to them.
No matter the weight, tool or piece of hardware, they should stay put as the drawer is opened and closed or even removed completely to be toted around the house and garage. The grippy shelf liner not only holds the dividers in place but also the objects sitting on top. And the interlocking lined dividers will be good for the more heavy duty items, while everyday dividers will work for smaller pieces and still stay in place with the help of the liner.
Again, this option allows for the dividers to be split and only be used in certain areas of the drawer, which also means that I am able to better maximize how each drawer is divided and categorized. Hooray for added flexibility!
BONUS TIP:Grip liner can be found just about everywhere in a variety of colors and price points, and can easily be cut down to size. If you only want to add some smaller pieces of the liner below the drawer dividers to stretch your investment, that works too! Also, get creative with what you use, rug pads and silicone caulk can serve the same purpose!
I always try out my tips before sharing them and recommending them, but you can't 100% tell from the photos just how well these methods work, so I compiled a couple of quick boomerangs I took with my phone to drive the point home.
And because I am often asked about where to purchase the items found in this post, or my favorite dividers in general, I have rounded up everything for you below.
It's time to put those dividers in their place once and for all!
]]>IHeart Organizinghttp://www.blogger.com/profile/05084013302005288836noreply@blogger.com15tag:blogger.com,1999:blog-8864666002840991252.post-84333957683250524292018-05-07T05:00:00.000-05:002018-05-07T05:52:53.338-05:00Teen Boy Bedroom Workspace & DIY Shelf
I always start out strong with big ambitions and ideas and then I get to the blank slate part and become a deer in headlights. You can see more of the blank slate photos of our son's room in this post here. It can be frustrating at times, but it is probably better that I allow myself to take these rooms at a snail's pace. I have never been one to pull off a room that I love with longevity if I race to the finish line.
In our son's room, I got stuck on such an odd detail, and that was the shelf to install over his new desk. I tried three options before I landed on the right one so I felt a lot of thankfulness for nice return policies! (In case you are curious about the shelves I checked out for the space, they were this one, this one, and this one.) After holding each one up and also asking my son to offer up his opinion, we decided that maybe we would be better off finding one that matched the stain in the nearby DIY wall map, which tends to be the main focus in the room.
Why was a shelf important? Well, my goal is to give my son a workspace that is easy to keep wide open and clear of clutter. He tends to be more productive and efficient when he is free of distractions and has simple organization. I guess the apple doesn't fall far from the tree!
So, a shelf not only would add a nice decorative touch to the space, it would also function as a place to toss some of those extra office supplies that tend to land on a desk. When the other shelves didn't feel right, I found these and used them as our inspiration to DIY something. We needed something that was a good depth for holding books and boxes, but not too deep that it felt heavy and out of place.
We already had a pair of the 7 1/2" EKBY shelf brackets from IKEA, so I thought it would be quick and easy to just head to the hardware store and grab a piece of standard lumbar to stain. I took the brackets with me only to realize that the common boards are generally a 3/4" thickness, and the brackets really needed something closer to an inch thick. I searched the store for something that would be a better fit, and then I remembered that I had used a stair tread with these types of brackets in the past. YES! Not what you might typically think of or go to, but it makes the perfect shelf option. Not only are they the correct thickness, they are also strong and sturdy and shouldn't bow easily.
The obvious solution may have been to pair and IKEA EKBY shelf with these EKBY brackets, but they didn't offer a finish that we were trying to achieve.
My favorite projects are ones that I can do quickly and easily with little to no help or money, and this one checked all of those boxes!
I began with the following supplies, many which I already had on hand from previous DIY projects.
The first step was to measure and cut the stair tread down to size. I opted to remove the rounded edge of the tread to square off the shelf completely and leave it the full 48" width.
After preconditioning the wood (I use this), I gave the board two coats of a dark walnut toned stain.
I also gave the shelf brackets a nice coat of flat black spray paint (this kind is my favorite).
The tread shelf is a nice and tight fit into the bracket, in fact, I ended up sanding it down just a smidge and using a rubber mallet to really secure the two together. Then it was as simple as using some drywall anchors and long black screws to install it on the wall.
As you can see, I also added some additional wall organization. He generally has some work-in-progress papers and reminders that I wanted to store in a wall pocket, so I dug out our old daily system pieces and spray painted them gray and black to better suit his room (I originally purchased them here years ago in the ivory finish, the two pieces used are this one and this one). The pockets hold his papers and Chromebook, while the adjoining piece coralls a few of his desk accessories and supplies.
On the shelf, I added an inexpensive box (which is a really great size for most shelves above a desk) with an adhesive label holder. Inside are all of his random homework supplies that he may need to reach for from time to time.
I know Letterboards are the new trendy chalkboard, but you guys, my teenage boy totally digs it! He loves looking up quotes and using it to express his current mood, and I love seeing how it changes and reflects his personality. I found his here for a great price and used a small tin to hold all of the extra letters.
He selected a soft swivel chair from our local Marshalls (similar), and the combination of it all has been many thumbs up by all of us.
The sliding closet door is our last big project for this room and we have been trying to come up with the best wood selection based on the larger size, but I think we have a pretty good plan and can't wait to get it done.
I am glad that we found our goldilocks of shelves, the small details in a room are what make it all come together in the end. And I always get discouraged when it takes me multiple tries to source something, especially basic items, but I really wanted to share because I know a lot of you have mentioned feeling the same way in the past. Decorating definitely comes easier to some than others, but keep at it and don't settle until your gut tells you it's right.
Oh! And this room has made me want to paint 100 more ceilings.
You know I love a good chit chat, so tell me, what is something that took you at least three times of trying before you found "the one".
You can catch up on the entire room update by checking out the closet plans here, how we patched the wall removal here, some nifty drawer dividers here, and the blank slate here.]]>IHeart Organizinghttp://www.blogger.com/profile/05084013302005288836noreply@blogger.com32tag:blogger.com,1999:blog-8864666002840991252.post-83401115199650446792018-03-22T04:00:00.000-05:002018-03-22T04:00:08.087-05:00My Favorite Tips for Organizing a Deep PantryKitchens seem to be a very popular request for me lately, and I have been helping a few different folks plan out and organize their cabinets, pantries, and drawers. I have also been compiling a lot of the common questions and themes that have been arising, and hope to do a post in the near future outlining how to get started and tips for creating a solid kitchen storage plan.
But a similar subject worthy of its own post, and a question I receive almost more than any other, is what to do with a deep pantry closet? Or any deep cabinet really. They can be such dark and confusing places and definitely require a little extra thinking and planning.
One of the kitchens I was recently asked to help with, has a deep pantry closet very reminiscent ofour previous pantry. I vividly remember the days of frustration and trial and error and constant reorganization.
Around the time I was consulting on this project,The Container Storehad reached out to me to see if I would be interested in partnering with them on a kitchen organizing story. Talk about the stars aligning just right. Their supersized kitchen sale is going on now through the end of the month, which means the majority of their very best organizers are on sale for 25% off. If you are going to stock up on your favorite bins or tackle a kitchen organizing project, big or small, now is the time to do it!
I am definitely particular about the brands and sponsors I select to work with, and The Container Store was a no-brainer for many reasons. I have used quite a few of their products around our home over the years, and have yet to be disappointed. In fact, I always feel quite the opposite, especially when I have the chance to use my all-time favorite organizer ever (mentioned here, here, and here), the Multi-Purpose bin.
The before and after photos of this project make my heart sing for a variety of reasons, but this post is much more than that. I really wanted to talk about my favorite tips for tackling a pantry, especially one that is on the deeper side.
So let's check out what the pantry looked like at the beginning of this story. Look familiar? In our area, there are so many homes built with similar style pantries; essentially a 2 ft x 2 ft closet with shelves. Is this a nationwide epidemic or just regional to the midwest?
Although these closets seem to be fairly common, how they are used will be different for everyone. This particular closet is used by a husband and a wife, kids have all grown up and moved out, and they now have seven grandkids who love to stop by with their parents for a visit.
Their storage needs vary from week-to-week. They will buy in bulk if there are sales, they enjoy hosting during the holidays, and also like to have foods and snacks on hand for their visitors and grandbabies. It is also worth mentioning that they have alternative storage in their kitchen carved out for additional pantry items such as spices, oils, and baking supplies.
T I P N U M B E R O N E
Begin with a stocked pantry. Do your grocery shopping for a typical week, and then take note of additional items you may purchase frequently and even some that may only be on rotation on occasion. Compile a list of everything you would like to be sure is accounted for in your pantry project.
T I P N U M B E R T W O
Completely clear out the pantry and any other cabinets in your kitchen that contain food items that probably should be in your pantry. Discard any items that are expired, and categorize the remainder into groupings of "like" items.
T I P N U M B E R T H R E E
Measure and create a plan! I tend to take this part pretty seriously, and I generally tackle these types of projects with the following goals:
Maximize the available space
Store the categorized items based on their frequency of use
Select products with longevity (this means that it will last many years either in the current space or is versatile enough to be reused in a variety of ways down the road)
You have seen quite a few of my closet plans in the past; here is the one I had dreamed up for this specific pantry:
As with any project, the end result evolved a bit as I began ordering and installing and doing some final assessments. But as you can see above, the plans included drawers, door storage, bins to take up both the width and the height, as well as some room for change and growth.
To come up with the closet plans I measured the width and depth of every shelf. They had already installed the shelving with ledger boards and wanted to work with what they had if possible. In these types of closets, adjustable shelving may add a bit more versatility, but it definitely is not necessary. From there, I sourced the products that I thought would make the best use of the shelves from top to bottom and front to back.
While planning, I looked at all of the items that they currently had stored in their pantry, and also considered how they ultimately wanted the pantry to function. Could we maximize the floor to ceiling shelves and add a door unit, therefore freeing up additional cabinets in their kitchen for other things? You bet!
T I P N U M B E R F O U R
Let's talk about the beautification process. This is NOT a necessary step, but it is something that I like to do. It doesn't make the closet more effective to paint it or paper it, but it does bring a little bit of joy and happiness and can even act as a bit of a motivator to maintain it. I will never tell you that have to install wallpaper and create labels from fancy vinyl lettering if that is not your thing. Those are just the details that I personally enjoy, and that many of my friends and clients also appreciate in the work that I offer (some people like to decorate rooms, I like to decorate hard working cabinets and closets).
My plan recommended removing the bottom shelf of the closet, so because we were going to patch and touch up paint anyway, I decided to paint the entire interior of the closet the same color as the adjoining kitchen walls with some of their leftover paint.
Once it was dry, I also added a peel-and-stick wallpaper between each of the ledger boards for some additional wow. The paper is temporary and removes just as easily and quickly as it went in (no residue or commitment necessary).
As things were coming together, the pantry owner walked by, caught a glimpse, let out a happy shriek and clapped her hands. This is 100% what it is all about for me. I almost cried seeing how happy she was with her new closet coming together.
T I P N U M B E R F I V E
If you take anything away from this post, it is to add drawers whenever possible. Drawers will take advantage of the area from front to back, and naturally bring the items from the back forward for you (vs. you needing to move things or reach over things). I added drawers to this pantry in a couple of ways; you can be as literal or creative about it as necessary. I do consider some types of bins as drawers, they can serve the same function and bring items from the back, forward.
The most impactful set of drawers was added at the bottom of the closet via a narrow elfa drawer unit. Originally, the closet had a single shelf and the floor to hold the items in this area, but now there are five nicely sized drawers, as well as a spot for a step-stool, a place to store grocery sacks, and even a little room to grow! Hello increased functionality and storage! For this particular elfa combination, I picked two of the narrow 2-runner drawers, three of the narrow 1-runner drawers, then added a narrow white melamine topper.
Closets like this can be tricky in terms of drawers because there are a few inches of recessed shelving area on either side of the door, and finding ways to not lose that space requires a little extra thinking. Although I knew we were already gaining storage by adding the elfa drawers, which are slim enough to pull through the narrow door opening, I was even happier that we were still able to add a little extra function on the one side of the drawer unit as well.
I was going to wait until a little later in the post to show how amazing these drawers are, but since we are on the topic, let's take a closer look inside of each one. This elfa combination is small but mighty and comes in at just 21" deep, 14" wide and 29" tall. Looking at those dimensions I was wondering if it really could store as much as I planned and hoped, and it certainly surprised us all.
The top drawer was created just for the grandkids. The homeowner mentioned that her grandkids will come over and know right where to look in the fridge for drinks and snacks, and she really wanted to duplicate that concept in the pantry.
Theelfadrawers are easily organized withfitted and divided clear trays, so I added them to the top two drawers to do just that. Very convenient! I am pretty sure the snack drawer was the homeowner's favorite, her reaction was priceless!
The next drawer was one of my personal favs, just because I love quick and easy entertaining that also feels a bit special. I always recommend putting together a small spot in your kitchen to store some basics such as napkins, candles, dishes, party decor, notecards, etc...
These slim drawers are also nicely sized for food storage bags and wraps.
While a deeper drawer conceals large bags of popcorn and chips.
Last but not least, the bottom drawer now holds their produce, which was previously being stored in some buckets on the floor. I lined the drawer with a couple of basic bins to catch any juices or onion flaking.
Quick Tip: Anytime I post about storing veggies, I do caution that keeping onions and potatoes together may increase their spoiling time. If you are only purchasing what you need for a week or two of meal planning, they are probably fine to be stored together (we have done this for years and never had any issues). But if you want to keep your potatoes for longer periods of time, they can be stored inside of an open box or paper bag in a cool, dark place (away from the onions).
Moving along...
As I mentioned above, I also used a few bins as drawers; specifically, these small clear Linus Handled Bins for a shorter shelf and my favorite Multi-Use helpers for some lighter weight cracker, snack, and pouch wrangling.
Previously, there was no finding anything on the back of that shorter shelf without moving a variety of items out of the way first, but now the bins easily bring the smaller items out of hiding.
Quick Tip: Most often times product packaging and boxes can create added bulk in your pantry, and you may find that quickly removing the box and storing the contents in a bin or drawer will give you twice the space. I like to keep a small vessel of clips in our pantry so we can remove crackers and cereal from the boxes and clip them closed to keep them fresh between uses. There are times when boxes may actually Tetris stack nicely, but I encourage you to give it a try. You just may be surprised about the space you gain.
T I P N U M B E R S I X
Tier your storage and your shelves!
In the initial plans, I included a shelf/tier of some sort for the back of the shelf that held all of their canisters and containers, but once we cleaned everything out, that wasn't exactly necessary. I still placed the taller items near the back, and the shorter items in front, but there was enough space left to create a path that would allow some easier access to all of the boxes and containers with little disruption to the setup.
Quick Tip: Place your everyday food and containers near the front, and store your overflow items near the back. In this case, extra boxes of cereal are placed behind the cereal containers, and extra boxes of grains and noodles were stored behind the pasta/rice section in another Multi-Purpose bin.
This closet was installed with a few full-length shelves throughout, as well as a couple of shorter shelves that were set further back. I appreciated this so much because it added an additional row of storage without impacting the overall accessibility of the other items in the closet (especially when the drawer-like bins were added).
T I P N U M B E R S E V E N
Maximize that vertical space and use the door or walls of the closet.
Although the door and walls are narrow, it doesn't mean some narrow baskets or shelves can't be added to increase the usable storage area. I initially considered spice racks on the recessed areas of the walls, but with all of the storage we were able to add to the door, we didn't end up needing the spice racks after all.
I have used the narrow elfa door rack in our own home for storage in our hallway closet, I can't rave about the system enough. It is sturdy, versatile, easy to install, and won't do any damage to the actual door. Not to mention, the baskets come in a variety of sizes and can be mixed and matched to fit the space beautifully.
The mesh baskets come in two widths (I went with the narrow), and a couple of different heights and depths. The shorter baskets can hold everything from cans to jars to small packets, while the deeper options are great for boxed foods, tall packages, and pouches.
The organizer is mounted with two over/under the door hooks that are tightened into place. When the door is closed, the baskets live inside the door jam area, not at all intruding into the actual closet.
Quick Tip: A few additional ideas for using these door baskets in a pantry could be for vitamins/medications, spice jars/packets, bottled water/drinks, cleaning supplies, meal planning supplies, and baking ingredients...
T I P N U M B E R E I G H T
A turntable is always a good idea. I especially love them in corner cabinets, but they can also make use of awkward nooks and open shelves in deeper pantries. They are known for corralling heavier jars and cans or categorizing cabinet contents, and a quick spin swiftly brings items from the back to the front. They are available in a variety of sizes and some are even tiered to make better use of available height. (Remember this pantry project I worked on? Turntables galore!)
In this situation, a tiered shelf may have used the space a bit better due to the available height, and it is definitely an option to easily swap things out down the road if necessary. This lazy susan can always be reused under the kitchen sink for cleaners, in the fridge for condiments or near the stove for oils, salt, pepper and cooking sauces.
T I P N U M B E R N I N E
Categorize and store items based on how they are used.
Originally we planned on storing small appliances up on the upper shelves, but thanks to this closet project, we were actually able to keep them in another location and save the homeowners from having to pull down heavy items from an upper shelf. That said, paper products now have plenty of room on the top shelf, as do some white stacking Nordic baskets filled with disposable dishware and ingredients used for on-the-spot snack and treat making with the grandkids.
The items stored on the upper shelf should generally be things that you have on hand for convenience or special occasions or larger items that you purchased in bulk at membership-only warehouse stores. Pulling out a stepstool to reach that upper shelf each day will become cumbersome over time and the goal is to streamline your daily processes.
By placing some of the awkwardly shaped items into baskets, it visually cleared up the available space and made it much easier to bring it all down to the counter in one swooping motion. Quick Tip: Speaking of making things as easy as possible, stacking bins and baskets are absolutely fantastic. Buuuuut, they are not really a great option for everyday items and accessibility. Do you want to have to remove a basket just to open a lid and access another basket? No, you don't. Especially not on the daily as that would get old pretty quickly. Stacking baskets are really wonderful for maximizing height, I just recommend you think about how often you will need to get to the actual contents inside of the bins/baskets, and also consider using stacking options that have open fronts for the items used more frequently. T I P N U M B E R T E N
The last step I take in any organizing project is to label everything so everyone in the house can be on the same page and take part in keeping it somewhat tidy. And also so that concealed items are quickly identified and easy to locate.
How much to label is always a debate, and there are times I have felt the need to label my kids' backpacks, pencils, foreheads, and toothbrushes. When there multiple small kids involved, everything is easily mixed and lost and confused. Also, getting the entire fam clan on board with putting things back where they belong, even in seemingly obvious situations, can be a bit of a challenge.
So, while some people are strong Team Label people (I am right there with you), there are also times when it is necessary to pick your battles. For example, if you have clear containers and can see the contents, do you need to label them? Especially if it contains items that may change time and time again based on your meal planning and supply levels? Probably not. However, if you have clear containers and one has flour and one has powdered sugar and one has gluten-free flour and another has baking powder, labels are extremely helpful in identifying products that look the same but definitely are not. Labeling is also important in the pantry when allergies are involved.
In this closet, I labeled any bin or basket that was not clear or see-through, and nothing more (I used these label holders with the elfa drawers and these label holders on the white stacking baskets). The small clear drawer-like bins can be used for a variety of snacks and mini-packages, the larger multi-purpose bins can hold a mixture of pouches and boxes, the airtight food canisters can store cereals and pasta as needed (while offering the owners a quick visual inventory of the contents), and the door baskets can serve endless functions as groceries rotate through week after week.
One of my bonus tips is something I always recommend when working on these types of projects, and that is to leave a little white space. Life changes, needs evolve, and it is almost always inevitable that something won't be taken into consideration during the initial planning phase. Having extra space allows for some flexibility down the road, and also allows your space, and yourself, to breath a little easier. It is always good to maximize your space, yes, but you may find that with the right products and systems, that you actually have more space than you initially imagined. I loved walking away from this project confident that the homeowners will continue to have room to grow and play with this closet, and that their overall usable space more than doubled with the help of these particular tips.
__________
How about a few before and after photos to see what a difference these changes made:
I love it so much that I sort of wish I could pick it up and transplant it into our own home! Never did I think I would say that about this type of closet or setup again. And if you adore it too, the majority of these tips should be simple to translate and work in your own pantry, even if you are a renter! The product is all very versatile and removable, right down to the peel-and-stick wallpaper.
Don't forget! Many of the products shown in this post are on sale through April 1st, and you can save 25% off of so many great kitchen organizers and storage containers. I can't thank The Container Store enough for partnering with me on this tremendously fun and functional pantry project. Although they provided a portion of the product, all ideas, thoughts, and tips are my own. Also, a special thank you goes out to the homeowners for asking me to help with this closet, giving me full control of the space, and offering me permission to share it all here on my blog. ♥