After the Rain: Prep Medium + Large Blocks
This post is part of the After the Rain Sew-Along! See all posts.
Hooray, time to start sewing!
Over the course of five weeks, I’ll be making an After the Rain quilt alongside you. This is a leisurely sew-along, so you may find you want to do more than I have scheduled. Be my guest to modify the pace for your needs!
Are you sewing-along? Please share your progress pictures, wherever you are in the process, on Instagram with #AftertheRainSAL. It really sustains momentum and spurs new ideas to see everyone else in the process. We can learn from each other, inspire each other and just generally have a good time!
Make sure you follow @StitchedinColor, and @TheConfidentStitch in order to be eligible to win prizes. More on that at the end of this post!
Week 1: Prep Medium + Large Blocks
I’ve heard that there aren’t enough slow quilt-alongs, so I’ve paced After the Rain to have a gentle pace that I hope will be easy to fit around your other commitments. This week our task is twofold:
Cut fabrics for medium and large size blocks
Test sew one block each for columns 3, 4 and 7
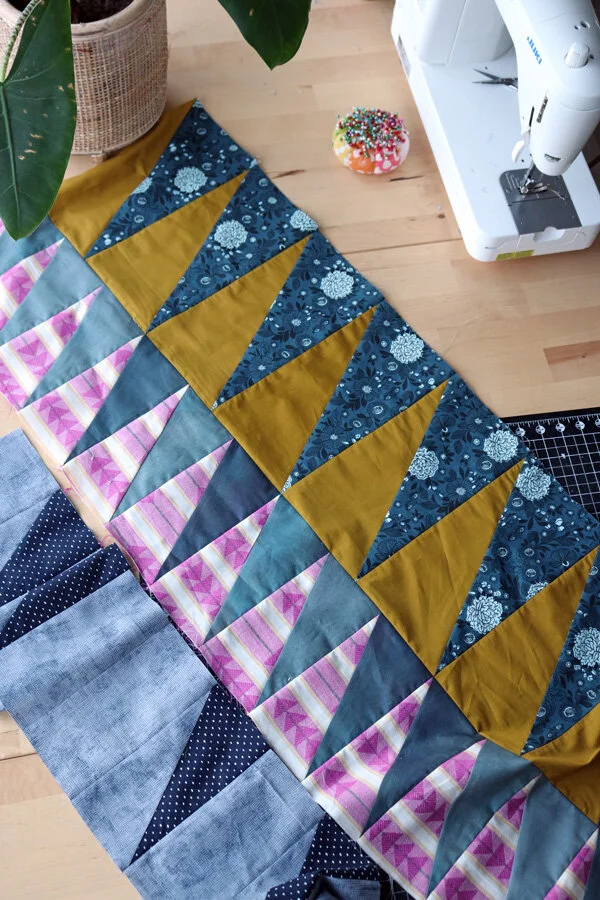
With this quilt, choosing fabrics for each column can be a challenging task. Let’s make sure you like the outcome before you cut all your fabrics. Over the course of weeks 1 and 2, we will sew test blocks for each column. Thus, you’ll be able to lay out the columns and easily visualize the effect of your fabric choices, before sewing all the blocks.
Start Cutting
You’ll find the cutting directions on pages 4-5 in your copy of the After the Rain quilt pattern. This week cut fabrics for large blocks (column 4 in the throw quilt) and for medium blocks (columns 3 and 7 in the throw quilt). Things to note:
Cutting a directional print? Think about the way you want the print to be oriented in your quilt, before you cut your fabric into rectangles.
Double and triple check that all rectangle fabrics are FACE UP before you cut the diagonal line that transforms the rectangles into triangles.
When cutting the diagonal line, the pattern intentionally gives different offset measurements for the different size blocks.
Feeling unsure about anything? Just cut enough fabric to sew your test blocks. When you have sewn them successfully and like the result, you can come back to complete this week’s cutting.
Sew Test Blocks
Before you can sew, you’ll need to print out paper foundations. You’ll find these on the final pages of your pattern. Print 2 copies of the size medium pattern and 1 copy of the size large pattern. Note that the large block is a two-page pattern.
Print these out at 100%, with no scaling. Seam allowances are not illustrated, so the outer aqua line of the paper piecing foundation is the finished size of the block. Check the 1” measurement on the pattern to make sure that your foundations are printing properly. For some printers, you may need to adjust the scale to compensate (for example, 95% would slightly shrink the block or 105% to slightly enlarge it).
To prepare the large pattern for use, cut along the red line on one side of the block. Now, align the two sides of the block so that the pattern arch is complete. Tape to secure.
You’ll find the sewing directions on pages 6-7 in your copy of the After the Rain quilt pattern. I’ve tried to carefully illustrate each step, but if you’ve never machine paper pieced before, I won’t be surprised if you have questions. Here are some extra tips:
When you learn to machine paper piece, it feels really strange. Just go with it and try to follow the directions. It’ll make much more sense when you are doing it, as compared to reading the directions.
Sew the first block with an extra-long stitch length (such as 3). Then check that you were successful. If so, go back and re-sew with a short stitch length (such as 1) in order to perforate the page for paper removal later on. The long stitch length will be much easier to unpick, if things go wrong.
So, you might be wondering why we are paper piecing this block. It looks easy, right? Sadly, half rectangle triangle blocks are not straightforward to sew, like their cousins half square triangle blocks (HST). They cannot be sewn in a similar batch way, like HST. Aligning triangles for a half rectangle triangle block (HRT) is complicated. Plus, a correctly sewn HRT block does NOT have a seam that runs from diagonal to diagonal, when the block is unfinished. Thus, trimming the unfinished blocks is also not straightforward. I’ve sewn this quilt both ways - traditional HRT and foundation paper pieced HRT. I found the paper piecing loads easier. Really night and day. That’s why I wrote the pattern for paper foundations. But, be sure to recycle the paper, ok?
When you’re done sewing your medium and large test blocks, trim the unfinished blocks to the correct size: 14.5” x 7.5” for large blocks and 11” x 5.75” for medium blocks. You’ll be trimming 1/4” beyond all the aqua lines, adding the seam allowance.
Yay! Don’t they look pretty?
Complete Prep
When you’re confident about your test blocks, it’s time to complete your preparation goals for this week. Cut all the fabric needed for the medium and large blocks in your quilt. Also, take the time to print out all of the paper foundations for medium and large blocks. You’ll find total counts needed for each block size and quilt type at the top of page 6. Lastly, prepare the large block foundations so they’re ready to sew.
Great! You’re all set. When it’s time to sew these blocks, you’ll fly right through them!
This Week’s Prize
On Friday, January 29th I’ll select a random winner from among everyone who has posted to the After the Rain hashtag this week.
Someone will win 1 yard of melton wool in winner's choice of color. You could make a wool purse like mine or a lux, wintry pillow!
Don’t be shy! Just add #AftertheRainSAL to your Instagram photo caption and you’ll automatically be in the running. Here are two recent additions to our hashtag stream:
The winner of last week’s kick-off prize is @beePeace99. I’ve reached out to you via Instagram messaging. Thanks for sharing, friends!


